
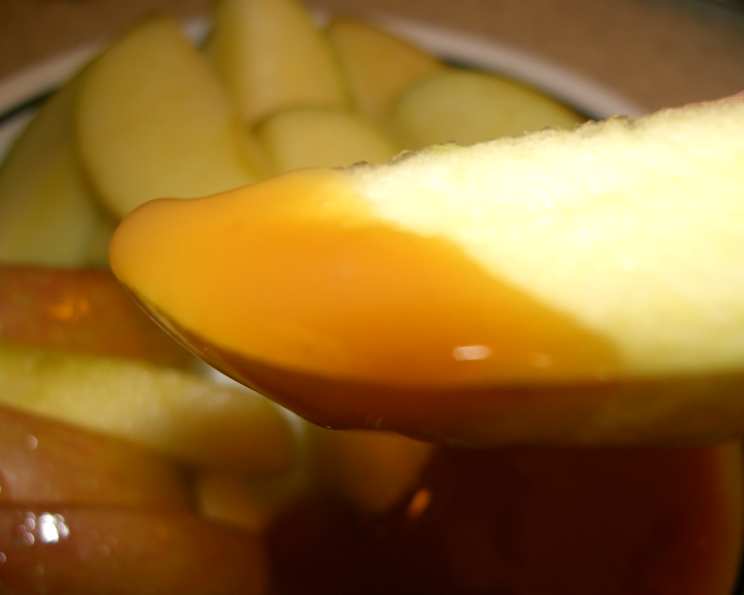
Good Eats Dulce De Leche
The scent of caramelized sugar always takes me back to my grandmother’s kitchen. She wasn’t a fancy baker, but she had a knack for simple pleasures, and her dulce de leche was legendary. Every spoonful was a taste of pure comfort, a reminder of warmth, love, and the magic that happens when milk and sugar meet time and patience. It’s a memory I cherish, and one I hope to recreate every time I make this sweet treat.
Recipe Overview
- Prep Time: 5 minutes
- Cook Time: 1 hour 30 minutes to 2 hours
- Total Time: 3 hours 5 minutes
- Servings: Variable, depending on use
- Yield: Approximately 1 cup
- Dietary Type: Vegetarian
Ingredients
- 1 quart whole milk
- 12 ounces sugar, by weight (approximately 1.5 cups)
- 1 vanilla bean, split and seeds scraped
- 1/2 teaspoon baking soda
Equipment Needed
- Large, 4-quart saucepan
- Spoon
- Fine-mesh strainer
- Airtight container
Instructions
- In a large, 4-quart saucepan, combine the whole milk, sugar, vanilla bean and its scraped seeds. Place the saucepan over medium heat.
- Bring the mixture to a simmer, stirring occasionally, until the sugar has completely dissolved. Ensuring the sugar is dissolved early is crucial to avoid graininess in the final product.
- Once the sugar has dissolved, add the baking soda and stir to combine thoroughly. The baking soda will cause the mixture to foam up slightly, so make sure your saucepan is large enough to accommodate this.
- Reduce the heat to low and cook the mixture uncovered at a bare simmer. This means you should see only the gentlest of bubbles, not a rolling boil.
- Stir the mixture occasionally. However, avoid re-incorporating the foam that forms on the surface of the mixture. This foam is essentially milk solids and proteins that are coagulating, and while harmless, it will affect the final texture if stirred back in.
- Continue to cook for 1 hour. After an hour, remove the vanilla bean. Discard the bean or save it to infuse other liquids with its flavor.
- Continue to cook the mixture at a bare simmer until it reaches a dark caramel color and has reduced to about 1 cup, approximately 1 1/2 to 2 hours more. The time will vary depending on your stove and the humidity in your kitchen. Be patient, as this is the most crucial part of the process! The color should be a rich, deep brown, similar to the color of a copper penny.
- Strain the mixture through a fine-mesh strainer to remove any remaining solids or thickened milk proteins. This will ensure a smooth and creamy final product.
- Transfer the dulce de leche to a sealed container and store it in the refrigerator for up to a month.
Expert Tips & Tricks
- The Right Pan: Using a heavy-bottomed saucepan is essential to prevent scorching. A lighter pan will have hot spots and can lead to burnt milk solids on the bottom.
- Low and Slow: Patience is key! Don’t be tempted to increase the heat to speed up the process. A gentle simmer is essential for even caramelization and to prevent burning.
- Don’t Overstir: While occasional stirring is necessary to prevent sticking, avoid excessive stirring, which can disrupt the caramelization process.
- Color is King: The color of the dulce de leche is your best indicator of doneness. Aim for a rich, dark caramel color, similar to a copper penny. If it’s too light, it will lack that characteristic caramel flavor.
- Salted Dulce De Leche: For a gourmet twist, stir in a pinch of sea salt after straining the dulce de leche. The salt enhances the sweetness and adds a delightful complexity.
- Preventing Crystallization: A common issue when making caramel is sugar crystallization. Adding a tablespoon of corn syrup or glucose syrup to the milk and sugar mixture at the beginning can help prevent this.
- Microwave Method: For a quicker (but slightly less nuanced) version, you can use sweetened condensed milk in a can. Remove the label, poke holes in the top, place the can in a pot, cover with water, and simmer for 2-3 hours. Always allow the can to cool completely before opening to avoid burns.
Serving & Storage Suggestions
Dulce de leche is incredibly versatile and can be enjoyed in countless ways.
- Serving: Drizzle it over ice cream, swirl it into your morning coffee, spread it on toast or crackers, use it as a filling for cakes and pastries, or simply enjoy it by the spoonful (we won’t judge!). It pairs beautifully with apples, bananas, and other fruits. For a truly decadent treat, serve it with a sprinkle of flaky sea salt.
- Storage: Store your dulce de leche in an airtight container in the refrigerator for up to one month. It will thicken as it cools. If it becomes too thick, you can gently warm it in the microwave or on the stovetop until it reaches your desired consistency.
- Freezing: While not ideal, dulce de leche can be frozen for up to 2 months. Be aware that the texture may change slightly upon thawing, becoming a bit grainy. To minimize this, thaw it slowly in the refrigerator.
Nutritional Information
Note: Nutritional information is an estimate and may vary based on specific ingredients and portion sizes.
| Nutrient | Amount per Serving (approx. 2 tablespoons) | % Daily Value* |
|---|---|---|
| Calories | 150 kcal | 8% |
| Total Fat | 5g | 6% |
| Saturated Fat | 3g | 15% |
| Cholesterol | 15mg | 5% |
| Sodium | 30mg | 1% |
| Total Carbohydrate | 25g | 9% |
| Dietary Fiber | 0g | 0% |
| Sugars | 25g | |
| Protein | 2g | 4% |
*Based on a 2,000 calorie diet.
Variations & Substitutions
- Goat’s Milk Dulce de Leche: Substitute goat’s milk for cow’s milk for a tangy and slightly richer flavor.
- Coconut Milk Dulce de Leche (Dairy-Free): Use full-fat coconut milk for a vegan-friendly version. The flavor will be slightly different, with a hint of coconut, but it’s still delicious. You may need to adjust the cooking time, as coconut milk tends to thicken faster.
- Spiced Dulce de Leche: Add a pinch of cinnamon, nutmeg, or cardamom to the milk and sugar mixture for a warm and festive twist.
- Coffee Dulce de Leche: Add a tablespoon of instant espresso powder or strongly brewed coffee to the milk and sugar mixture for a coffee-infused delight.
- Boozy Dulce de Leche: Stir in a tablespoon of your favorite liquor, such as rum, bourbon, or brandy, after the dulce de leche has cooled slightly.
FAQs (Frequently Asked Questions)
Q: Why is my dulce de leche grainy?
A: Graininess is often caused by undissolved sugar or excessive stirring. Ensure the sugar is completely dissolved at the beginning, and avoid stirring too much during the cooking process.
Q: Can I use low-fat milk?
A: Whole milk is highly recommended. The fat content contributes to the rich, creamy texture of dulce de leche. Low-fat milk may result in a thinner and less flavorful product.
Q: How do I know when the dulce de leche is done?
A: The best indicator is the color. It should be a rich, dark caramel color, similar to a copper penny. The mixture should also have thickened considerably, coating the back of a spoon.
Q: My dulce de leche is too thick. What can I do?
A: Gently warm the dulce de leche in the microwave or on the stovetop, adding a tablespoon of milk or cream at a time until it reaches your desired consistency.
Q: Can I use this dulce de leche in baking?
A: Absolutely! It’s a fantastic filling for cakes, cookies, and pastries. It can also be used as a topping for cheesecakes or brownies.
Final Thoughts
Making dulce de leche from scratch is a labor of love, a testament to the magic that can happen when simple ingredients are transformed with patience and care. Don’t be intimidated by the simmering time; it’s mostly hands-off. The reward is a jar of pure caramel bliss, ready to elevate everything from your morning coffee to your most elaborate desserts. So, gather your ingredients, put on some music, and get ready to create a truly unforgettable treat. And don’t forget to share your creations and feedback – I’d love to hear how it turns out! Consider pairing this with some sea salt crackers and a rich, dark roast coffee for an amazing dessert.