
Good Eats Southern Biscuits
The memory is etched in my mind: Sunday mornings at my grandmother’s house. The aroma of freshly brewed coffee mingled with something magical, something subtly sweet and impossibly comforting. It was the smell of her biscuits baking. They weren’t perfectly uniform, some leaning slightly, others sporting a rustic golden-brown hue, but each one was a testament to her love, a warm, buttery hug in edible form. And now, I carry on that tradition, filling my own kitchen with that same comforting aroma.
Recipe Overview
- Prep Time: 10 minutes
- Cook Time: 15-20 minutes
- Total Time: 25-30 minutes
- Yields: 8-12 Biscuits
- Serves: 2-3
- Dietary Type: Vegetarian
Ingredients
- 2 cups flour
- 4 teaspoons baking powder
- ¼ teaspoon baking soda
- ¾ teaspoon salt
- 2 tablespoons butter, cold and cut into small cubes
- 2 tablespoons shortening, cold
- 1 cup buttermilk, chilled
Equipment Needed
- Large mixing bowl
- Measuring cups and spoons
- Pastry blender or fingertips
- Floured surface
- Rolling pin (optional)
- 2-inch biscuit cutter
- Baking sheet
Instructions
-
Preheat your oven to 450 degrees Fahrenheit. This high temperature is crucial for achieving that beautiful rise and golden-brown crust.
-
In a large mixing bowl, whisk together the flour, baking powder, baking soda, and salt. Make sure these dry ingredients are thoroughly combined; this helps distribute the leavening agents evenly throughout the dough.
-
Now comes the important part: incorporating the fats. Using your fingertips or a pastry blender, cut the cold butter and shortening into the dry ingredients. The goal here is to work quickly, preventing the fats from melting. You want to create a mixture that resembles coarse crumbs, with small, distinct pieces of fat scattered throughout. These little pockets of fat will release steam during baking, creating those flaky layers we all crave in a good biscuit.
-
Create a well in the center of the flour mixture. Pour in the chilled buttermilk.
-
Stir just until the dough comes together. Be careful not to overmix! Overmixing develops the gluten in the flour, resulting in tough, dense biscuits. The dough will be very sticky, and that’s perfectly fine.
-
Turn the sticky dough out onto a lightly floured surface. Dust the top of the dough with a little more flour. Gently fold the dough over on itself 5 or 6 times. This folding process helps to create layers in the biscuits. Think of it like laminating dough, but on a smaller scale.
-
Press the dough into a 1-inch thick round. You can use a rolling pin for this if you prefer, but I find that gently patting it down with my hands works just as well and minimizes gluten development.
-
Cut out the biscuits using a 2-inch biscuit cutter. It’s essential to push the cutter straight down through the dough without twisting. Twisting seals the edges and prevents the biscuits from rising fully.
-
Place the cut biscuits on an ungreased baking sheet so that they just touch each other. This encourages them to rise straight up, resulting in taller, more tender biscuits.
-
Reform the scrap dough, working it as little as possible, and continue cutting out biscuits. Keep in mind that biscuits from the second pass won’t be quite as light and airy as the first batch, but they’ll still be delicious.
-
Bake for 15 to 20 minutes, or until the biscuits are tall and light golden brown on top. Keep a close eye on them, as oven temperatures can vary.
-
If you don’t have buttermilk on hand, you can use regular milk instead. However, omit the baking soda if you use regular milk, as buttermilk’s acidity is what activates the baking soda. This is how I often make this recipe when I’m in a pinch.
Expert Tips & Tricks
- Keep everything cold! Cold ingredients are key to achieving flaky biscuits. Chill the flour, butter, shortening, and buttermilk before you begin.
- Don’t overmix. Overmixing develops the gluten in the flour, resulting in tough biscuits. Mix only until the dough just comes together.
- Handle the dough gently. Avoid working the dough too much, as this will also toughen the biscuits.
- Use a sharp biscuit cutter. A dull cutter will drag the dough and prevent it from rising properly.
- Bake at a high temperature. A hot oven is essential for creating tall, golden-brown biscuits.
- For extra golden tops: Brush the tops of the biscuits with melted butter or milk before baking.
- Make-ahead tip: You can prepare the dry ingredients and the butter/shortening mixture ahead of time and store it in the refrigerator until ready to use. Just add the buttermilk and bake as directed.
- If your biscuits are browning too quickly: Tent the baking sheet with foil during the last few minutes of baking.
Serving & Storage Suggestions
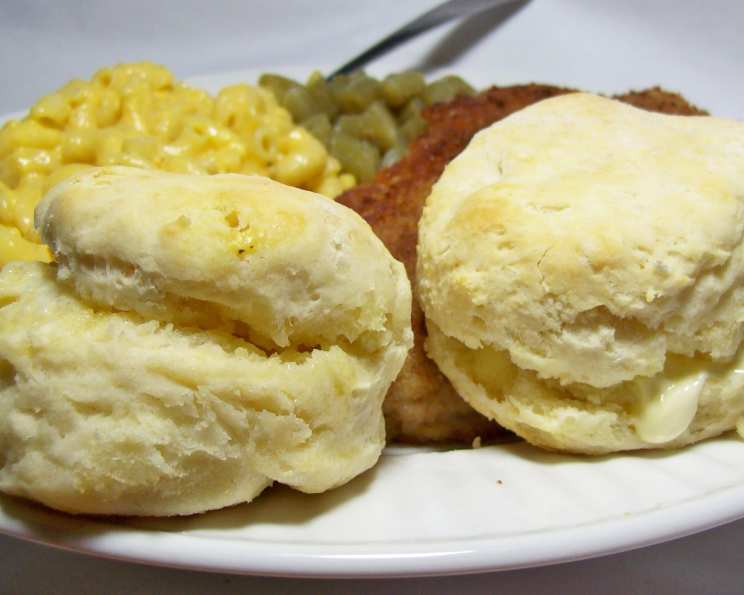
Serve these biscuits warm, straight from the oven. They are perfect with butter, jam, honey, or gravy. They also make a great addition to any breakfast, brunch, or dinner.
Leftover biscuits can be stored at room temperature in an airtight container for up to 2 days. For longer storage, wrap them individually in plastic wrap and freeze them for up to 2 months. To reheat, thaw the biscuits overnight in the refrigerator or microwave them briefly. You can also reheat them in a preheated oven at 350 degrees Fahrenheit for 5-10 minutes, or until heated through.
Nutritional Information
| Nutrient | Amount per Serving | % Daily Value |
|---|---|---|
| Calories | 723.7 kcal | N/A |
| Calories from Fat | 239 g | 33% |
| Total Fat | 26.6 g | 40% |
| Saturated Fat | 11.4 g | 56% |
| Cholesterol | 35.4 mg | 11% |
| Sodium | 1968.5 mg | 82% |
| Total Carbohydrate | 103.5 g | 34% |
| Dietary Fiber | 3.4 g | 13% |
| Sugars | 6.2 g | 24% |
| Protein | 17.1 g | 34% |
Note: Nutritional information is an estimate and may vary based on specific ingredients and portion sizes.
Variations & Substitutions
- Cheese Biscuits: Add 1/2 cup of shredded cheddar cheese to the dry ingredients.
- Herb Biscuits: Stir in 1 tablespoon of chopped fresh herbs, such as rosemary, thyme, or chives, to the dry ingredients.
- Sweet Potato Biscuits: Substitute 1/2 cup of mashed cooked sweet potato for 1/2 cup of buttermilk.
- Gluten-Free Biscuits: Use a gluten-free all-purpose flour blend. You may need to add a little more buttermilk to achieve the desired consistency.
- Vegan Biscuits: Substitute plant-based butter and non-dairy milk for the butter and buttermilk. Be sure to use a non-dairy milk that is slightly acidic, or add a teaspoon of lemon juice or vinegar to the non-dairy milk to help activate the baking soda.
FAQs (Frequently Asked Questions)
Q: Why are my biscuits flat?
A: Flat biscuits are often caused by using warm ingredients, overmixing the dough, or using old baking powder. Make sure your ingredients are cold, mix the dough gently, and check the expiration date on your baking powder.
Q: Can I use self-rising flour?
A: No, this recipe is specifically formulated for all-purpose flour and includes baking powder and salt. Using self-rising flour would throw off the ratios and result in different results.
Q: What if I don’t have a biscuit cutter?
A: You can use a knife to cut the biscuits into squares or triangles.
Q: Can I freeze the biscuit dough?
A: Yes, you can freeze the biscuit dough after cutting out the biscuits. Place the biscuits on a baking sheet and freeze them until solid, then transfer them to a freezer bag. Bake them directly from frozen, adding a few extra minutes to the baking time.
Q: How do I get a flaky biscuit texture?
A: The key to flaky biscuits is to use cold ingredients and avoid overmixing the dough. The small pieces of cold fat will create steam during baking, resulting in those desirable flaky layers.
Final Thoughts
These Southern biscuits are more than just a recipe; they’re a taste of home, a connection to tradition, and a reminder of the simple joys in life. Don’t be intimidated by the process – with a few simple steps and fresh ingredients, you can create warm, fluffy biscuits that will rival even your grandmother’s. So, gather your ingredients, preheat your oven, and let the comforting aroma of baking biscuits fill your kitchen. I encourage you to experiment with variations, share your creations with loved ones, and most importantly, enjoy the process. Perhaps serve them with a hearty sausage gravy or alongside a steaming cup of coffee. Happy baking!