
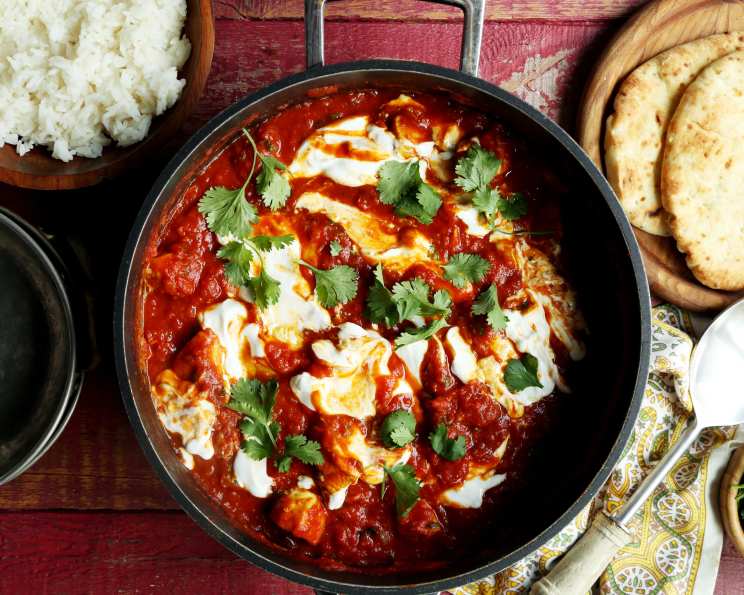
Gordon Ramsay’s Tikka Masala: A Culinary Adventure
I remember the first time I tasted a truly exceptional Tikka Masala. It was at a tiny, unassuming restaurant tucked away on a rainy London street. The aroma alone was intoxicating, a symphony of warm spices that promised comfort and delight. One bite, and I was hooked. The tender chicken, bathed in a creamy, vibrant sauce, was an explosion of flavor that danced on my palate. It was a culinary revelation, and it sparked a lifelong passion for recreating that perfect balance of spice, sweetness, and richness in my own kitchen. That experience instilled in me the importance of fresh ingredients and careful technique – elements that truly make the difference.
Recipe Overview
- Prep Time: 15 minutes
- Cook Time: 20 minutes
- Total Time: 35 minutes
- Servings: 4
- Yield: About 6 cups
- Dietary Type: Not Vegan (Contains Chicken and Yogurt), Gluten-Free
Ingredients
- 2 tablespoons peanut oil
- 1 large onion, peeled
- 1-2 fresh green chilies, depending on desired heat
- 1-inch piece of fresh ginger, peeled
- 3 garlic cloves, peeled
- ½ teaspoon chili powder
- 1 teaspoon turmeric
- 2 teaspoons garam masala
- 1 tablespoon soft brown sugar
- 1 tablespoon tomato puree
- 400g chopped tomatoes
- 4 boneless chicken breasts, cubed
- 10 dried curry leaves
- 4-6 tablespoons natural yogurt
- Fresh coriander, chopped
Equipment Needed
- Large pan or skillet
- Food processor or blender
Instructions
- Heat 2 tablespoons of peanut oil in a large pan or skillet over medium heat.
- Slice the onion and add it to the pan.
- De-seed and chop the green chili(es), then add them to the pan along with the ginger, which should be chopped as well.
- Crush the garlic and add it to the pan. Cook the mixture for 2-3 minutes, stirring occasionally, until the onion softens and becomes translucent.
- Add the chili powder, turmeric, garam masala, and soft brown sugar to the pan. Cook for another 1-2 minutes, stirring constantly, to toast the spices and release their aromas. This step is crucial for developing depth of flavor.
- Add the tomato puree and chopped tomatoes to the pan. Stir well to combine all the ingredients, then cook for a few minutes, allowing the mixture to simmer and thicken slightly.
- Carefully transfer the sauce to a food processor or blender. Be cautious when blending hot liquids to avoid splattering. Blitz the sauce until it is completely smooth and creamy. This step ensures a luxurious texture for the final dish.
- Add 1 tablespoon of fresh peanut oil into the same pan in which you cooked the sauce. Return the pan to medium heat.
- Add the cubed chicken breasts to the pan and fry them until they are lightly colored on all sides. You’re not looking to fully cook the chicken at this stage, just to sear the outside and lock in the juices.
- Pour the blended sauce back into the pan with the chicken.
- Add the dried curry leaves to the pan. These leaves will infuse the sauce with their unique flavor.
- Simmer the curry for 10 minutes, or until the chicken is cooked through and tender. The internal temperature of the chicken should reach 165°F (74°C). Be sure to stir occasionally to prevent sticking and ensure even cooking.
- Stir in the natural yogurt. To achieve a visually appealing swirl effect, avoid mixing it in completely. Instead, gently swirl it through the sauce.
- Add half of the chopped fresh coriander to the curry and stir it in.
- Serve hot, garnishing each portion with the remaining fresh coriander.
Expert Tips & Tricks
- Spice Level Adjustment: If you prefer a milder curry, remove the seeds from the green chilies before chopping or reduce the amount used. For a spicier dish, leave the seeds in or add a pinch of cayenne pepper.
- Yogurt Tempering: To prevent the yogurt from curdling when added to the hot sauce, you can temper it first. Take a tablespoon or two of the hot sauce and whisk it into the yogurt before adding the yogurt to the pan. This helps to gradually raise the yogurt’s temperature.
- Make-Ahead Tip: The sauce can be made a day or two in advance. Store it in an airtight container in the refrigerator. This allows the flavors to meld and deepen.
- Chicken Marinade: For even more tender and flavorful chicken, marinate the cubed chicken in a mixture of yogurt, ginger-garlic paste, and a pinch of turmeric for at least 30 minutes before cooking.
Serving & Storage Suggestions
Serve your Tikka Masala hot with freshly cooked basmati rice or naan bread. A side of cucumber raita can provide a cooling contrast to the rich flavors of the curry.
Leftover Tikka Masala can be stored in an airtight container in the refrigerator for up to 3 days. To reheat, gently warm it in a saucepan over medium-low heat, stirring occasionally, or microwave it in short intervals, stirring in between. You may need to add a splash of water or milk to prevent it from drying out.
For longer storage, Tikka Masala can be frozen for up to 2 months. Thaw it overnight in the refrigerator before reheating.
Nutritional Information
| Nutrient | Amount per Serving | % Daily Value |
|---|---|---|
| Calories | 420 kcal | 21% |
| Total Fat | 25g | 38% |
| Saturated Fat | 8g | 40% |
| Cholesterol | 120mg | 40% |
| Sodium | 250mg | 11% |
| Total Carbohydrate | 20g | 7% |
| Dietary Fiber | 5g | 20% |
| Sugars | 10g | |
| Protein | 30g | 60% |
Note: Nutritional information is an estimate and may vary based on specific ingredients and portion sizes.
Variations & Substitutions
- Vegetarian Tikka Masala: Substitute the chicken with paneer (Indian cheese), tofu, or a mix of vegetables like cauliflower, bell peppers, and peas.
- Coconut Milk: For a richer and creamier sauce, replace some or all of the natural yogurt with coconut milk.
- Cashew Cream: For a dairy-free version, use cashew cream instead of yogurt. Soak raw cashews in hot water for at least 30 minutes, then drain and blend them with fresh water until smooth.
- Different Proteins: Experiment with other proteins like lamb or shrimp for a unique twist. Adjust the cooking time accordingly.
FAQs (Frequently Asked Questions)
Q: Can I use pre-ground spices instead of whole spices?
A: While pre-ground spices are convenient, using freshly ground spices will result in a more intense and complex flavor. If using pre-ground spices, be sure they are fresh, as spices lose their potency over time.
Q: How do I prevent the sauce from being too acidic?
A: Adding a touch of sugar or a small pat of butter can help to balance the acidity of the tomatoes in the sauce. Be careful not to add too much, as you don’t want the curry to be overly sweet.
Q: What is the best way to serve Tikka Masala for a dinner party?
A: Serve the Tikka Masala in a warmed serving dish and garnish with plenty of fresh coriander. Offer a variety of sides, such as rice, naan bread, raita, and chutney, to create a complete and satisfying meal.
Q: Can I make this recipe in a slow cooker?
A: Yes, you can adapt this recipe for a slow cooker. Sauté the onions, ginger, and garlic as instructed, then transfer everything to the slow cooker along with the remaining ingredients (except the yogurt and coriander). Cook on low for 6-8 hours, or on high for 3-4 hours, until the chicken is tender. Stir in the yogurt and coriander just before serving.
Q: What if my sauce is too thin?
A: If your sauce is too thin, simmer it uncovered for a longer period to allow it to reduce and thicken. You can also add a cornstarch slurry (1 tablespoon of cornstarch mixed with 2 tablespoons of cold water) to the sauce while it’s simmering.
Final Thoughts
This Tikka Masala recipe, inspired by the legendary Gordon Ramsay, offers a fantastic balance of flavors that’s sure to impress. Don’t be afraid to experiment with the spice levels and ingredient substitutions to create a dish that perfectly suits your taste. Whether you’re a seasoned cook or just starting your culinary journey, this recipe is a great way to explore the wonderful world of Indian cuisine. I encourage you to try it, share your feedback, and perhaps even pair it with a crisp Indian beer or a refreshing glass of lassi for the ultimate dining experience. Enjoy!