
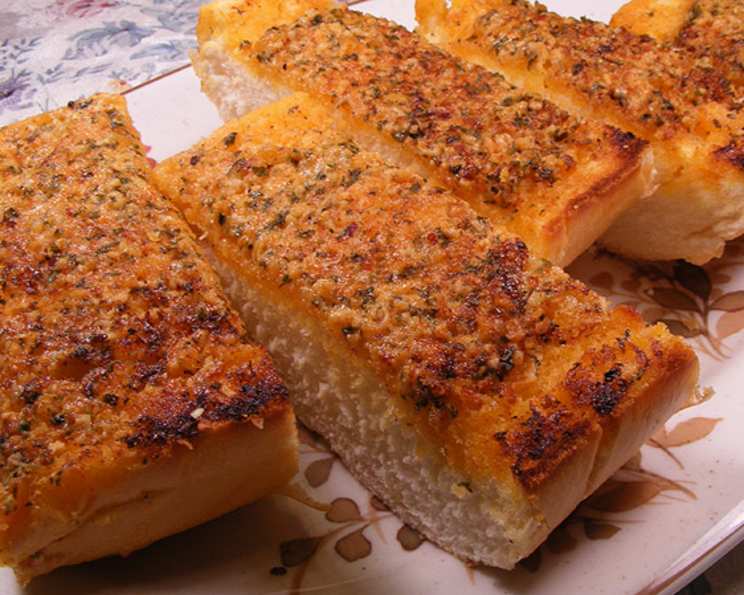
Gotta-Have-It Garlic Bread: An Irresistible Classic
The aroma of garlic bread baking – it’s pure magic, isn’t it? My earliest memory is standing on a step stool next to my grandmother, watching her slather a fragrant, garlicky mixture onto sliced Italian bread. The anticipation as the bread toasted under the broiler, filling the kitchen with its savory scent, was almost unbearable. That first bite, always perfectly crisp and intensely flavorful, was pure bliss. This recipe, inspired by those cherished memories, delivers that same comforting and irresistible experience.
Recipe Overview
- Prep Time: 15 minutes
- Cook Time: 3-5 minutes
- Total Time: 20 minutes
- Servings: Varies depending on loaf size
- Yield: 1 large loaf
- Dietary Type: Vegetarian
Ingredients
- ½ cup softened butter
- ¼ cup mayonnaise
- 1 tablespoon minced garlic
- 3 tablespoons grated Parmesan cheese
- 1 teaspoon smoked paprika
- 1 pinch red pepper flakes
- ¼ teaspoon onion powder
- ¼ teaspoon garlic powder
- 1 pinch fresh coarse ground black pepper
- 1-2 tablespoons chopped fresh parsley leaves
- 1 pinch kosher salt
- 1 large loaf French bread
Equipment Needed
- Small bowl
- Mixing spoon or fork
- Baking sheet
Instructions
- Begin by preheating your broiler. Keep a close eye on the bread as it broils to prevent burning.
- In a small bowl, combine the softened butter, mayonnaise, minced garlic, grated Parmesan cheese, smoked paprika, red pepper flakes, onion powder, garlic powder, black pepper, parsley leaves, and kosher salt.
- Mix all the ingredients thoroughly until they are well combined, forming a smooth and fragrant spread. The softened butter is crucial for easy mixing. If your butter is too cold, it will be difficult to incorporate all the ingredients evenly.
- Cut the French loaf in half lengthwise. This creates two long halves that are perfect for spreading. Ensure the cut is even so that both sides cook uniformly under the broiler.
- Liberally spread the butter mixture on each half of the French bread. Don’t be shy! The generous coating is what makes this garlic bread so flavorful. Spread the mixture evenly across the entire surface of the bread.
- Arrange the bread halves on a baking sheet. This will allow for easy handling and even broiling.
- Place the baking sheet under the broiler and broil until the bread is browned and toasty, about 3-5 minutes. Watch very carefully, as broilers can vary in intensity, and the bread can burn quickly. The goal is a golden-brown color with slightly crispy edges.
- Remove the garlic bread from the oven. Let it cool slightly before slicing.
- Slice the garlic bread and serve immediately. The aroma and taste are best when it is fresh from the broiler.
Expert Tips & Tricks
- For an extra layer of flavor, try roasting the garlic before mincing it. Roasted garlic has a sweeter, mellower taste that adds depth to the garlic bread. Simply wrap a head of garlic in foil with a drizzle of olive oil and roast at 400°F (200°C) for about 45 minutes, or until the cloves are soft and easily squeezed out.
- If you don’t have smoked paprika, regular paprika will work, but the smoked variety adds a wonderful depth of flavor.
- To prevent the bread from getting soggy, you can lightly toast the cut sides before spreading the garlic mixture.
- Make the garlic butter mixture ahead of time and store it in the refrigerator. This makes it easy to whip up a batch of garlic bread whenever the craving strikes. Just be sure to let the mixture soften slightly before spreading.
- For a richer flavor, use salted butter instead of unsalted, adjusting the kosher salt accordingly.
Serving & Storage Suggestions
Serve this Gotta-Have-It Garlic Bread hot and fresh from the broiler for the best experience. It’s a fantastic accompaniment to pasta dishes, soups, salads, or grilled meats. For a more elegant presentation, arrange the sliced garlic bread on a platter garnished with fresh parsley sprigs.
Leftover garlic bread can be stored at room temperature for up to 24 hours, or in the refrigerator for up to 3 days. To reheat, wrap the bread in foil and warm in a 350°F (175°C) oven for about 10 minutes, or until heated through. You can also reheat individual slices in a toaster oven. Freezing is not generally recommended as it can alter the texture of the bread, but it’s possible. Wrap tightly in plastic wrap then foil and freeze for up to a month. Reheat directly from frozen in a low oven to avoid sogginess.
Nutritional Information
| Nutrient | Amount per Serving | % Daily Value |
|---|---|---|
| Calories | 353 kcal | 18% |
| Total Fat | 29.6 g | 45% |
| Saturated Fat | 16.1 g | 80% |
| Cholesterol | 68.1 mg | 22% |
| Sodium | 525.4 mg | 21% |
| Total Carbohydrate | 18.6 g | 6% |
| Dietary Fiber | 0.9 g | 3% |
| Sugars | 1.7 g | – |
| Protein | 4.9 g | 9% |
Note: Nutritional information is an estimate and can vary based on specific ingredients and portion sizes.
Variations & Substitutions
- Spicy Garlic Bread: Add a pinch of cayenne pepper to the butter mixture for an extra kick.
- Herbaceous Garlic Bread: Incorporate other fresh herbs like rosemary, thyme, or oregano into the garlic butter.
- Cheese Lover’s Garlic Bread: Sprinkle shredded mozzarella or provolone cheese over the garlic butter before broiling.
- Vegan Garlic Bread: Substitute vegan butter and Parmesan cheese alternatives for a dairy-free version.
- Gluten-Free Garlic Bread: Use a gluten-free baguette for those with gluten sensitivities.
FAQs (Frequently Asked Questions)
Q: Can I use regular butter instead of softened butter?
A: While you can, softened butter is essential for easy mixing and even distribution of the garlic mixture. Cold butter will be difficult to work with and may result in unevenly flavored bread.
Q: How do I prevent the garlic bread from burning under the broiler?
A: Watch the bread closely while it’s under the broiler. Broilers vary in intensity, so it’s best to keep a close eye on it and adjust the rack position if needed. Lowering the rack or reducing the broiling time can help prevent burning.
Q: Can I make this garlic bread ahead of time?
A: Yes, you can prepare the garlic butter mixture ahead of time and store it in the refrigerator. However, it’s best to broil the bread just before serving for the best flavor and texture.
Q: What is smoked paprika, and can I substitute regular paprika?
A: Smoked paprika is paprika that has been smoked over oak fires, giving it a distinct smoky flavor. While you can substitute regular paprika, the smoked variety adds a unique depth of flavor to the garlic bread.
Q: Can I use a different type of bread?
A: While French bread is the traditional choice, you can use other types of bread like Italian bread, sourdough, or even ciabatta. Just be sure to adjust the broiling time accordingly, as different breads may brown at different rates.
Final Thoughts
This Gotta-Have-It Garlic Bread is more than just a side dish; it’s an experience. It’s the aroma that fills your kitchen, the satisfying crunch with every bite, and the burst of garlicky flavor that lingers on your palate. I hope this recipe brings as much joy to your table as it has to mine. Don’t be afraid to experiment with variations and make it your own. And please, share your creations and feedback – I’d love to hear how you make this classic your own. Enjoy!