
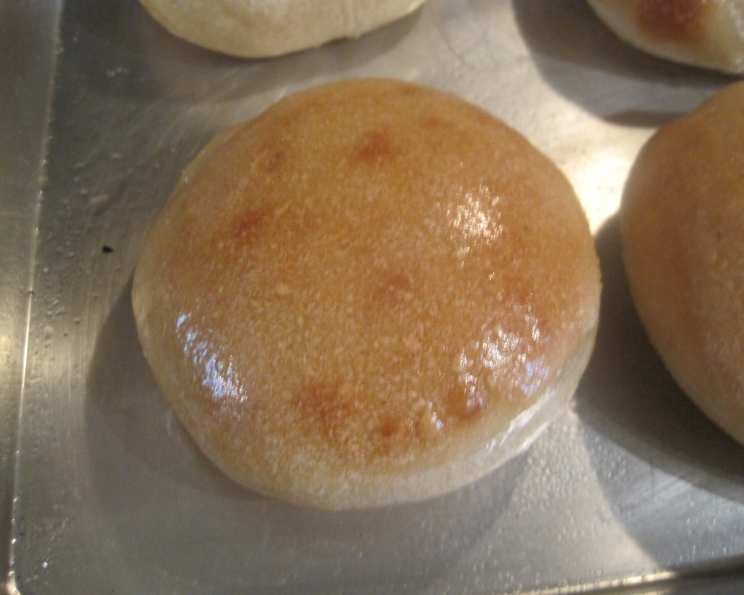
Gourmet French Bread Style Hamburger and Hotdog Buns (Bread Machine)
There’s something truly special about a homemade burger. It’s not just the patty, the toppings, or the sauce – it’s the bun. I remember one summer, I decided to elevate our family barbecues by ditching the store-bought buns. The first attempt was…memorable, but not in a good way! After some tweaking and a little help from a trusty bread machine, I created these French bread-style buns. The look on my kids’ faces when they bit into those chewy, crisp buns piled high with their favorite toppings was pure joy. Suddenly, it wasn’t just burgers; it was an experience.
Recipe Overview
- Prep Time: 15 minutes
- Cook Time: 15-18 minutes
- Total Time: 1 hour 33 minutes (includes proofing time)
- Servings: 6-9
- Yield: 6-9 buns
- Dietary Type: Vegetarian
Ingredients
- 500 g (4 cups) bread flour
- 5 g (1 teaspoon) salt
- 7 g (1/4 ounce package) yeast
- 325 g (1 1/2 cups) warm water (around 110°F)
- 8 ounces hot water, for spraying oven walls
Equipment Needed
- Bread machine
- Floured surface
- 3 1/2 inch cutter (or glass)
- Greased baking sheet
- Tea towel
- Oven
- Water bottle sprayer
- Wire rack
Instructions
-
Place the bread flour, salt, yeast, and warm water into your bread machine pan according to the manufacturer’s instructions. The water should be around 110°F to properly activate the yeast.
-
Set the bread machine to the dough cycle and start the machine. This cycle will mix and knead the dough, and provide a warm environment for the first rise.
-
Once the dough cycle is complete, carefully remove the dough from the bread machine and place it onto a lightly floured surface.
-
Using a rolling pin, gently roll the dough to a thickness of approximately 1 1/4 to 2 inches. The final thickness will determine the height of your buns. For taller, more substantial buns, aim for the thicker end of the range.
-
Flour a 3 1/2-inch cutter (a glass works well if you don’t have a cutter) and firmly press straight down into the dough to cut out the buns. Try to minimize waste by cutting the buns close together.
-
Carefully place the cut buns onto a greased baking sheet, leaving a little space between each bun to allow for expansion during the second rise.
-
Cover the baking sheet with a clean tea towel and let the buns rise in a warm place for approximately 1 hour, or until they have roughly doubled in size. This proofing period is crucial for achieving a light and airy texture.
-
Preheat your oven to 425°F (220°C). Ensure the oven is fully preheated before baking the buns, as this is vital for the crust formation.
-
Once the buns have proofed and the oven is preheated, place the baking sheet with the buns into the oven. Immediately after placing the buns in the oven, using a water bottle sprayer, carefully squirt hot water onto the oven walls, avoiding the light bulb. This creates steam, which is essential for achieving a crisp, chewy crust, characteristic of French bread.
-
Wait about 30 seconds and repeat the spraying process. Do this one more time (a total of three sprays) to ensure sufficient steam in the oven.
-
Bake the buns for 15 to 18 minutes, or until they are golden brown. Oven temperatures can vary, so keep a close eye on the buns to prevent burning.
-
Halfway through the baking time (around 7-9 minutes), rotate the baking sheet to ensure even browning.
-
Once the buns are baked, remove them from the oven and transfer them to a wire rack to cool completely. This prevents the bottoms from becoming soggy.
-
Let the buns cool completely before slicing and using. Enjoy!
Expert Tips & Tricks
- Temperature is key: Ensure your warm water is around 110°F to properly activate the yeast without killing it. Too hot and you risk hindering the yeast’s ability to rise.
- Don’t skip the steam: The steam created by spraying water into the oven is crucial for the characteristic crust. If you have a steam oven setting, you can use that instead.
- Bread machine alternative: As noted in the original recipe, you can absolutely use a stand mixer with a dough hook attachment if you don’t have a bread machine. Knead the dough for about 8-10 minutes on medium speed until it is smooth and elastic.
- Shaping Variations: For hotdog buns, divide the dough after the first rise, and roll each piece into an oblong shape, then proceed with proofing and baking.
- Egg Wash: For a shinier crust, brush the buns with an egg wash (1 egg beaten with 1 tablespoon of water) before baking.
Serving & Storage Suggestions
These buns are fantastic for hamburgers, hotdogs, and sandwiches. They are best enjoyed fresh, but leftovers can be stored in an airtight container at room temperature for up to 2 days. For longer storage, wrap them tightly in plastic wrap and freeze for up to 2 months. To reheat frozen buns, thaw them at room temperature and then warm them in a low oven (around 300°F or 150°C) for a few minutes to restore their texture. Alternatively, you can slice them and toast them lightly.
Nutritional Information
(Estimated, per bun, assuming 8 buns per batch)
| Nutrient | Amount per Serving | % Daily Value |
|---|---|---|
| Calories | 383 kcal | 19% |
| Total Fat | 1.1 g | 1% |
| Saturated Fat | 0.2 g | 1% |
| Cholesterol | 0 mg | 0% |
| Sodium | 328 mg | 14% |
| Total Carbohydrate | 80 g | 27% |
| Dietary Fiber | 3.1 g | 12% |
| Sugars | 0.3 g | 1% |
| Protein | 11.2 g | 22% |
Variations & Substitutions
- Whole Wheat Buns: Substitute up to half of the bread flour with whole wheat flour for a nuttier flavor and added fiber.
- Sweet Buns: Add 1-2 tablespoons of sugar to the dough for a slightly sweeter bun, perfect for breakfast sandwiches.
- Sesame Seed Buns: Brush the buns with egg wash before baking and sprinkle with sesame seeds for added flavor and texture.
- Herb Buns: Add a tablespoon of dried herbs like rosemary or thyme to the dough for a savory twist.
- Gluten-Free: While achieving the exact texture of these buns with gluten-free flour can be challenging, you can experiment with a gluten-free bread flour blend, but you may need to adjust the liquid content.
FAQs (Frequently Asked Questions):
Q: Can I use active dry yeast instead of instant yeast?
A: Yes, but you’ll need to proof the active dry yeast in warm water for about 5-10 minutes before adding it to the bread machine.
Q: Why is the steam so important?
A: The steam helps create a crisp, chewy crust by keeping the surface of the buns moist during the initial baking period, allowing them to expand fully before the crust sets.
Q: Can I make the dough ahead of time?
A: Yes, you can make the dough ahead of time and store it in the refrigerator for up to 24 hours. Let it come to room temperature before rolling and shaping.
Q: What if my buns are browning too quickly?
A: If the buns are browning too quickly, you can tent them with aluminum foil to prevent further browning.
Q: My buns didn’t rise enough, what went wrong?
A: Several factors can affect the rise, including the age of your yeast, the temperature of the water, and the room temperature. Make sure your yeast is fresh, the water is warm but not hot, and the room is warm enough for the dough to rise properly.
Final Thoughts
These French bread-style buns are a game-changer for any burger or hotdog lover. They’re a little more work than buying store-bought buns, but the payoff in flavor and texture is well worth the effort. Don’t be intimidated – this recipe is surprisingly straightforward, especially with the help of a bread machine. Give it a try, and I promise you’ll never look at a burger the same way again! I encourage you to experiment with the variations, share your creations, and let me know what you think. Happy baking!