
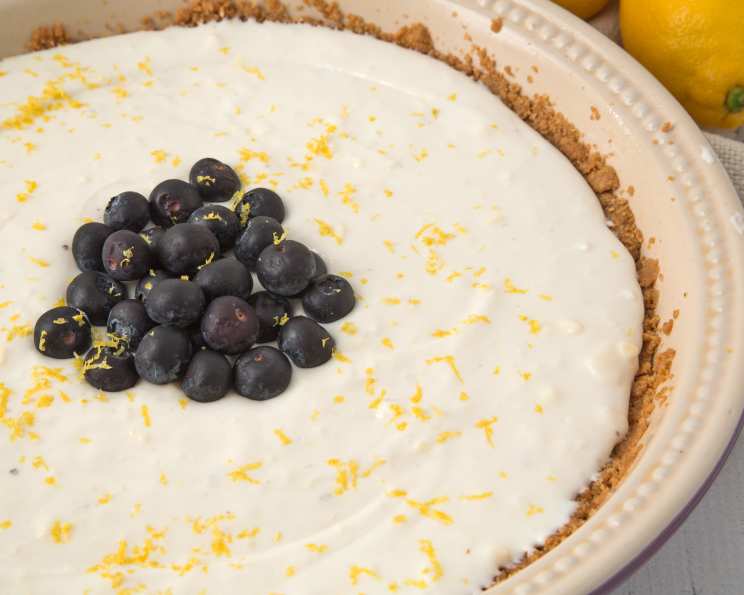
The Unsung Hero: Mastering the Graham Cracker Pie Crust
I’ll never forget my first attempt at making a key lime pie. The filling was perfect – tart, creamy, and fragrant with lime. But the store-bought graham cracker crust? It was a soggy, crumbly disaster. From that moment on, I vowed to master the art of the homemade graham cracker crust. Now, years later, I can confidently say that a well-made graham cracker crust can elevate even the simplest pie into something truly special. It’s the foundation of so many beloved desserts, and today, I’m sharing my go-to recipe for a crust that’s perfectly crisp, subtly sweet, and sturdy enough to hold even the richest fillings.
Recipe Overview
- Prep Time: 10 minutes
- Cook Time: 8 minutes
- Total Time: 18 minutes (plus 1 hour chilling)
- Servings: 8
- Yield: 1 (9-inch) pie crust
- Dietary Type: Vegetarian (easily adaptable to vegan)
Ingredients
- 1 1⁄4 cups graham cracker crumbs, (Keebler brand recommended for consistent texture)
- 3 tablespoons sugar
- 1⁄3 cup butter, melted (or margarine)
Equipment Needed
- 9-inch pie pan
- Medium-sized mixing bowl
- Measuring cups and spoons
- Fork or spoon for mixing
- Measuring cup or flat-bottomed glass for pressing
Instructions
-
Preheat your oven to 350 degrees F (175 degrees C), if you plan to bake the crust.
-
In a medium-sized bowl, combine the graham cracker crumbs and sugar. Use a fork or spoon to thoroughly mix the dry ingredients until evenly distributed. This ensures a consistent sweetness throughout the crust.
-
Pour the melted butter (or margarine) into the graham cracker crumb mixture. Stir continuously until the crumbs are completely moistened and the mixture resembles wet sand. It’s important to make sure all the crumbs are coated with butter for proper binding.
-
Transfer the crumb mixture into a 9-inch pie pan.
-
Pack the mixture firmly into the pie pan. Use the bottom of a measuring cup or a flat-bottomed glass to press the crumbs evenly onto the bottom and up the sides of the pan. Pay special attention to the edges, pressing firmly to create a neat and even rim. This is crucial for preventing the crust from crumbling.
-
Chill for at least one hour before filling if you are not baking. The chilling process helps the butter to solidify, which will set the crust and prevent it from becoming soggy when filled.
-
If baking: Bake in the preheated oven for 8 minutes. This will help to further set the crust and give it a slightly toasted flavor.
-
Cool completely after baking. Allow the crust to cool to room temperature before adding any filling. This will prevent the filling from melting or softening the crust.
-
Chill again after baking, before filling. This final chilling step ensures the crust is firm and ready to hold your delicious pie filling.
Expert Tips & Tricks
-
Pulse, Don’t Pound: When making your own graham cracker crumbs, use a food processor and pulse until finely ground. Avoid over-processing into a powder. A bit of texture is desirable.
-
Butter Temperature Matters: Ensure the butter is fully melted but not hot. Hot butter can cause the crust to become greasy. Microwaving in short intervals is best, rather than melting over the stovetop.
-
Pressing Perfection: For a perfectly even crust, use a measuring cup to press the crumbs. The consistent pressure ensures the crust holds its shape.
-
Blind Baking for Perfection: If your filling is particularly wet, consider blind-baking the crust. After pressing the crumbs into the pan, line the crust with parchment paper and fill with pie weights or dried beans. Bake as directed to prevent a soggy bottom. Remove the weights and parchment for the last couple minutes of baking.
-
Preventing Cracks: If your crust cracks while baking, don’t panic. Simply brush the cracks with a little melted butter and sprinkle with extra graham cracker crumbs. The crumbs will help to fill the cracks and seal the crust.
-
Vegan Adaptation: Substitute the butter with melted coconut oil or a vegan butter alternative for a delicious vegan crust.
-
Add a Hint of Spice: Consider adding a pinch of cinnamon, nutmeg, or ginger to the graham cracker crumb mixture for extra flavor and warmth.
Serving & Storage Suggestions
Serve your graham cracker pie crust filled with your favorite pie filling, such as key lime, chocolate, or banana cream. Garnish with whipped cream, fresh fruit, or chocolate shavings for an elegant presentation.
- Room Temperature: A graham cracker pie crust filled with a non-dairy filling can typically be stored at room temperature for up to 2 hours.
- Refrigeration: For pies containing dairy or perishable fillings, store the pie in the refrigerator for up to 3-4 days. Cover loosely with plastic wrap or foil to prevent drying.
- Freezing: To freeze a graham cracker pie crust, wrap it tightly in plastic wrap and then in foil. It can be frozen for up to 2-3 months. Thaw in the refrigerator overnight before filling. Baked, unfilled crusts also freeze well.
Nutritional Information
Estimates based on a crust made with butter. Actual values may vary.
| Nutrient | Amount per Serving | % Daily Value |
|---|---|---|
| Calories | 150 kcal | 8% |
| Total Fat | 8g | 12% |
| Saturated Fat | 5g | 25% |
| Cholesterol | 20mg | 7% |
| Sodium | 75mg | 3% |
| Total Carb. | 18g | 6% |
| Dietary Fiber | 1g | 4% |
| Sugars | 9g | – |
| Protein | 1g | 2% |
Variations & Substitutions
- Gluten-Free Graham Cracker Crust: Use gluten-free graham crackers or cookies to make the crust gluten-free.
- Chocolate Graham Cracker Crust: Add 1/4 cup of unsweetened cocoa powder to the graham cracker crumb mixture for a rich chocolate flavor.
- Nutty Graham Cracker Crust: Add 1/4 cup of finely chopped nuts (such as pecans or walnuts) to the graham cracker crumb mixture for added texture and flavor.
- Spice it up! A little bit of cinnamon or ginger in the crust brings a warmth that is especially nice with fruit fillings.
- Lemon Zest Boost: Add the zest of one lemon to the crust mixture for a subtle citrus flavor that pairs well with many fillings.
FAQs (Frequently Asked Questions)
Q: Can I make this crust ahead of time?
A: Absolutely! The unbaked crust can be made up to 2 days in advance and stored in the refrigerator, tightly covered. You can also bake the crust and store it at room temperature for a day, or freeze it for longer storage.
Q: My crust is always crumbly. What am I doing wrong?
A: Ensure you’re using enough melted butter and pressing the crumbs firmly into the pie pan. A slightly coarser crumb can also help, preventing it from becoming overly fine.
Q: Can I use a different type of cookie instead of graham crackers?
A: Yes, you can! Digestive biscuits, shortbread cookies, or even crushed Oreos (without the filling) can be used to create a unique and delicious crust.
Q: Do I always have to bake the crust?
A: No, baking is optional. An unbaked crust is perfect for no-bake pies and fillings that don’t require baking. However, baking adds a bit of sturdiness and toastiness.
Q: How can I prevent my crust from getting soggy?
A: Blind baking the crust before filling it is an excellent way to prevent sogginess, especially with wet fillings. Also, chilling the crust thoroughly helps to solidify the butter and create a moisture barrier.
Final Thoughts
The perfect graham cracker pie crust is the foundation of so many delicious desserts. Whether you’re making a classic key lime pie, a decadent chocolate pie, or a simple no-bake treat, mastering this simple recipe will take your desserts to the next level. Don’t be afraid to experiment with different flavors and variations to create your own signature crust. So go ahead, get baking, and enjoy the sweet satisfaction of a perfectly made graham cracker pie crust! I’d love to hear about your creations and any variations you try – share your feedback and let me know what fillings you pair it with!