
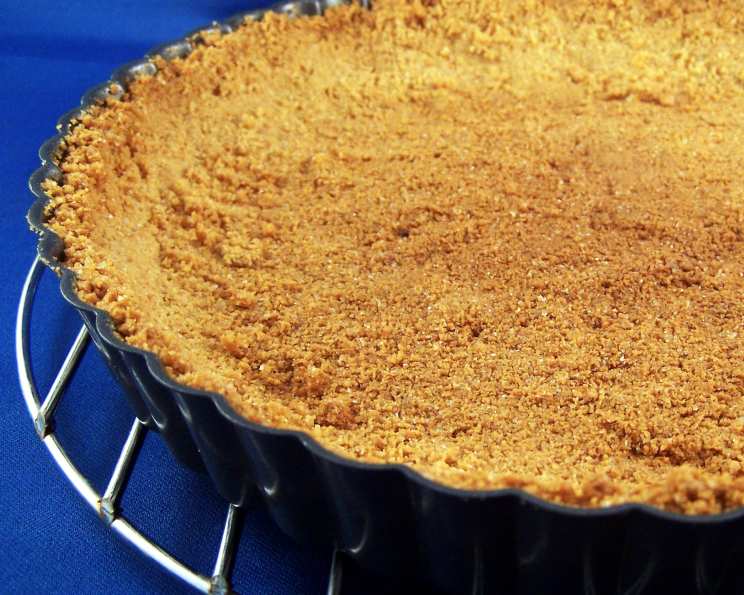
The Perfect Graham Cracker Tart Crust: A Baker’s Secret Weapon
There’s a certain nostalgia that washes over me whenever I smell the warm, comforting aroma of graham crackers baking. It instantly transports me back to childhood summers spent making s’mores around a crackling campfire. That simple combination of graham crackers, chocolate, and marshmallow was pure magic, and it sparked a lifelong love affair with the humble graham cracker. Now, as a professional chef, I’ve elevated that love into something truly special: the perfect graham cracker tart crust. It’s not just a base; it’s the foundation for countless delectable desserts, each bite carrying a hint of those cherished memories.
Recipe Overview
- Prep Time: 10 minutes
- Cook Time: 10 minutes
- Total Time: 20 minutes
- Servings: 12
- Yield: 1 tart crust
- Dietary Type: Vegetarian
Ingredients
- 1 1/4 cups finely ground graham crackers (ground in a food processor, about 9 whole)
- 2 tablespoons granulated sugar
- 4 tablespoons unsalted butter, melted
Equipment Needed
- Food processor
- Medium bowl
- Fork
- 9 1/2-inch fluted tart pan with a removable bottom
- Plastic wrap (optional)
Instructions
-
Position a rack in the center of the oven and preheat the oven to 350°F (175°C). It’s important to ensure your oven is properly preheated for even baking.
-
Have ready an ungreased 9 1/2-inch fluted tart pan with a removable bottom. The removable bottom is crucial for easily releasing the finished tart.
-
In a medium bowl, mix the finely ground graham crackers and granulated sugar with a fork until well blended. This ensures an even distribution of sweetness throughout the crust.
-
Drizzle the melted butter over the crumb mixture and mix until evenly moistened. The mixture should resemble wet sand; it needs to be moist enough to hold its shape when pressed.
-
Put the crumb mixture in the tart pan. This is where you create the crust’s shape.
-
Use your hands to spread the crumbs so that they cover the bottom of the pan and the sides. I like to use a piece of plastic wrap between my hands and the crust to prevent sticking and ensure a smooth, even surface.
-
Use your fingers to pinch and press some of the crumbs around the inside edge of the pan to cover the sides evenly and create a wall about a scant 1/4 inch thick. This wall will hold your filling securely.
-
Redistribute the remaining crumbs evenly over the bottom of the pan and press firmly to make a compact layer. This is key to preventing the crust from crumbling apart when you slice the tart.
-
Bake the crust until it smells nutty and fragrant, about 10 minutes. Keep a close eye on it, as it can burn quickly. The edges should be lightly golden brown.
-
Set the baked crust on a rack and let cool completely. This allows the crust to firm up.
-
The crust can be made up to a day ahead and stored at room temperature, wrapped well in plastic. This is a great time-saver when you’re preparing for a dinner party or special occasion.
Expert Tips & Tricks
-
Pulse, Don’t Process: When grinding the graham crackers in a food processor, use short pulses rather than a continuous stream. This prevents the crackers from turning into a paste.
-
Butter Temperature Matters: Make sure the butter is fully melted but not hot. Hot butter can scorch the graham crackers and create a bitter taste.
-
Pressing is Key: Don’t be shy about pressing the crumbs firmly into the pan. A well-compacted crust is less likely to crumble.
-
Blind Baking: For tarts with particularly wet fillings, consider blind-baking the crust. This involves baking the crust with pie weights or dried beans to prevent it from puffing up. After 10 minutes, remove the weights and bake for another 5 minutes to crisp the bottom.
-
Prevent Soggy Crusts: A thin layer of melted chocolate, brushed onto the cooled crust before adding a wet filling, can prevent sogginess.
Serving & Storage Suggestions
Serve your graham cracker tart crust filled with your favorite sweet or savory filling. It pairs beautifully with chocolate ganache, lemon curd, fruit compote, or even a creamy quiche filling.
-
Storage: Store the baked, unfilled crust at room temperature for up to 24 hours, wrapped tightly in plastic wrap. Filled tarts should be stored in the refrigerator.
-
Freezing: You can freeze the baked, unfilled crust for up to 1 month. Wrap it tightly in plastic wrap and then in foil. Thaw completely at room temperature before filling.
-
Reheating: Reheating is generally not necessary, but if you prefer a warm crust, you can heat it in a 300°F (150°C) oven for about 5 minutes.
Nutritional Information
| Nutrient | Amount per Serving | % Daily Value |
|---|---|---|
| Calories | 79 kcal | 4% |
| Calories from Fat | 42 kcal | N/A |
| Total Fat | 4.7 g | 7% |
| Saturated Fat | 2.6 g | 12% |
| Cholesterol | 10.2 mg | 3% |
| Sodium | 53.5 mg | 2% |
| Total Carbohydrate | 8.8 g | 2% |
| Dietary Fiber | 0.2 g | 0% |
| Sugars | 4.8 g | 19% |
| Protein | 0.6 g | 1% |
Variations & Substitutions
-
Gluten-Free: Use gluten-free graham crackers for a gluten-free crust.
-
Different Spices: Add a pinch of cinnamon, nutmeg, or ginger to the crumb mixture for a warm, spiced flavor.
-
Different Nuts: Substitute some of the graham cracker crumbs with finely ground nuts like almonds, pecans, or walnuts.
-
Brown Sugar: Replace the granulated sugar with brown sugar for a richer, molasses-like flavor.
-
Vegan Option: Use a vegan butter substitute. Many brands work perfectly well in this recipe.
FAQs (Frequently Asked Questions)
Q: Can I use a different size tart pan?
A: Yes, but you may need to adjust the amount of ingredients. A smaller pan will require less, while a larger pan will require more.
Q: My crust is crumbling apart. What did I do wrong?
A: Most likely, the crumbs were not moistened enough with butter, or the crust wasn’t pressed firmly enough into the pan.
Q: Can I make this crust without a food processor?
A: Yes, you can crush the graham crackers in a resealable bag using a rolling pin. Just make sure the crumbs are very fine.
Q: How do I prevent the crust from sticking to the pan?
A: While the recipe doesn’t call for greasing the pan, you can lightly grease it with butter or cooking spray if you’re concerned about sticking. Also, make sure the removable bottom is properly seated in the pan before adding the crumbs.
Q: What can I do if my crust starts to brown too quickly in the oven?
A: Tent the crust with foil to prevent it from burning.
Final Thoughts
Creating a perfect graham cracker tart crust is easier than you might think! It all comes down to the right ratio of ingredients, proper technique, and a little bit of love. Whether you fill it with a rich chocolate ganache, a tangy lemon curd, or a vibrant fruit filling, this crust is the perfect canvas for your culinary creations. Don’t be afraid to experiment with different flavors and variations to make it your own. So go ahead, bake up a batch and let the warm, comforting aroma of graham crackers fill your kitchen. Happy baking!