
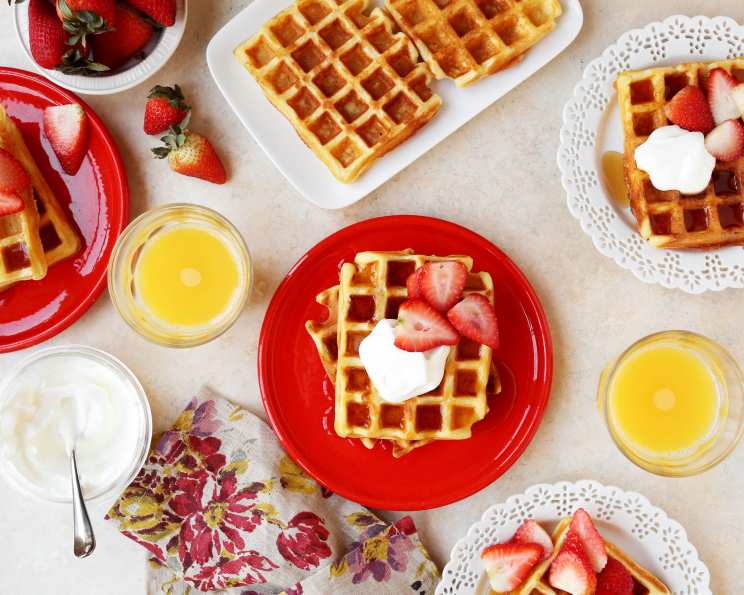
Grandma B’s Super Waffles: A Timeless Family Tradition
The scent of waffles, warm and buttery, is practically woven into my childhood memories. Every Sunday morning, without fail, my grandma would be at the waffle iron, a benevolent ruler presiding over a kingdom of crispy edges and fluffy interiors. These weren’t just any waffles; these were Grandma B’s Super Waffles, a recipe passed down through generations, each waffle imbued with love and a secret ingredient: pure, unadulterated nostalgia. The stack would dwindle quickly, the symphony of forks on plates a testament to their irresistible charm.
Recipe Overview
- Prep Time: 10 minutes
- Cook Time: 15-20 minutes
- Total Time: 25-30 minutes
- Servings: 6-8
- Yield: 6-8 waffles (depending on waffle iron size)
- Dietary Type: Not specified
Ingredients
- 2 cups sifted all-purpose flour
- 3 teaspoons baking powder
- 1 teaspoon baking soda
- 1 teaspoon salt
- 2 cups sour milk (see note below) or 2 cups buttermilk (see note below)
- 4 eggs, well beaten
- ¾ cup melted margarine (or butter) or ¾ cup salad oil
Note on Sour Milk: If you don’t have sour milk or buttermilk on hand, you can easily make a substitute. Measure 2 tablespoons of vinegar into a 2-cup measuring cup, then fill to the 2-cup mark with sweet milk. Let it stand for a few minutes while you prepare the other ingredients. The acidity of the vinegar will “sour” the milk, giving you a similar result to buttermilk.
Equipment Needed
- Large Mixing Bowl
- Hand Mixer or Electric Mixer
- Measuring Cups and Spoons
- Waffle Iron
- Whisk (optional, for initial mixing)
Instructions
-
If using the sour milk substitute, begin by preparing it as described above, allowing the milk and vinegar mixture to stand while you gather and prepare the remaining ingredients. This allows the milk to properly curdle.
-
In a large mixing bowl, sift together the dry ingredients: 2 cups sifted all-purpose flour, 3 teaspoons baking powder, 1 teaspoon baking soda, and 1 teaspoon salt. Sifting is important for a light and airy waffle, as it helps to evenly distribute the baking powder and soda.
-
In a separate bowl, combine 2 cups sour milk (or buttermilk) and 4 well-beaten eggs. Ensure the eggs are thoroughly beaten to incorporate air, which will contribute to the waffle’s fluffy texture.
-
Add the wet ingredients (milk and eggs) to the dry ingredients. Using a hand mixer or an electric mixer on high speed, beat the batter until smooth. Be careful not to overmix, as this can develop the gluten in the flour and result in tough waffles. A few small lumps are perfectly acceptable.
-
Stir in ¾ cup melted margarine (or butter) or ¾ cup salad oil. Gently fold the melted margarine (or butter/oil) into the batter until just combined. Be careful not to deflate the batter at this stage. The melted butter adds richness and flavor, while the oil contributes to a crispier texture.
-
Preheat your waffle iron according to the manufacturer’s instructions. It’s crucial to ensure the waffle iron is fully heated before adding the batter, to prevent sticking and ensure even cooking.
-
Once the waffle iron is hot, pour the batter onto the preheated iron. The amount of batter will depend on the size of your waffle iron. As a general guideline, use about 2 cups of batter for a large waffle maker and 1 cup of batter for a smaller maker. Distribute the batter evenly over the surface of the iron.
-
Bake in the preheated waffle iron until crisp and golden brown. The cooking time will vary depending on your waffle iron. Follow the manufacturer’s instructions, but typically, waffles take about 3-5 minutes to cook. Look for a deep golden-brown color and steam cessation as indicators of doneness.
-
Carefully remove the cooked waffle from the iron using a fork or tongs.
-
Serve immediately with your favorite toppings.
Expert Tips & Tricks
- For extra fluffy waffles: Separate the eggs and beat the egg whites until stiff peaks form. Gently fold the beaten egg whites into the batter just before cooking.
- Don’t overmix the batter: Overmixing develops the gluten in the flour, resulting in tough waffles. Mix until just combined.
- Keep waffles warm: Preheat your oven to 200°F (93°C). Place the cooked waffles on a wire rack in the oven to keep them warm and crisp while you finish cooking the rest of the batch.
- Crispy edges: Adding a tablespoon or two of cornstarch to the dry ingredients can enhance the crispness of the waffle edges.
- Prevent sticking: Ensure your waffle iron is properly seasoned and preheated. A light spray of cooking oil can also help prevent sticking.
Serving & Storage Suggestions
Grandma B’s Super Waffles are best served immediately, hot off the waffle iron. They are the perfect canvas for an array of toppings. Consider classic choices like butter, maple syrup, fresh berries, whipped cream, and powdered sugar. For a more decadent treat, try chocolate sauce, Nutella, or a scoop of ice cream. For a savory twist, top with fried chicken, bacon, or a poached egg.
Leftover waffles can be stored in an airtight container in the refrigerator for up to 3 days. For longer storage, freeze the waffles in a single layer on a baking sheet until solid, then transfer them to a freezer bag. Frozen waffles can be stored for up to 2 months.
To reheat refrigerated waffles, toast them in a toaster or toaster oven until crisp. To reheat frozen waffles, toast them directly from frozen, adding a few extra minutes of cooking time. You can also reheat waffles in the oven at 350°F (175°C) for about 10 minutes.
Nutritional Information
Note: Nutritional information is an estimate and may vary based on specific ingredients and portion sizes.
| Nutrient | Amount per Serving | % Daily Value |
|---|---|---|
| Calories | 453 kcal | 23% |
| Total Fat | 29g | 44% |
| Saturated Fat | 7g | 35% |
| Cholesterol | 132mg | 44% |
| Sodium | 1128mg | 47% |
| Total Carbohydrate | 37g | 12% |
| Dietary Fiber | 1g | 4% |
| Sugars | 4g | 8% |
| Protein | 11g | 22% |
Variations & Substitutions
- Gluten-Free: Substitute the all-purpose flour with a gluten-free all-purpose flour blend. Be sure to choose a blend that contains xanthan gum, as this will help bind the ingredients together and provide structure to the waffles.
- Dairy-Free: Use a non-dairy milk alternative such as almond milk, soy milk, or oat milk in place of the sour milk or buttermilk. Substitute the melted margarine or butter with a plant-based butter alternative or a neutral-flavored oil.
- Chocolate Chip: Add ½ cup of chocolate chips to the batter before cooking.
- Blueberry: Gently fold in 1 cup of fresh or frozen blueberries into the batter before cooking.
- Cinnamon Sugar: Add 1 teaspoon of ground cinnamon and 2 tablespoons of sugar to the dry ingredients for a warm and comforting flavor.
FAQs (Frequently Asked Questions)
Q: Why is it important to sift the flour?
A: Sifting the flour helps to aerate it and remove any lumps, resulting in a lighter and fluffier waffle.
Q: Can I make the batter ahead of time?
A: While it’s best to cook the waffles immediately after making the batter, you can prepare the batter up to 30 minutes in advance. Keep it refrigerated until ready to use.
Q: How do I know when the waffle is done cooking?
A: The waffle is done when it is golden brown and crisp, and steam is no longer escaping from the waffle iron.
Q: Can I use a different type of oil?
A: Yes, you can use any neutral-flavored oil, such as canola oil, vegetable oil, or grapeseed oil.
Q: What’s the best way to keep waffles crispy?
A: Place the cooked waffles on a wire rack in a preheated oven at 200°F (93°C) to keep them warm and crisp while you finish cooking the rest of the batch.
Final Thoughts
Grandma B’s Super Waffles are more than just a breakfast food; they are a symbol of family, love, and cherished memories. I encourage you to try this recipe and create your own waffle traditions. Feel free to experiment with different toppings and variations to make it your own. And please, share your feedback – I’d love to hear how these waffles bring a little bit of sunshine to your kitchen, just as they did in my grandma’s. Perhaps serve them alongside a steaming mug of coffee or a refreshing glass of orange juice for the perfect weekend brunch. Happy cooking!