
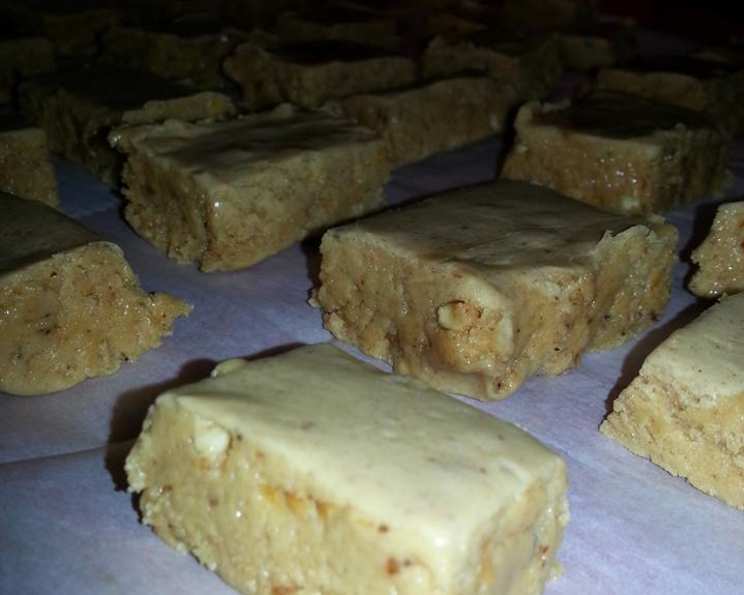
Grandma Evelyn’s Irresistible Peanut Butter Fudge
The scent of peanut butter always transports me back to my childhood, to Grandma Evelyn’s kitchen, a place brimming with warmth and the promise of sweet treats. But it wasn’t just any peanut butter scent – it was her peanut butter fudge, a confection so rich and creamy, so utterly perfect, that it became a defining flavor of my youth. Every holiday, every birthday, every special occasion (and even some not-so-special ones) included a generous plate of this fudge, its squares perfectly imperfect, each bite a little piece of Grandma’s love.
Recipe Overview
- Prep Time: 15 minutes
- Cook Time: 10-12 minutes
- Total Time: 25-27 minutes
- Yields: 36 pieces
- Serves: 25-30
- Dietary Type: Not Gluten-Free
Ingredients
- 1 (14 ounce) can sweetened condensed milk (No substitutions)
- ½ cup real butter
- 3 cups granulated sugar
- 1 (16 ounce) jar peanut butter
- 1 (16 ounce) jar marshmallow cream
- 2 teaspoons vanilla extract
- 1 cup chopped walnuts (optional)
Equipment Needed
- Heavy stock pot
- Small glass of cold tap water
- Wooden spoon
- Teaspoon
- Greased 9×12 inch cake pan
Instructions
-
Begin by preparing your workspace. Grease a 9×12 inch cake pan thoroughly. This will prevent the fudge from sticking and make it easier to remove once it’s cooled.
-
In a heavy stock pot, combine the sweetened condensed milk, butter, and granulated sugar. The heavy stock pot is crucial for even heat distribution and prevents scorching.
-
Place the pot over medium-high heat and bring the mixture to a rolling boil. A “rolling boil” means the mixture is actively bubbling and continues to do so even when stirred.
-
Stir constantly with a wooden spoon to prevent the sugar from burning or sticking to the bottom of the pot. This step is absolutely critical!
-
Once the mixture has reached a rolling boil, continue to boil for several minutes. This step is temperature dependent, but roughly 3-5 minutes is ideal.
-
Now, the crucial step: testing for the “soft ball” stage. Fill a small glass with cold tap water. Using a teaspoon, carefully gather a small amount of the boiling mixture and drop it into the cold water.
-
Observe what happens to the candy in the water. If it forms a soft, pliable ball that you can easily mold with your fingers, it has reached the soft ball stage and is ready. If it dissolves or remains liquid, continue to boil for another minute or two, then test again.
-
Once the mixture has reached the soft ball stage, immediately remove the pot from the heat. Do not overcook, as this will result in dry, crumbly fudge.
-
Quickly add the remaining ingredients in the following order: marshmallow cream, peanut butter, vanilla extract, and chopped walnuts (if using). The order is important for even distribution.
-
Work fast! Using the wooden spoon, stir vigorously until all ingredients are fully incorporated and the mixture is smooth and homogenous. Do not overmix, or your fudge can become grainy.
-
Immediately pour the fudge into the prepared 9×12 inch cake pan.
-
If necessary, use a spatula to gently spread the fudge evenly in the pan.
-
Let the fudge cool completely at room temperature. This usually takes several hours. Avoid the temptation to refrigerate it, as this can affect the texture.
-
Once the fudge is completely cooled and firm, cut it into squares. A warm knife can make this process easier.
Expert Tips & Tricks
- The Soft Ball Stage is Key: Mastering the soft ball stage is paramount for perfect fudge. Invest in a candy thermometer for more accurate temperature readings. The soft ball stage corresponds to a temperature of 235-240°F (118-121°C).
- Preventing Graininess: Avoid stirring the mixture too much after adding the peanut butter and marshmallow cream. Overmixing can cause sugar crystals to form, resulting in grainy fudge.
- Perfectly Smooth Fudge: If you prefer a super-smooth fudge, use creamy peanut butter instead of chunky. You can also use an immersion blender very briefly after adding the peanut butter and marshmallow cream to ensure a perfectly smooth consistency.
- Easy Cutting: For clean cuts, chill the fudge slightly in the refrigerator (about 30 minutes) before cutting. Use a warm, sharp knife.
- Flavor Boost: Toast the walnuts before adding them to the fudge for an extra nutty flavor.
- Salted Peanut Butter: If you use salted peanut butter instead of unsalted, you may want to reduce the amount of salt in the recipe slightly.
Serving & Storage Suggestions
Serve Grandma Evelyn’s Peanut Butter Fudge at room temperature, cut into squares. It’s a wonderful addition to holiday dessert platters, potlucks, or as a sweet treat any time of year.
For storage, wrap the fudge tightly in plastic wrap, then in foil, or place it in an airtight container. It can be stored at room temperature for up to a week, in the refrigerator for up to two weeks, or in the freezer for up to one year. Freezing is a great way to preserve the fudge for longer periods.
To thaw frozen fudge, place it in the refrigerator overnight. Bring it to room temperature before serving.
Nutritional Information
| Nutrient | Amount per Serving | % Daily Value |
|---|---|---|
| Calories | 342.5 kcal | N/A |
| Calories from Fat | N/A | N/A |
| Total Fat | 14.3 g | 21% |
| Saturated Fat | 5.1 g | 25% |
| Cholesterol | 15.2 mg | 5% |
| Sodium | 144.2 mg | 6% |
| Total Carbohydrate | 50.6 g | 16% |
| Dietary Fiber | 1.1 g | 4% |
| Sugars | 42.8 g | N/A |
| Protein | 6 g | 11% |
Note: Nutritional information is an estimate and may vary based on specific ingredients and portion sizes.
Variations & Substitutions
- Chocolate Peanut Butter Fudge: Add 1/2 cup of cocoa powder to the mixture along with the sugar for a chocolatey twist.
- Maple Peanut Butter Fudge: Substitute 1/2 cup of the granulated sugar with maple syrup for a rich, autumnal flavor.
- Peanut-Free Fudge: If allergies are a concern, try using sunflower seed butter (sunbutter) as a substitute for peanut butter. The flavor will be different, but the texture will be similar.
- Vegan Peanut Butter Fudge: This is challenging, given the condensed milk. You can try using sweetened condensed coconut milk, but the results may vary. Look for recipes specifically formulated for vegan peanut butter fudge.
- Different Nut Combinations: Experiment with different nuts, such as pecans, almonds, or macadamia nuts. You can also use a combination of nuts.
- Swirl in some caramel: After pouring into the pan, drizzle melted caramel over the top and swirl with a toothpick.
FAQs (Frequently Asked Questions)
Q: Why is it important to use sweetened condensed milk and not evaporated milk?
A: Sweetened condensed milk contains a high sugar content, which is crucial for the fudge to set properly and achieve its signature creamy texture. Evaporated milk lacks the necessary sugar.
Q: How do I know when the fudge has reached the “soft ball” stage without a candy thermometer?
A: The cold water test is the best way to determine the soft ball stage. When a small amount of the boiling mixture is dropped into cold water, it should form a soft, pliable ball that you can easily mold with your fingers.
Q: My fudge turned out grainy. What did I do wrong?
A: Grainy fudge is usually caused by overmixing or allowing sugar crystals to form. Avoid stirring the mixture too much after adding the peanut butter and marshmallow cream. Also, ensure all the sugar is fully dissolved during the boiling process.
Q: Can I use natural peanut butter for this recipe?
A: While you can, the results may vary. Natural peanut butter often contains more oil, which can affect the fudge’s texture. If using natural peanut butter, stir it very well before adding it to the recipe to ensure the oil is fully incorporated.
Q: How long does the fudge take to cool completely?
A: Cooling time can vary depending on the ambient temperature, but it usually takes several hours. It’s best to let it cool completely at room temperature before cutting it. Avoid refrigerating it, as this can affect the texture.
Final Thoughts
Grandma Evelyn’s Peanut Butter Fudge is more than just a recipe; it’s a connection to family, tradition, and the simple joys of life. I encourage you to try this recipe and experience the magic for yourself. Share it with loved ones, create your own memories, and perhaps even pass it down to future generations. This fudge is guaranteed to bring smiles and warm hearts, one delicious square at a time. Let me know how yours turns out and feel free to share your own variations!