
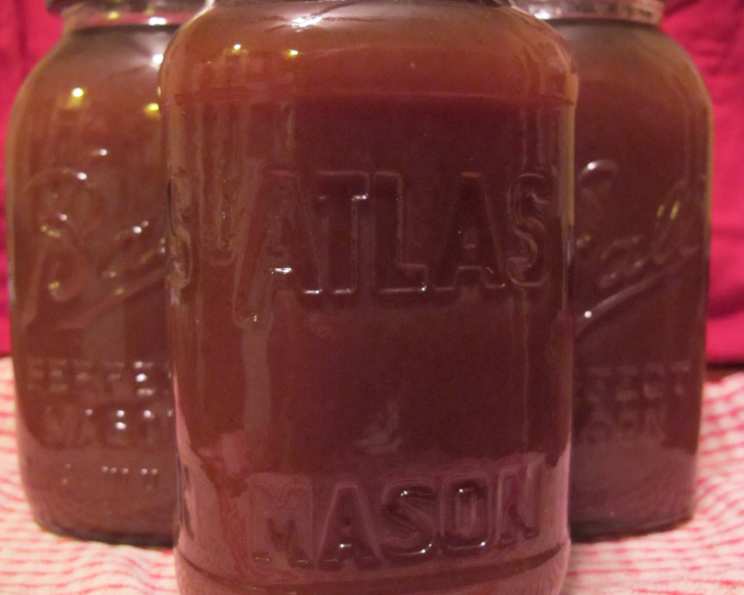
Grandma Horner’s Dutch Apple Butter: A Taste of Autumn’s Embrace
The scent of cinnamon and spice, mingled with the sweet-tart aroma of cooked apples, always transports me back to my grandmother’s cozy kitchen. I can almost see her now, standing over a bubbling pot, her brow furrowed in concentration as she stirred and stirred, transforming a mountain of apples into the most exquisite apple butter I’ve ever tasted. It wasn’t just a condiment; it was a spoonful of love, a jarful of memories, and a testament to the simple pleasures of home cooking. This is her recipe, perfected over decades and shared with love – a recipe that deserves to be cherished and passed down through generations.
Recipe Overview
- Prep Time: 30 minutes
- Cook Time: 2 hours
- Total Time: 2 hours 30 minutes
- Yields: 3-4 quart jars or 7-8 pint jars
- Serves: 60
- Dietary Type: Vegetarian, Gluten-Free
Ingredients
- 4 quarts baking apples (sliced with skins on, cored)
- 1 quart water
- 1 quart cider
- 2 lbs brown sugar
- 1 teaspoon cinnamon
- 1 teaspoon allspice
- 1 teaspoon ground cloves
Equipment Needed
- Large pot
- Apple slicer (optional)
- Food mill
- Canning jars and equipment (if canning)
- Wooden spoon or heat-resistant spatula
Instructions
-
Begin by thoroughly washing the apples. This is crucial, even if you plan to peel them later, as some of the apple flavor resides in the skin.
-
Use an apple slicer to slice the apples into uniform pieces. This ensures even cooking. Discard the cores. If you don’t have an apple slicer, simply quarter the apples and remove the cores with a knife. Leave the skins on.
-
In a large pot, combine the sliced apples and water. Bring the mixture to a boil over high heat.
-
Once boiling, reduce the heat to medium-low and simmer the apples until they are soft and easily pierced with a fork, approximately 15 minutes. Stir occasionally to prevent sticking.
-
Drain the apples in a colander, discarding the water.
-
Now comes the secret to a smooth apple butter: using a food mill. Run the cooked apples through a food mill. This efficiently removes the skins and creates a smooth, even pulp. This step is essential for achieving the desired texture. If you don’t have a food mill, you can use a blender or food processor, but be careful not to over-process, as this can make the apple butter gummy.
-
Return the apple pulp to the large pot.
-
Add the cider to the pot and bring the mixture to a boil over medium-high heat.
-
Stir in the brown sugar, ensuring it is fully dissolved.
-
Reduce the heat to simmer. It is crucial to stir frequently in a figure 8 motion to prevent the apple butter from burning on the bottom of the pot. This step requires patience, as it takes time for the mixture to reduce and thicken.
-
As the apple butter reduces and thickens, continue to stir diligently. The consistency will change gradually, becoming richer and more concentrated. This process could take approximately one to two hours.
-
When the apple butter has reached your desired spreading consistency, usually when a spoonful placed on a cold plate sets up slightly, add the cinnamon, allspice, and ground cloves.
-
Stir the spices in thoroughly to ensure they are evenly distributed.
-
Continue to simmer for another 5-10 minutes, allowing the flavors to meld together.
-
If you plan to can the apple butter, follow standard canning procedures to ensure proper preservation. If not canning, allow the apple butter to cool slightly before transferring it to sterilized jars.
-
When jarring, leave approximately 1 inch of headspace to prevent the apple butter from darkening at the top during storage.
-
Process jars in a boiling water bath for the appropriate time, based on your altitude and jar size.
-
Let the jars cool completely. You should hear a “pop” sound, indicating that the jars have sealed correctly.
-
The recipe yields approximately 3-4 quart jars or 7-8 pint jars.
-
Enjoy your homemade apple butter on bread, toast, muffins, or even on cottage cheese for a delightful sweet and savory treat!
Expert Tips & Tricks
- For the best flavor, use a blend of different baking apple varieties. This adds complexity and depth to the apple butter. Avoid using eating apples, as some can become grainy when cooked down.
- Don’t be afraid to experiment with the spices. A pinch of nutmeg or ginger can add a unique twist.
- If you don’t have a food mill, you can use an immersion blender to puree the cooked apples directly in the pot. However, be extremely careful as the hot apple mixture can splatter.
- For a smoother texture, peel the apples before cooking. However, leaving the skins on adds fiber and nutrients.
- To check for doneness, place a spoonful of apple butter on a chilled plate. If it doesn’t run and holds its shape, it’s ready.
- If the apple butter becomes too thick, add a little more cider to thin it out.
- If you don’t want to can the apple butter, you can store it in the refrigerator for up to two weeks or freeze it for longer storage.
Serving & Storage Suggestions
Grandma Horner’s Dutch Apple Butter is incredibly versatile. It’s delightful spread on warm toast, biscuits, or muffins for breakfast. It also pairs beautifully with cheese and crackers for an elegant appetizer. Dollop it on top of pancakes or waffles for a special weekend treat. You can also use it as a filling for pies or tarts.
For storage, if you have canned the apple butter properly, it can be stored in a cool, dark place for up to a year. Once opened, refrigerate the jar. Uncanned apple butter should be stored in an airtight container in the refrigerator and will last for about two weeks. You can also freeze apple butter in freezer-safe containers for longer storage; it will keep well for several months.
Nutritional Information
Note: Nutritional information is an estimate and may vary based on specific ingredients used.
| Nutrient | Amount per Serving | % Daily Value |
|---|---|---|
| Calories | 75 kcal | 4% |
| Total Fat | 0.1 g | 0% |
| Saturated Fat | 0 g | 0% |
| Cholesterol | 0 mg | 0% |
| Sodium | 4.8 mg | 0% |
| Total Carbohydrate | 19.5 g | 7% |
| Dietary Fiber | 0.8 g | 3% |
| Sugars | 18.1 g | 36% |
| Protein | 0.1 g | 0% |
Variations & Substitutions
- Spice it up: Add a pinch of cayenne pepper for a subtle kick.
- Maple Apple Butter: Substitute half of the brown sugar with maple syrup for a richer, more complex flavor.
- Apple Pear Butter: Use a combination of apples and pears for a unique twist.
- Cranberry Apple Butter: Add a cup of fresh or frozen cranberries during the simmering process for a tart and festive variation.
- Sugar-Free Apple Butter: Use a sugar substitute like erythritol or stevia in place of brown sugar, adjusting to your preferred level of sweetness.
FAQs (Frequently Asked Questions)
Q: Do I have to use a food mill?
A: While a food mill provides the smoothest texture, you can use a blender or food processor. Just be careful not to over-process, which can make the apple butter gummy.
Q: Can I use a slow cooker or Instant Pot?
A: Yes, you can adapt this recipe for a slow cooker or Instant Pot. Reduce the water and cider slightly, and cook on low for 6-8 hours in a slow cooker or on high pressure for 15 minutes in an Instant Pot, followed by a natural pressure release.
Q: How do I know when the apple butter is thick enough?
A: The best way to test for doneness is to place a spoonful of apple butter on a chilled plate. If it doesn’t run and holds its shape, it’s ready.
Q: Can I freeze apple butter?
A: Yes, apple butter freezes well. Store it in freezer-safe containers, leaving some headspace for expansion.
Q: Why did my apple butter turn brown on top during storage?
A: Leaving too much air in the jar (insufficient headspace) can cause the apple butter to darken on top. Ensure you leave only about 1 inch of headspace when canning.
Final Thoughts
Grandma Horner’s Dutch Apple Butter is more than just a recipe; it’s a legacy of love and a taste of autumn in a jar. Whether you’re a seasoned canner or a kitchen novice, I encourage you to give this recipe a try. The process is simple, the ingredients are readily available, and the result is a delicious and heartwarming treat that you and your loved ones will cherish. Share your creations and feedback, and perhaps even pair it with a slice of warm, crusty bread and a cup of hot cider for the ultimate autumn experience. Happy cooking!