
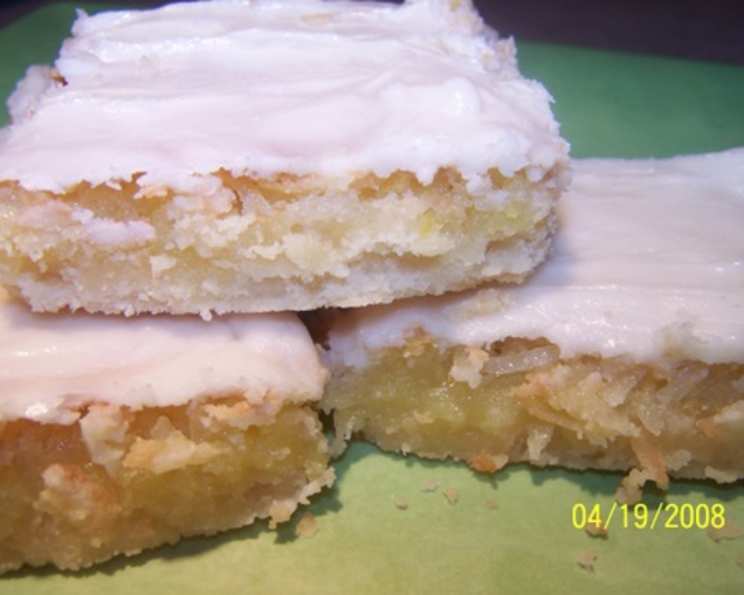
Grandma Ila Nelson’s Lemon Dream Bars
There’s a scent that instantly transports me back to childhood summers: the bright, zesty aroma of lemon. I remember countless afternoons spent in my grandmother’s sun-drenched kitchen, perched on a stool, watching her work her magic. While she was famous for her pies, it was Grandma Ila’s Lemon Dream Bars that truly stole my heart. The buttery, crumbly crust, the tangy lemon filling bursting with coconut, and that melt-in-your-mouth frosting – it was pure sunshine in every bite. And now, I’m excited to share this cherished family recipe with you.
Recipe Overview
- Prep Time: 20 minutes
- Cook Time: 35 minutes
- Total Time: 55 minutes
- Yields: 24-36 bars
- Dietary Type: Not Gluten-Free
Ingredients
For the Crust:
- 2 cups all-purpose flour
- 1 cup (2 sticks) unsalted butter, softened
- 1/2 cup powdered sugar
For the Filling:
- 4 large eggs
- 6 tablespoons lemon juice (fresh or bottled)
- 1 lemon, zest and juice of
- 6 tablespoons all-purpose flour
- 2 cups granulated sugar
- 1 teaspoon baking powder
- 2 cups finely shredded coconut
For the Lemon Frosting:
- 1/2 cup (1 stick) unsalted butter, softened
- 2 tablespoons lemon juice (fresh or bottled)
- 1 teaspoon vanilla extract
- 3 cups powdered sugar (or more, as needed, for desired consistency)
Equipment Needed
- 10x15x1 inch baking pan
- Medium-sized mixing bowl
- Pastry blender or two forks
- Electric mixer
- Wire rack
Instructions
-
Prepare the Crust: In a medium-sized bowl, stir together 2 cups flour and 1/2 cup powdered sugar until well combined.
-
Cut in the Butter: Using a pastry blender or the tines of two forks, cut in 1 cup (2 sticks) softened butter into the flour mixture. Continue to cut in the butter until the mixture resembles coarse crumbs.
-
Press into Pan: Grease a 10x15x1 inch baking pan thoroughly. Press the crumb mixture evenly into the prepared pan.
-
Bake the Crust: Bake the crust in a preheated 350-degree Fahrenheit oven for 10-15 minutes, or until lightly golden. Keep a close eye on it to prevent burning.
-
Prepare the Filling: While the crust is baking, prepare the filling. In a large mixing bowl, beat together 4 eggs, 6 tablespoons lemon juice, zest of 1 lemon, juice of 1 lemon, 6 tablespoons flour, 2 cups granulated sugar, 1 teaspoon baking powder, and 2 cups shredded coconut.
-
Mix the Filling: Mix all filling ingredients well until fully incorporated. There should be no lumps, and the mixture should be smooth.
-
Pour Filling over Crust: Once the crust is lightly golden and has finished its initial bake, carefully pour the filling mixture evenly over the hot crust.
-
Bake the Bars: Return the pan to the oven and bake uncovered for 25 minutes, or until the filling is golden brown and set. To check for doneness, insert a toothpick into the center; it should come out clean or with moist crumbs attached.
-
Cool Completely: Remove the pan from the oven and cool completely on a wire rack. This is crucial for the bars to set properly before frosting. Patience is key!
-
Prepare the Frosting: While the bars are cooling, prepare the frosting. In a mixing bowl, beat together 1/2 cup softened butter, 2 tablespoons lemon juice, 1 teaspoon vanilla, and 3 cups powdered sugar.
-
Adjust Consistency: If the frosting is too thick, add a little more lemon juice (a teaspoon at a time) until you reach a spreading consistency. If it’s too thin, add more powdered sugar (a tablespoon at a time).
-
Frost the Bars: Once the bars are completely cool, spread the lemon frosting evenly over the filling.
-
Cut and Serve: Cut the bars into squares and serve. These bars are delicious at room temperature or slightly chilled.
-
Store: Store the bars covered at room temperature or in the refrigerator to maintain freshness.
Expert Tips & Tricks
- Softened Butter is Key: Ensure the butter is properly softened, but not melted, for both the crust and the frosting. This will make mixing easier and result in the correct texture.
- Zest Matters: Don’t skip the lemon zest! It adds an extra layer of bright, citrusy flavor to the filling. Use a microplane grater for the finest zest.
- Toasting the Coconut: For an even more intense coconut flavor, lightly toast the shredded coconut in a dry skillet over medium heat until golden brown, stirring frequently. Let it cool completely before adding it to the filling.
- Prevent Soggy Crust: Baking the crust separately before adding the filling helps to prevent a soggy bottom. Make sure to let the crust cool slightly before pouring the filling on top.
- Even Baking: To ensure even baking, rotate the pan halfway through the baking time.
Serving & Storage Suggestions
Grandma Ila’s Lemon Dream Bars are perfect for any occasion! Serve them as a delightful afternoon treat, a potluck dessert, or a sweet ending to a special meal. They pair beautifully with a cup of tea or coffee, or even a scoop of vanilla ice cream.
Store leftover bars in an airtight container at room temperature for up to 3 days or in the refrigerator for up to 5 days. For longer storage, you can freeze the bars (unfrosted) for up to 2 months. Thaw them in the refrigerator overnight and frost before serving.
Nutritional Information
Note: Nutritional information is an estimate and can vary based on specific ingredients and serving sizes.
| Nutrient | Amount per Serving | % Daily Value |
|---|---|---|
| Calories | 340 kcal | 17% |
| Total Fat | 17 g | 26% |
| Saturated Fat | 12 g | 58% |
| Cholesterol | 66 mg | 22% |
| Sodium | 112 mg | 5% |
| Total Carbohydrate | 46 g | 15% |
| Dietary Fiber | 2 g | 6% |
| Sugars | 35 g | N/A |
| Protein | 3 g | 6% |
Variations & Substitutions
- Gluten-Free: To make these bars gluten-free, substitute the all-purpose flour in the crust and filling with a gluten-free all-purpose flour blend. Be sure to check that your baking powder is also gluten-free.
- Dairy-Free: For a dairy-free version, use a plant-based butter alternative in the crust and frosting. Coconut oil can also be used in the crust.
- Nut-Free: Ensure that the coconut flakes are processed in a nut-free facility.
- Extra Lemon: For a more intense lemon flavor, add a teaspoon of lemon extract to the filling or frosting.
- Citrus Medley: Experiment with other citrus fruits! Try using a combination of lemon, lime, and orange zest for a unique twist.
FAQs (Frequently Asked Questions)
Q: Can I use bottled lemon juice instead of fresh?
A: Yes, bottled lemon juice can be used, but fresh lemon juice will give a brighter and more vibrant flavor. If using bottled, be sure to choose a high-quality brand.
Q: How do I know when the bars are done baking?
A: The bars are done when the filling is golden brown and set. A toothpick inserted into the center should come out clean or with moist crumbs attached.
Q: Can I make the crust ahead of time?
A: Yes, you can make the crust ahead of time and store it in the refrigerator for up to 2 days. You can also freeze the crust for up to a month.
Q: Why did my crust turn out hard?
A: Overbaking the crust or using too much flour can result in a hard crust. Be sure to measure the flour accurately and bake the crust for the recommended time.
Q: Can I freeze the frosted bars?
A: It’s best to freeze the bars before frosting them, as the frosting may not hold up well in the freezer. Thaw the bars in the refrigerator overnight and frost before serving.
Final Thoughts
Grandma Ila’s Lemon Dream Bars are more than just a dessert; they’re a taste of sunshine and a reminder of cherished family memories. I encourage you to try this recipe and experience the joy of creating something truly special. Whether you’re baking for a crowd or simply treating yourself, these bars are guaranteed to brighten your day. Don’t hesitate to share your feedback and any creative twists you add to the recipe – I’d love to hear about your experience! Pair these bars with a refreshing glass of iced tea for the perfect summer indulgence. Happy baking!