
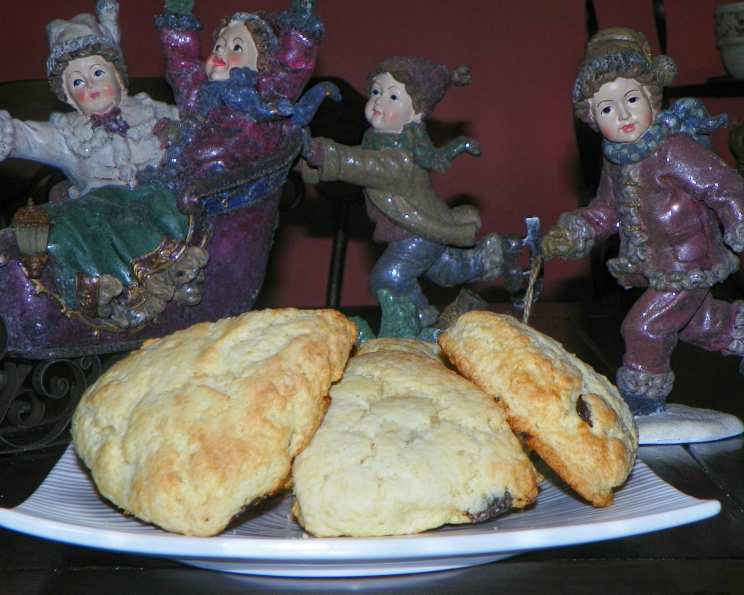
Grandma Johnson’s Scones: A Taste of Home
The scent of baking scones always transports me back to Grandma Johnson’s sun-drenched kitchen. I remember perched on a rickety stool, mesmerized as she effortlessly transformed simple ingredients into golden-brown triangles of pure comfort. The warmth of the oven, the sweet aroma of raisins, and Grandma’s gentle humming created a symphony of sensory delight that I carry with me to this day. Each bite of these scones is a warm hug, a reminder of simpler times and the enduring power of family recipes.
Recipe Overview
- Prep Time: 20 minutes
- Cook Time: 12-15 minutes
- Total Time: 32-35 minutes
- Servings: 12
- Dietary Type: Not Gluten-Free
Ingredients
- 1 cup sour cream
- 1 teaspoon baking soda
- 4 cups all-purpose flour
- 1 cup white sugar
- 2 teaspoons baking powder
- 1/4 teaspoon cream of tartar
- 1 teaspoon salt
- 1 cup (2 sticks) butter, cold and cubed
- 1 egg
- 1 cup raisins, pre-soaked to plump
Equipment Needed
- Large mixing bowl
- Small mixing bowl
- Measuring cups and spoons
- Baking sheet
- Lightly floured surface
- Rolling pin or hands for patting
- Knife or pastry cutter
Instructions
- In a small bowl, blend the sour cream and baking soda together. Set aside. This mixture will bubble slightly.
- Preheat your oven to 350 degrees F (175 degrees C). Make sure your oven rack is in the center position.
- Lightly grease a large baking sheet. You can also line it with parchment paper for easier cleanup.
- In a large bowl, mix the flour, sugar, baking powder, cream of tartar, and salt together thoroughly. Ensure there are no clumps of baking powder.
- Cut in the cold, cubed butter using a pastry blender or your fingertips. Work quickly to keep the butter cold. The mixture should resemble coarse crumbs with some pea-sized pieces of butter remaining. These small pieces of butter will create pockets of steam in the oven, resulting in a flakier scone.
- Stir the sour cream mixture and the egg into the flour mixture until just moistened. Be careful not to overmix. Overmixing develops the gluten in the flour, leading to tough scones.
- Mix in the pre-soaked raisins. Distribute them evenly throughout the dough. Soaking the raisins prevents them from drying out during baking.
- Turn the dough out onto a lightly floured surface. Knead it briefly, just until it comes together. Again, avoid overworking the dough.
- Roll or pat the dough into a 3/4-inch thick round. Use a rolling pin for a more uniform thickness, or gently pat it with your hands for a rustic look.
- Cut the round into 12 wedges. A pizza cutter works well for this.
- Place the wedges 2 inches apart on the prepared baking sheet. This spacing allows for even baking and prevents the scones from sticking together.
- Bake for 12 to 15 minutes in the preheated oven, or until golden brown on the bottom. Check for doneness by lifting one of the scones. The bottom should be a rich golden brown.
- Remove from the oven and let cool slightly on the baking sheet before transferring to a wire rack to cool completely.
Expert Tips & Tricks
- Keep the butter cold: This is crucial for creating flaky scones. You can even chill the flour mixture and the bowl beforehand for extra insurance.
- Don’t overmix the dough: Overmixing develops the gluten, resulting in tough scones. Mix until just combined.
- Pre-soak the raisins: This prevents them from drying out and becoming hard during baking. Soak them in warm water or rum for added flavor.
- For extra browning: Brush the tops of the scones with a little milk or cream before baking. You can also sprinkle them with sugar for a sweet, crunchy top.
- Make ahead: You can prepare the dough ahead of time, wrap it tightly in plastic wrap, and store it in the refrigerator for up to 24 hours. Bake as directed when ready to serve.
- If your scones are dry: You may have overbaked them. Reduce the baking time slightly for future batches. Adding a touch more sour cream to the dough can also help.
Serving & Storage Suggestions
Serve Grandma Johnson’s scones warm with a dollop of clotted cream and your favorite jam. They’re also delicious with butter or honey. These scones are best enjoyed fresh, but leftovers can be stored in an airtight container at room temperature for up to 2 days. For longer storage, freeze them in a freezer-safe bag for up to 2 months. To reheat, thaw overnight in the refrigerator and then warm in a 350°F (175°C) oven for a few minutes.
Nutritional Information
| Nutrient | Amount per Serving | % Daily Value |
|---|---|---|
| Calories | 431.4 kcal | N/A |
| Calories from Fat | 179 g | 42% |
| Total Fat | 20 g | 30% |
| Saturated Fat | 12.1 g | 60% |
| Cholesterol | 66.1 mg | 22% |
| Sodium | 517.9 mg | 21% |
| Total Carbohydrate | 58.8 g | 19% |
| Dietary Fiber | 1.6 g | 6% |
| Sugars | 24.6 g | N/A |
| Protein | 5.8 g | 11% |
Note: Nutritional information is an estimate and may vary based on specific ingredients and portion sizes.
Variations & Substitutions
- Fruit Variations: Substitute the raisins with other dried fruits like cranberries, chopped apricots, or blueberries.
- Citrus Zest: Add the zest of an orange or lemon to the dough for a bright, citrusy flavor.
- Spice it Up: Incorporate a pinch of cinnamon, nutmeg, or cardamom for a warm, comforting twist.
- Savory Scones: Omit the sugar and raisins. Add cheddar cheese, herbs (such as rosemary or thyme), and a pinch of black pepper for a savory version.
- Chocolate Chip Scones: Substitute some of the raisins for chocolate chips or chunks.
- Gluten-Free Option: While this recipe uses all-purpose flour, you can experiment with a gluten-free flour blend. Be aware that the texture may be slightly different. You may need to adjust the amount of liquid.
FAQs (Frequently Asked Questions)
Q: Why do I need to soak the raisins?
A: Soaking the raisins plumps them up, preventing them from becoming hard and dry during baking. It also adds moisture to the scone.
Q: Can I use salted butter instead of unsalted?
A: Yes, you can. Just reduce the amount of salt you add to the dry ingredients by half a teaspoon.
Q: My scones are flat and dense. What did I do wrong?
A: This is likely due to overmixing the dough or using warm butter. Be sure to keep the butter cold and mix the dough until just combined.
Q: How can I tell if the scones are done?
A: The scones are done when they are golden brown on the bottom and lightly golden on top. You can also insert a toothpick into the center; it should come out clean.
Q: Can I freeze the baked scones?
A: Yes, you can. Let them cool completely, then wrap them individually in plastic wrap and place them in a freezer-safe bag. Reheat in a 350°F (175°C) oven until warmed through.
Final Thoughts
Grandma Johnson’s Scones are more than just a recipe; they’re a taste of nostalgia, a connection to family, and a reminder that simple ingredients can create extraordinary moments. I urge you to give this recipe a try and experience the warmth and comfort that these scones bring. Whether you serve them for breakfast, brunch, or afternoon tea, they’re sure to be a hit. And don’t hesitate to add your own personal touches to make them your own family tradition. Share your creations and feedback – I’d love to hear about your baking adventures!