
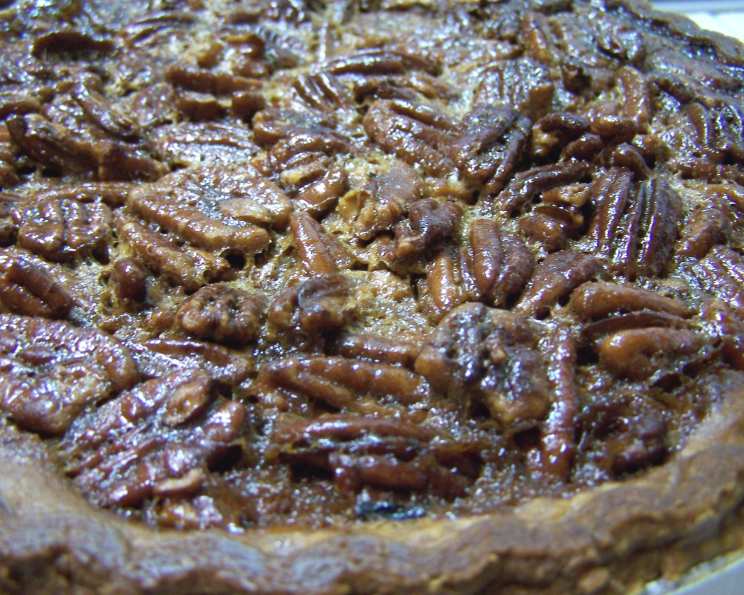
Grandma Weeks’ Unforgettable Pecan Pie
The aroma of pecan pie always takes me back to crisp autumn afternoons in my childhood home. My grandmother, Nana Rose, wasn’t known for her baking prowess – she’d readily admit her pies were more “rustic” than refined – but the love she poured into them was undeniable. One Thanksgiving, determined to elevate our dessert game, I stumbled upon a recipe passed down from a friend’s family, a cherished secret known as “Grandma Weeks’ Pecan Pie.” That year, a new tradition was born, one that perfectly blended Nana Rose’s warmth with an unexpectedly decadent filling.
Recipe Overview
- Prep Time: 15 minutes
- Cook Time: 35-45 minutes
- Total Time: 50-60 minutes
- Servings: 10
- Yield: 1 pie
- Dietary Type: Vegetarian (can be adapted for vegan with substitutions – see Variations section)
Ingredients
- 1/3 cup butter, melted
- 1 cup light Karo syrup
- 1 cup brown sugar
- 3 eggs, lightly beaten
- 1 1/2 cups pecans, broken into small pieces
- 1 teaspoon vanilla extract
- 1 dash salt
- 1 pie crust (store-bought or homemade)
Equipment Needed
- Medium mixing bowl
- Whisk
- 9-inch pie dish
- Oven
- Toothpick
- Pie shield or foil (optional)
Instructions
-
Preheat your oven to 350 degrees Fahrenheit (175 degrees Celsius).
-
In a medium mixing bowl, combine the melted butter, Karo syrup, and brown sugar. Whisk thoroughly until well combined and smooth. This mixture forms the luscious, gooey base of your pie, so ensure the ingredients are properly incorporated.
-
Add the lightly beaten eggs to the bowl. Gently whisk to incorporate them into the sugar mixture. Be careful not to overmix, as this can introduce air and affect the pie’s texture.
-
Now, add the broken pecans, vanilla extract, and salt to the bowl. Stir until the pecans are evenly distributed throughout the mixture. The pecans are the star of the show, so don’t be shy with them!
-
Pour the pecan mixture into the pie crust. Ensure the filling is evenly spread to ensure consistent baking.
-
Bake in the preheated oven for 35-45 minutes. To ensure the crust edges do not burn, you can shield them with a pie shield or strips of foil during baking (see Caryn’s note below).
-
To test for doneness, insert a toothpick into the center of the pie. It should come out with only a few moist crumbs clinging to it. Remember, the pie will continue to set as it cools, so it’s okay if the center is slightly jiggly.
-
Remove the pie from the oven and let it cool completely on a wire rack before slicing and serving. This allows the filling to fully set and prevents a messy cut.
Caryn’s Note: The original recipe is concise, but I’ve found a couple of tricks help. I like to baste the edges of the pie crust with a tiny bit of egg white and cover it with a pie shield (foil works too) until the last 15 minutes of cooking to prevent burning. Also, baking times can vary. In my oven, it took almost an hour for a toothpick to come out mostly clean. As the pie cools, it will set up beautifully, so don’t worry if the center jiggles a little when you take it out of the oven.
Expert Tips & Tricks
- Toast Your Pecans: For an even richer, nuttier flavor, lightly toast the pecans in a dry skillet over medium heat for 5-7 minutes before adding them to the filling. Keep a close eye on them to prevent burning.
- Homemade Crust is Key: While store-bought crusts are convenient, a homemade pie crust elevates this pie to another level. Use your favorite recipe or search for a classic butter crust recipe online.
- Blind Bake Your Crust: For a perfectly crisp bottom crust, consider blind baking it for 10-15 minutes before adding the filling. Line the crust with parchment paper, fill it with pie weights or dried beans, and bake until lightly golden.
- Prevent a Soggy Bottom: To further prevent a soggy bottom crust, brush the crust with melted chocolate before adding the filling. The chocolate creates a barrier that helps keep the crust crisp.
- Adjust Sweetness: If you prefer a less sweet pie, reduce the amount of brown sugar by a tablespoon or two.
- Add a Touch of Bourbon: For a grown-up twist, add a tablespoon of bourbon to the filling. It adds a warm, complex flavor that complements the pecans beautifully.
Serving & Storage Suggestions
Grandma Weeks’ Pecan Pie is best served at room temperature, allowing the flavors to fully develop. A dollop of whipped cream or a scoop of vanilla ice cream makes the perfect accompaniment.
Storage: Leftover pecan pie can be stored at room temperature for up to 2 days, or in the refrigerator for up to 5 days. Cover the pie loosely with plastic wrap to prevent it from drying out.
Reheating: If you prefer a warm slice of pie, gently reheat it in a 300°F (150°C) oven for 10-15 minutes, or microwave individual slices for a few seconds.
Freezing: Pecan pie can be frozen for up to 2 months. Wrap the pie tightly in plastic wrap and then in foil to prevent freezer burn. Thaw the pie in the refrigerator overnight before serving.
Nutritional Information
(Estimates may vary based on specific ingredients and serving size)
| Nutrient | Amount per Serving | % Daily Value |
|---|---|---|
| Calories | 460 kcal | 23% |
| Total Fat | 26g | 40% |
| Saturated Fat | 7g | 35% |
| Cholesterol | 80mg | 27% |
| Sodium | 205mg | 9% |
| Total Carbohydrate | 59g | 20% |
| Dietary Fiber | 2g | 9% |
| Sugars | 32g | N/A |
| Protein | 5g | 10% |
Variations & Substitutions
- Vegan Pecan Pie: Substitute the butter with a vegan butter alternative, the eggs with flax eggs (3 tablespoons water mixed with 3 tablespoons ground flaxseed), and ensure your pie crust is vegan-friendly.
- Gluten-Free Pecan Pie: Use a gluten-free pie crust or make your own using a blend of gluten-free flours.
- Chocolate Pecan Pie: Add 1/2 cup of semi-sweet chocolate chips to the filling for a decadent chocolatey twist.
- Maple Pecan Pie: Replace the Karo syrup with maple syrup for a richer, more complex flavor.
- Spiced Pecan Pie: Add 1/2 teaspoon of cinnamon, 1/4 teaspoon of nutmeg, and a pinch of cloves to the filling for a warm, spiced flavor.
FAQs (Frequently Asked Questions)
Q: Can I use a different type of nut besides pecans?
A: While this recipe is specifically for pecan pie, you can experiment with other nuts like walnuts or almonds. Keep in mind that the flavor and texture will be slightly different.
Q: My pie crust always burns. What can I do?
A: As mentioned in Caryn’s note, use a pie shield or strips of foil to protect the edges of the crust during baking. Also, make sure your oven temperature is accurate.
Q: How do I know when the pie is done?
A: The toothpick test is a good indicator, but the pie should also be set around the edges and slightly jiggly in the center. Remember, it will continue to set as it cools.
Q: Can I make the pie ahead of time?
A: Absolutely! Pecan pie is a great make-ahead dessert. You can bake it a day or two in advance and store it at room temperature or in the refrigerator.
Q: The top of my pie is browning too quickly. What should I do?
A: Tent the pie loosely with foil to prevent further browning.
Final Thoughts
Grandma Weeks’ Pecan Pie isn’t just a dessert; it’s a testament to the power of shared recipes and cherished memories. It’s a simple pie, yes, but deeply satisfying, rich with nutty flavor and a comforting sweetness. So, preheat your oven, gather your ingredients, and bake a pie that’s sure to become a new favorite. Share it with loved ones, and maybe even start a new family tradition of your own. I encourage you to experiment with the variations, leave a review, and of course, enjoy every last crumb! This pecan pie pairs beautifully with a scoop of vanilla ice cream and a warm cup of coffee.