
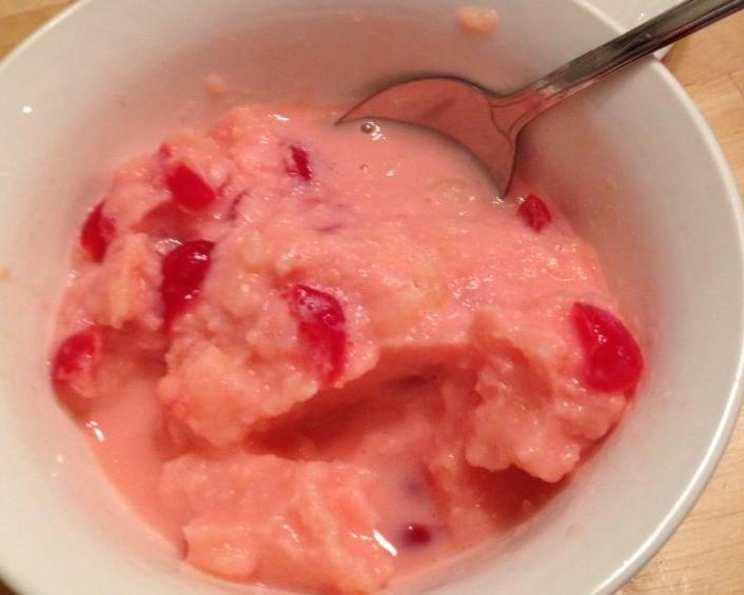
Grandmama Marshall’s Cherry Pineapple Ice Cream: A Taste of Nostalgia
My earliest memories of summer are inextricably linked to the whirring churn of an old-fashioned ice cream maker on Grandmama Marshall’s porch. The rhythmic sound, punctuated by the excited chatter of cousins and the sweet aroma of ripening fruit, meant one thing: Grandmama’s legendary Cherry Pineapple Ice Cream. Its pale pink hue and perfectly balanced sweetness were the taste of pure joy, a flavor that transcended simple dessert and became a symbol of family, love, and the simple pleasures of life. Every spoonful was a trip back in time, a reminder of simpler days filled with laughter, sunshine, and the unwavering love of a grandmother who knew how to make life just a little bit sweeter.
Recipe Overview
- Prep Time: 20 minutes
- Cook Time: 10-15 minutes
- Total Time: 40 minutes (plus freezing time)
- Servings: Varies; Makes approximately 4 quarts
- Yield: About 4 quarts
- Dietary Type: Not specified; contains dairy and eggs.
Ingredients
- 3 eggs
- 2 cups sugar
- 1 quart milk (whole or skim)
- 1 (10 ounce) jar maraschino cherries in juice, chopped
- 1 (20 ounce) can crushed pineapple in juice
- 1 (12 ounce) can evaporated milk
- Additional milk, as needed to fill churn
Equipment Needed
- Double boiler
- Spoon
- Ice cream maker (churn)
Instructions
-
In the top of a double boiler, whisk together the 3 eggs, 2 cups of sugar, and 1 quart of milk. It is crucial to use a double boiler to gently cook the mixture and prevent the eggs from curdling. If you don’t have one, you can create a makeshift double boiler by placing a heat-safe bowl over a saucepan of simmering water, ensuring the bottom of the bowl doesn’t touch the water.
-
Place the double boiler over simmering water (or use your makeshift setup). Cook the mixture, stirring constantly with a spoon, for a few minutes, or until it thickens enough to coat the back of the spoon. This step is crucial for creating a smooth and creamy ice cream base. The mixture should thicken to the consistency of a light custard. Be patient and continue stirring to ensure even heating and prevent scorching.
-
Remove the double boiler from the heat and let the mixture cool completely. Cooling the base is essential before adding the other ingredients; otherwise, the mixture could become too warm and affect the final texture of the ice cream. You can speed up the cooling process by placing the bowl in an ice bath, stirring occasionally.
-
Once the mixture is completely cool, gently stir in the 1 (10 ounce) jar of chopped maraschino cherries, including the juice, and the 1 (20 ounce) can of crushed pineapple, including the juice. The juice from both the cherries and pineapple adds sweetness and vibrant flavor to the ice cream. Make sure the cherries are well chopped to ensure an even distribution throughout the final product.
-
Stir in the 1 (12 ounce) can of evaporated milk. This adds richness and creaminess to the ice cream.
-
Pour the mixture into your ice cream churn. Add additional milk, as needed, to fill the churn to the manufacturer’s recommended level. Be careful not to overfill the churn, as the mixture will expand during the freezing process.
-
Freeze the ice cream according to the manufacturer’s instructions for your ice cream maker. The churning process is essential for incorporating air into the mixture and creating a light and fluffy texture. Most ice cream makers require a specific ratio of ice and salt to achieve the proper freezing temperature. Follow the instructions for your particular model.
Expert Tips & Tricks
- Egg Safety: Use pasteurized eggs or cook the custard base to 160°F (71°C) to ensure food safety, especially if serving to children, pregnant women, or individuals with compromised immune systems. A candy thermometer is useful for monitoring the temperature.
- Chill Time Matters: Ensure the custard base is completely chilled before churning. A warmer base will take longer to freeze and may result in a grainy texture. Overnight chilling is ideal.
- Salt Ratio: The correct ice-to-salt ratio in your ice cream maker is essential for proper freezing. Rock salt is ideal for this purpose.
- Taste as you go: Before freezing, give the mixture a taste. If it’s not sweet enough for your liking, you can add a little more sugar, but do so sparingly.
- Don’t Overchurn: Avoid overchurning the ice cream, as it can become dense and lose its creamy texture. Churn until it reaches a soft-serve consistency.
- Freezing for later: For a firmer ice cream, transfer the churned ice cream to an airtight container and freeze for an additional 2-3 hours before serving.
Serving & Storage Suggestions
Serve Grandmama Marshall’s Cherry Pineapple Ice Cream immediately after churning for a soft-serve consistency. For a firmer scoop, freeze for a couple of hours after churning. It’s delicious on its own or as a complement to warm pies, cakes, or fruit cobblers. Store leftovers in an airtight container in the freezer. Homemade ice cream is best consumed within 1-2 weeks for optimal flavor and texture. It tends to develop ice crystals over time. If the ice cream becomes too hard to scoop, let it sit at room temperature for a few minutes before serving.
Nutritional Information
Please note that these are estimated values and can vary based on specific ingredient brands and portion sizes.
| Nutrient | Amount per Serving (approximate) | % Daily Value (approximate) |
|---|---|---|
| Calories | 350 kcal | 18% |
| Total Fat | 12g | 15% |
| Saturated Fat | 7g | 35% |
| Cholesterol | 100mg | 33% |
| Sodium | 150mg | 7% |
| Total Carbohydrate | 55g | 20% |
| Dietary Fiber | 1g | 4% |
| Sugars | 45g | N/A |
| Protein | 7g | 14% |
Variations & Substitutions
- Dairy-Free: While this recipe traditionally uses dairy, you could experiment with using full-fat coconut milk instead of regular milk and evaporated milk. The flavor will be different, but it can still be delicious.
- Lower Sugar: Reduce the amount of sugar or use a sugar substitute, keeping in mind that this may affect the texture of the ice cream.
- Fresh Fruit: In the summer, try using fresh, ripe pineapple instead of canned. Be sure to chop it finely. Fresh cherries (pitted, of course!) can also be used, though the flavor will be different from the maraschino cherries.
- Nutty Twist: Add a handful of chopped nuts, such as almonds or pecans, to the ice cream mixture before freezing for added texture and flavor.
- Boozy Version: For an adult treat, add a tablespoon or two of cherry liqueur or pineapple rum to the cooled custard base.
FAQs (Frequently Asked Questions)
Q: Why do I need to use a double boiler?
A: Using a double boiler ensures gentle cooking, preventing the eggs from curdling and resulting in a smooth, creamy ice cream base.
Q: Can I use frozen pineapple instead of canned?
A: While canned pineapple is traditional for this recipe, you can use thawed, well-drained frozen pineapple.
Q: How long will homemade ice cream last in the freezer?
A: Homemade ice cream is best consumed within 1-2 weeks for optimal flavor and texture.
Q: My ice cream is icy. What did I do wrong?
A: Icy ice cream is usually caused by slow freezing or temperature fluctuations. Ensure your freezer is cold enough and store the ice cream in an airtight container.
Q: Can I make this recipe without an ice cream maker?
A: It’s difficult to achieve the same creamy texture without an ice cream maker, but you can try the “no-churn” method, which involves whipping heavy cream and folding it into the mixture before freezing.
Final Thoughts
Grandmama Marshall’s Cherry Pineapple Ice Cream is more than just a recipe; it’s a legacy of love, passed down through generations. I encourage you to try this recipe and create your own cherished memories. Feel free to experiment with variations and make it your own. Don’t hesitate to share your feedback and photos – I’d love to hear how it turns out! Consider pairing this ice cream with a slice of warm apple pie or a refreshing glass of lemonade for the ultimate summer treat. Enjoy!