
Grandma’s Apple Butter: A Taste of Autumn
The scent alone transports me back to childhood. I can almost feel the cool, crisp air of October, hear the rustling of leaves underfoot, and see my grandmother standing over her ancient crock pot, stirring a bubbling, fragrant mixture. The air in her kitchen, usually filled with the aroma of baking bread, would be overtaken by the warm, spicy sweetness of apples, slowly transforming into a velvety smooth, dark amber spread – her legendary apple butter. This isn’t just a recipe; it’s a time machine to simpler days and cherished memories.
Recipe Overview
- Prep Time: 20 minutes
- Cook Time: 9 hours
- Total Time: 9 hours 20 minutes
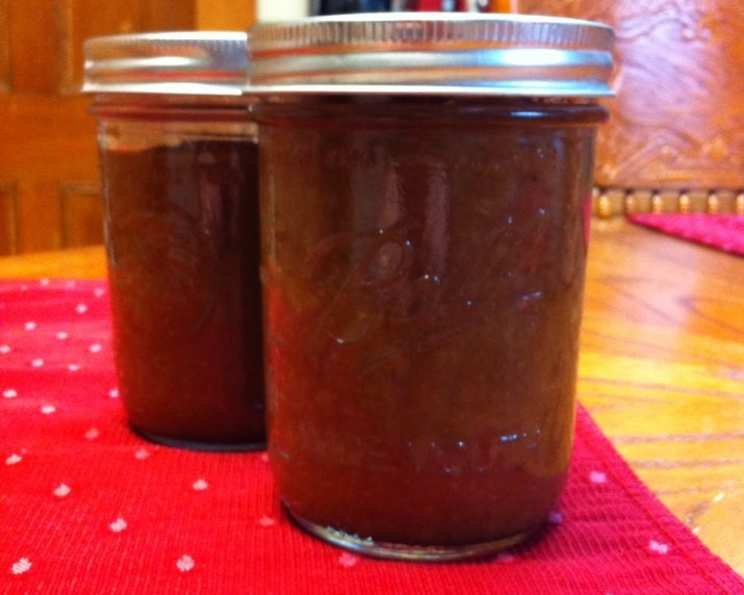
- Yields: Approximately 6 1/2 pint jars
- Dietary Type: Vegan (naturally)
Ingredients
- 10 cups apples (peeled, cored & chunked) – Use a variety of apples for the best flavor. I love a mix of Honeycrisp, Gala, and Fuji.
- 1 cup sugar – Granulated sugar works perfectly, but you could experiment with brown sugar for a deeper molasses flavor.
- 1 tablespoon cinnamon – Freshly ground cinnamon will have the strongest aroma!
- 1/2 teaspoon nutmeg – A little goes a long way. Freshly grated is ideal.
- 1/2 teaspoon allspice – Adds warmth and complexity.
- 1/2 – 3/4 teaspoon ground cloves – Adjust to your taste preference. Cloves can be quite potent.
Equipment Needed
- Crock pot (slow cooker)
- Measuring cups and spoons
- Knife and cutting board
- Peeler and apple corer
- Jars with lids and rings (for canning)
- Jar lifter (for canning – optional, but recommended)
- Large pot (for hot water bath canning – optional)
Instructions
-
Begin by preparing your apples. Peel, core, and chunk the 10 cups of apples. Aim for evenly sized pieces to ensure uniform cooking.
-
Place the prepared apples into the crock pot.
-
Cook on high for 4-1/2 hours, covered. This initial cooking period softens the apples and allows them to release their natural juices.
-
After 4-1/2 hours, stir the softened apples thoroughly.
-
Add the remaining ingredients: 1 cup sugar, 1 tablespoon cinnamon, 1/2 teaspoon nutmeg, 1/2 teaspoon allspice, and 1/2 – 3/4 teaspoon ground cloves (adjust to taste).
-
Cook for another 4-1/2 hours with NO lid. Leaving the lid off allows the excess moisture to evaporate, concentrating the apple flavor and creating that signature butter-like consistency.
-
Stir the apple butter periodically during this second cooking phase to prevent sticking and ensure even cooking. The apple butter will gradually darken and thicken.
-
Once the apple butter has reached your desired consistency (thick and spreadable), it’s ready to be preserved.
-
Sealing in Jars (Optional): You have two options for sealing.
- Hot Water Bath Canning: If you choose to can the apple butter for longer storage, follow standard canning procedures. Sterilize your jars and lids. Ladle the hot apple butter into the sterilized jars, leaving 1/4-inch headspace. Remove air bubbles, wipe the jar rims clean, and place lids and rings on the jars. Process in a boiling water bath for the recommended time based on your altitude (usually 10-15 minutes).
- Paraffin Wax: This method is less common now due to potential mold issues. However, if you choose this method, pour a thin layer of melted paraffin wax over the top of the apple butter in each jar to create a seal.
Expert Tips & Tricks
- Apple Variety: Don’t be afraid to experiment with different apple varieties. A mix of sweet and tart apples creates the most complex flavor profile.
- Crock Pot Temperature: Crock pots can vary in temperature. Keep an eye on the apple butter, especially during the second cooking phase. If it’s bubbling too vigorously, reduce the heat to low.
- Consistency is Key: The apple butter is done when it’s thick enough to mound on a spoon and holds its shape. It will also thicken slightly as it cools.
- Stick Blender Secret: For an extra smooth texture, use an immersion blender directly in the crock pot during the last hour of cooking. Be careful of splattering!
- Spice Adjustment: Taste the apple butter during the last hour of cooking and adjust the spices to your liking.
- Preventing Sticking: While the crock pot helps prevent scorching, occasionally stirring ensures even cooking and prevents the apple butter from sticking to the bottom.
- Hot Water Bath Canning Safety: Always follow established canning safety guidelines to prevent spoilage. Consult your local extension office for specific recommendations based on your altitude.
Serving & Storage Suggestions
Grandma’s apple butter is incredibly versatile. Serve it warm or cold on toast, biscuits, muffins, or pancakes. It’s also delicious as a topping for yogurt, oatmeal, or ice cream. Use it as a glaze for pork or chicken, or as a filling for pastries.
- Uncanned apple butter: Store in an airtight container in the refrigerator for up to two weeks.
- Canned apple butter: Properly canned apple butter can be stored in a cool, dark place for up to a year. Once opened, refrigerate and use within two weeks.
Nutritional Information
(Note: Nutritional information is an estimate and may vary based on apple variety and specific ingredients used.)
| Nutrient | Amount per Serving | % Daily Value |
|---|---|---|
| Calories | 243 kcal | 12% |
| Total Fat | 0.5 g | 1% |
| Saturated Fat | 0.1 g | 1% |
| Cholesterol | 0 mg | 0% |
| Sodium | 3.1 mg | 0% |
| Total Carbohydrate | 63.5 g | 21% |
| Dietary Fiber | 5.8 g | 23% |
| Sugars | 55 g | N/A |
| Protein | 0.6 g | 1% |
Variations & Substitutions
- Sugar Alternatives: Replace granulated sugar with maple syrup, honey, or agave nectar for a different flavor profile. Adjust the amount to taste.
- Spice Variations: Experiment with other spices, such as cardamom, ginger, or star anise.
- Apple Sauce Base: For a smoother texture, start with unsweetened applesauce instead of chopped apples. Reduce the cooking time accordingly.
- Bourbon Apple Butter: Add a splash of bourbon during the last hour of cooking for a boozy twist.
- Spiced Apple Butter with Pears: Add in peeled, cored, and diced pears in with the apples to create a more dynamic flavour.
FAQs (Frequently Asked Questions)
Q: Can I use a different type of apple?
A: Absolutely! A mix of sweet and tart apples is ideal, but feel free to use your favorite varieties. Granny Smith, Honeycrisp, Gala, and Fuji are all excellent choices.
Q: How do I know when the apple butter is done?
A: The apple butter is done when it’s thick enough to mound on a spoon and holds its shape. It will also thicken slightly as it cools.
Q: Can I make this recipe in a pot on the stove?
A: Yes, but you’ll need to stir it more frequently to prevent sticking and burning. Use a heavy-bottomed pot and cook over low heat.
Q: Is it necessary to can the apple butter?
A: No, canning is optional. If you don’t can it, store the apple butter in an airtight container in the refrigerator and use it within two weeks.
Q: What if my apple butter is too thin?
A: Continue cooking the apple butter with the lid off until it reaches your desired consistency. Stir occasionally to prevent sticking.
Final Thoughts
This apple butter recipe isn’t just about preserving apples; it’s about preserving memories. It’s a taste of home, a comforting reminder of simpler times, and a testament to the power of family recipes. I encourage you to try this recipe and create your own memories. Imagine the aroma filling your kitchen, the warmth spreading through your home, and the joy of sharing this delicious treat with loved ones. Don’t hesitate to adjust the spices to your preference and feel free to share your creations. Enjoy a spoonful of autumn!