
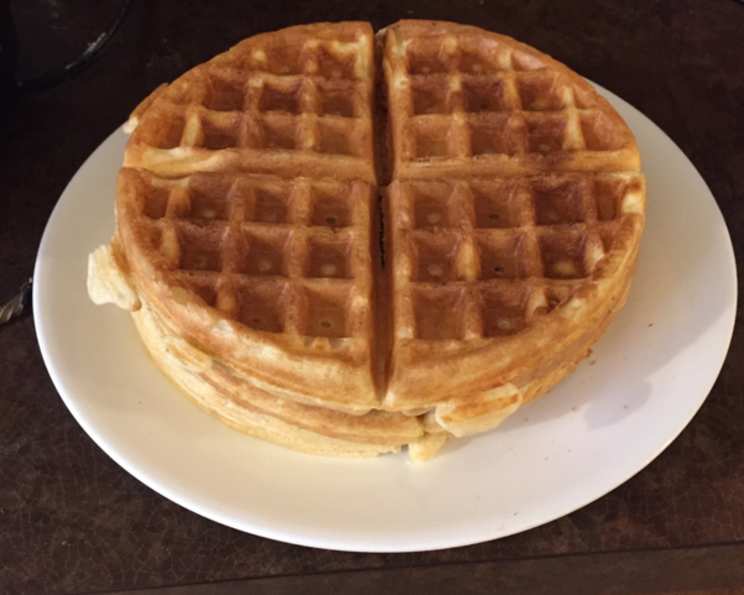
Grandma’s Buttermilk Waffles: A Taste of Home
I remember, as a child, waking up to the most incredible aroma wafting through the house. It wasn’t bacon, surprisingly, but the subtle, tangy sweetness of buttermilk mingling with the crisp, buttery scent of waffles. Grandma, a woman whose love language was definitely food, would be at the stove, a whirlwind of flour dust and gentle smiles, crafting these very waffles. Every bite was pure comfort, a warm hug on a plate, and a reminder that simple ingredients, prepared with love, can create magic.
Recipe Overview
- Prep Time: 10 minutes
- Cook Time: 25 minutes
- Total Time: 35 minutes
- Servings: Approximately 6 waffles
- Yield: Varies based on waffle iron size
- Dietary Type: Not specified, contains gluten and dairy
Ingredients
- 2 cups all-purpose flour
- 1 teaspoon baking powder
- 1/2 teaspoon salt
- 1 teaspoon baking soda
- 2 eggs, beaten
- 2 cups buttermilk
- 4 tablespoons butter, melted
Equipment Needed
- Large mixing bowl
- Measuring cups and spoons
- Whisk or electric mixer
- Preheated waffle iron
Instructions
- In a large mixing bowl, combine the flour, baking powder, salt, and baking soda. Whisk together until well blended. This ensures even distribution of the leavening agents for a light and airy waffle.
- In a separate bowl, or directly into the dry ingredients (making a well in the center), add the beaten eggs, buttermilk, and melted butter.
- Mix the wet and dry ingredients together until just combined. Be careful not to overmix! A few lumps are perfectly fine; overmixing will develop the gluten in the flour, resulting in tough waffles. The batter should be pourable but not too thin.
- Preheat your waffle iron according to the manufacturer’s instructions. Most waffle irons have an indicator light or setting to signal when they are ready. A hot waffle iron is key to achieving crispy waffles.
- Pour the batter onto the preheated waffle iron. The amount of batter will vary depending on the size of your waffle iron. Refer to your waffle iron’s instructions for guidance. Usually, you want to fill the iron so that the batter spreads evenly but doesn’t overflow.
- Cook the waffles until the steaming stops and the waffles are crisp and golden brown. This typically takes 3-5 minutes, but it can vary depending on your waffle iron. Resist the urge to peek too early, as this can prevent the waffles from browning properly. Trust the process!
- Carefully remove the waffles from the waffle iron. A fork or spatula can be used to gently lift them out.
- Serve immediately with your favorite toppings.
Expert Tips & Tricks
- Don’t overmix the batter: As mentioned earlier, overmixing develops the gluten in the flour, leading to tough waffles. Mix just until the wet and dry ingredients are combined.
- Use melted, not hot, butter: Hot butter can cook the eggs slightly when added to the batter, affecting the texture of the waffles. Melt the butter and let it cool slightly before adding it to the other wet ingredients.
- For extra crispy waffles: Try adding a tablespoon or two of cornstarch to the dry ingredients. Cornstarch helps to create a crispier crust.
- Keep waffles warm: If you’re making a large batch, keep the cooked waffles warm in a preheated oven (200°F or 95°C) on a wire rack. This will prevent them from becoming soggy.
- Buttermilk substitute: If you don’t have buttermilk on hand, you can make a quick substitute by adding 1 tablespoon of white vinegar or lemon juice to a measuring cup, then filling it up to the 2-cup mark with milk. Let it sit for 5 minutes to curdle slightly.
Serving & Storage Suggestions
Serve these delightful waffles immediately for the best taste and texture. They’re fantastic with classic toppings like butter, maple syrup, fresh berries, whipped cream, and powdered sugar. For a more savory option, try them with fried chicken or a poached egg and hollandaise sauce.
Leftover waffles can be stored in an airtight container in the refrigerator for up to 2 days. To reheat, you can use a toaster, toaster oven, or regular oven. For best results, reheat in a single layer to ensure they crisp up nicely.
You can also freeze waffles for longer storage. Let them cool completely, then wrap them individually in plastic wrap or place them in a freezer-safe bag. Frozen waffles can be stored for up to 2 months. To reheat from frozen, simply pop them in the toaster or oven until heated through and crispy.
Nutritional Information
Note: Nutritional information is an estimate and may vary based on specific ingredients and serving size.
| Nutrient | Amount per Serving | % Daily Value |
|---|---|---|
| Calories | 350 kcal | 18% |
| Total Fat | 16g | 25% |
| Saturated Fat | 9g | 45% |
| Cholesterol | 130mg | 43% |
| Sodium | 970mg | 40% |
| Total Carbohydrate | 55g | 18% |
| Dietary Fiber | 2g | 7% |
| Sugars | 7g | N/A |
| Protein | 14g | 28% |
Variations & Substitutions
- Gluten-Free Waffles: Substitute the all-purpose flour with a gluten-free all-purpose flour blend. You may need to add a bit more liquid to achieve the right batter consistency.
- Dairy-Free Waffles: Use a dairy-free milk alternative (such as almond milk, soy milk, or oat milk) in place of the buttermilk. You can also use a dairy-free butter substitute.
- Whole Wheat Waffles: Replace up to half of the all-purpose flour with whole wheat flour for a nuttier flavor and added fiber.
- Chocolate Chip Waffles: Fold in 1/2 cup of chocolate chips into the batter before cooking.
- Blueberry Waffles: Gently fold in 1 cup of fresh or frozen blueberries into the batter before cooking.
- Lemon Poppy Seed Waffles: Add the zest of one lemon and 2 tablespoons of poppy seeds to the batter.
- Spice It Up: Add 1/2 teaspoon of ground cinnamon, nutmeg, or cardamom to the dry ingredients for a warm and comforting flavor.
FAQs (Frequently Asked Questions)
Q: Why are my waffles not crispy?
A: There are several reasons why your waffles might not be crispy. Ensure your waffle iron is properly preheated, and don’t open it too early. Also, avoid overmixing the batter, which can lead to tough waffles. Adding a bit of cornstarch to the batter can also help.
Q: Can I make the batter ahead of time?
A: While it’s best to cook the waffles immediately after mixing the batter, you can make the batter ahead of time and store it in the refrigerator for up to 24 hours. However, the baking soda may lose some of its effectiveness, so the waffles might not be as light and airy.
Q: Can I freeze the waffles?
A: Yes, waffles freeze very well. Let them cool completely, then wrap them individually in plastic wrap or place them in a freezer-safe bag. Frozen waffles can be stored for up to 2 months.
Q: My waffle iron is sticking. What can I do?
A: Make sure your waffle iron is properly seasoned. You can also lightly grease the iron with cooking spray before each use. Avoid using too much batter, as this can also cause sticking.
Q: Can I use this recipe to make pancakes?
A: Yes, this batter can also be used to make pancakes. Simply pour the batter onto a preheated griddle or frying pan and cook until golden brown on both sides.
Final Thoughts
These Grandma’s Buttermilk Waffles are more than just a breakfast food; they’re a symbol of warmth, comfort, and love. I encourage you to try this recipe and experience the joy of creating a dish that’s sure to become a family favorite. Don’t be afraid to experiment with different toppings and variations to make them your own. And most importantly, enjoy the process of cooking and sharing this delicious treat with the people you love. Let me know what you think! What toppings did you go with? What are some variations you’d like to try? I’m eager to hear your thoughts and experiences. Enjoy!