
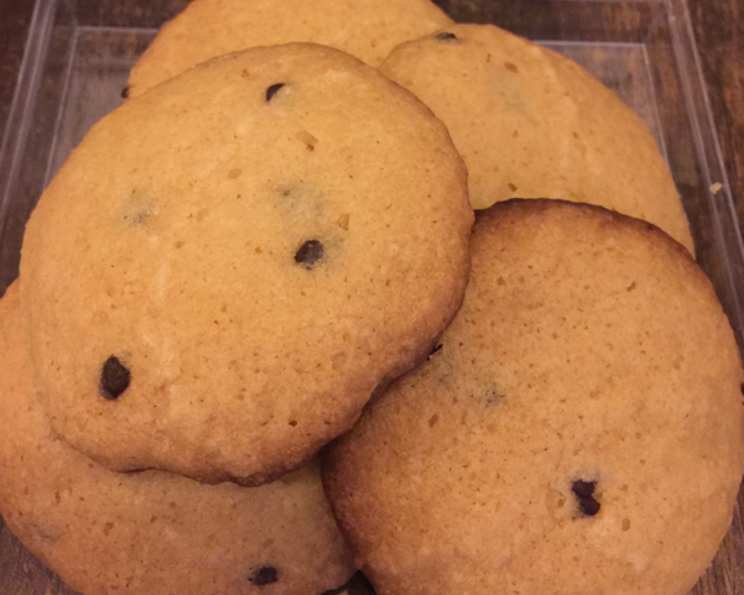
Grandma’s Chocolate Chip Cookies: A Timeless Classic
The scent of Grandma’s chocolate chip cookies baking in the oven is a memory etched into my soul. I can almost feel the warmth radiating from the old, avocado-green oven in her kitchen, see the flour dust swirling in the sunbeams, and taste the slightly burnt edges of the first cookie, always offered to me fresh from the sheet. It wasn’t just about the cookies themselves, though they were undeniably delicious; it was about the love and warmth that went into each and every batch, a tradition I’m honored to carry on. It’s a taste of pure, unadulterated comfort, and I’m so excited to share this treasured recipe with you.
Recipe Overview
- Prep Time: 15 minutes
- Cook Time: 9-10 minutes
- Total Time: Approximately 25 minutes
- Yields: Approximately 5 dozen cookies
- Serves: Varies, depending on cookie consumption! (Approximately 60)
- Dietary Type: Not specified (contains gluten, dairy, and eggs)
Ingredients
- 1 cup sugar
- 1/2 cup brown sugar, firmly packed
- 1 cup shortening
- 1 teaspoon vanilla
- 2 large eggs
- 2 1/4 cups flour
- 1 teaspoon baking soda
- 1 teaspoon salt
- 1 (12 ounce) package chocolate chips
Equipment Needed
- Mixing bowl
- Electric mixer (optional, but recommended)
- Measuring cups and spoons
- Cookie sheets
- Spatula
- Cooling rack
Instructions
-
Preheat your oven to 375°F (190°C). Make sure your oven rack is positioned in the center. An oven thermometer is your best friend for accurate baking.
-
In a large mixing bowl, cream together the sugar, brown sugar, shortening, vanilla, and eggs. This step is crucial! Creaming means beating the ingredients together until light and fluffy. Use an electric mixer for best results, but you can do it by hand – just be prepared for a bit of a workout! The mixture should be pale and significantly increased in volume.
-
Once the first five ingredients are thoroughly creamed, add the flour, baking soda, and salt. Mix until just combined. Be careful not to overmix at this stage, as it can lead to tough cookies. The dough should be uniformly mixed, but don’t worry about small lumps.
-
Finally, stir in the chocolate chips. Ensure they are evenly distributed throughout the dough.
-
Drop the dough by rounded tablespoonfuls onto ungreased cookie sheets. You can use a cookie scoop for uniformity or simply use two spoons. Leave about 2 inches of space between each cookie to allow for spreading.
-
Bake for 9-10 minutes. Keep a close eye on them! The cookies are done when the edges are golden brown, and the centers are still slightly soft. Remember that they will continue to bake slightly as they cool on the cookie sheet.
-
Remove the cookie sheets from the oven and let the cookies cool for a few minutes on the baking sheets before transferring them to a wire rack to cool completely. This prevents them from sticking and allows them to firm up properly.
Expert Tips & Tricks
- Creaming is Key: Don’t skimp on the creaming process! This is where the air gets incorporated, resulting in light and tender cookies.
- Don’t Overmix: Overmixing develops the gluten in the flour, leading to tough cookies. Mix until just combined.
- Chill the Dough: For thicker, chewier cookies, chill the dough for at least 30 minutes before baking. This allows the flavors to meld and prevents excessive spreading.
- Baking Sheet Matters: Light-colored baking sheets are preferred for even baking. Dark baking sheets can cause the bottoms of the cookies to burn.
- Oven Calibration: Oven temperatures can vary. Use an oven thermometer to ensure your oven is accurately heated.
- Brown Sugar: Always pack the brown sugar firmly into the measuring cup for accurate measurement.
- Salt Type: Consider using a flaky sea salt sprinkled on top of the cookies just after baking to enhance the sweetness.
- Adjust Baking Time: If your cookies are browning too quickly, lower the oven temperature slightly. If they’re not browning enough, increase the baking time by a minute or two.
- Troubleshooting: If your cookies are flat, you may have used too much shortening or not enough flour. If they’re dry, you may have overbaked them.
Serving & Storage Suggestions
These cookies are best enjoyed warm, straight from the oven (after cooling slightly, of course!). Serve them with a cold glass of milk, a scoop of vanilla ice cream, or a warm cup of coffee.
To store, keep the cookies in an airtight container at room temperature for up to 3 days. For longer storage, you can freeze them for up to 2 months. To freeze, place the cooled cookies in a single layer on a baking sheet and freeze until solid. Then, transfer them to a freezer bag or container. Thaw at room temperature before serving. You can also freeze the cookie dough! Just scoop into individual balls and freeze on a baking sheet before transferring to a freezer bag. When ready to bake, bake from frozen, adding a few minutes to the baking time.
Nutritional Information
(Estimated, based on standard ingredients and serving size of one cookie)
| Nutrient | Amount per Serving | % Daily Value* |
|---|---|---|
| Calories | 97 kcal | 5% |
| Total Fat | 5.3g | 8% |
| Saturated Fat | 1.9g | 9% |
| Cholesterol | 6.2mg | 2% |
| Sodium | 63.4mg | 2% |
| Total Carbohydrate | 12.3g | 4% |
| Dietary Fiber | 0.5g | 1% |
| Sugars | 8.2g | – |
| Protein | 0.9g | 1% |
- Percent Daily Values are based on a 2000 calorie diet.
Variations & Substitutions
- Nutty Delight: Add 1/2 cup of chopped walnuts or pecans to the dough for a nutty flavor and added texture.
- Oatmeal Chocolate Chip: Replace 1/2 cup of flour with 1/2 cup of rolled oats for a heartier cookie.
- Double Chocolate: Use 1/2 cup of cocoa powder in place of 1/2 cup of flour and add white chocolate chips for a decadent double chocolate experience.
- M&M Cookies: As Grandma always said, replace the chocolate chips with M&M plain baking bits for a colorful twist!
- Gluten-Free: Substitute a gluten-free all-purpose flour blend for the regular flour. Be sure to choose a blend that contains xanthan gum for best results.
- Dairy-Free: Use a dairy-free shortening and dairy-free chocolate chips to make these cookies dairy-free.
- Spice it Up: Add 1/2 teaspoon of cinnamon, nutmeg, or cardamom to the dough for a warm, spiced flavor.
FAQs (Frequently Asked Questions)
Q: My cookies are spreading too thin. What can I do?
A: This is often caused by using too much shortening or not enough flour. Try chilling the dough before baking, or adding a tablespoon or two of extra flour.
Q: Can I use butter instead of shortening?
A: Yes, but the texture will be slightly different. Butter will give the cookies a richer flavor and a slightly flatter, crispier texture.
Q: How do I prevent my chocolate chips from melting too much?
A: Use high-quality chocolate chips and avoid overbaking the cookies. You can also chill the dough before baking.
Q: My cookies are burning on the bottom. What’s happening?
A: Your oven temperature may be too high, or your baking sheet may be too dark. Try lowering the oven temperature and using a lighter-colored baking sheet.
Q: Can I make the dough ahead of time?
A: Absolutely! The dough can be stored in the refrigerator for up to 3 days, or frozen for up to 2 months.
Final Thoughts
Grandma’s Chocolate Chip Cookies are more than just a recipe; they’re a symbol of love, comfort, and connection. I encourage you to try this recipe and create your own cherished memories. Don’t be afraid to experiment with variations and make them your own. And most importantly, share them with the people you love! I’d love to hear about your baking experiences, so please leave a comment and let me know how your cookies turned out. Consider pairing them with a rich vanilla bean ice cream or a steaming mug of hot cocoa on a chilly evening. Happy baking!