
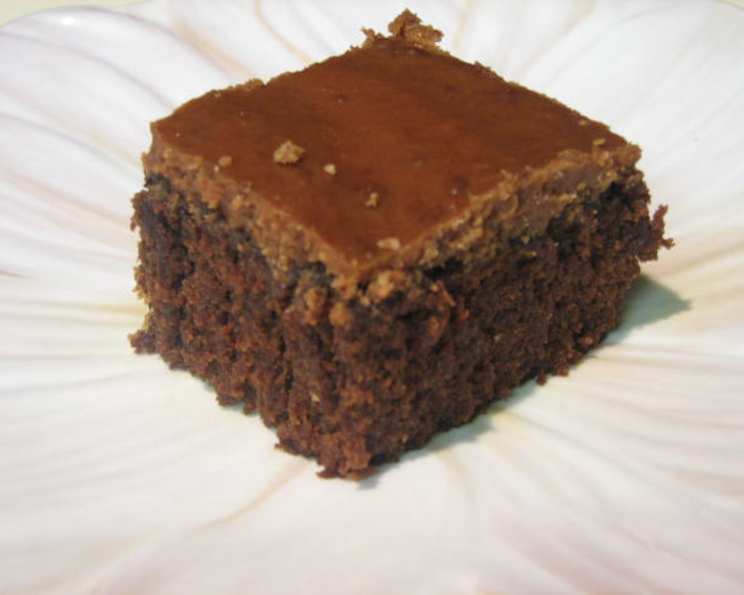
Grandma’s Chocolate Syrup Brownies: A Taste of Nostalgia
The aroma alone could transport me back to childhood. Grandma’s chocolate syrup brownies were more than just a dessert; they were a symbol of family gatherings, warm hugs, and unconditional love. I can still picture her, flour dusting her apron, humming a tune as she stirred the batter, knowing the joy these treats would bring to everyone. These brownies were always the first thing to disappear at any family function, and now, I’m so excited to share her secret recipe with you.
Recipe Overview
- Prep Time: 15 minutes
- Cook Time: 30 minutes
- Total Time: 45 minutes
- Servings: 12
- Yield: 1 (9×13 inch) pan of brownies
- Dietary Type: Not specified
Ingredients
For the Brownies:
- ½ cup butter or ½ cup margarine, softened
- 1 cup white sugar
- 1 (16 ounce) can Hershey’s Chocolate Syrup
- 4 eggs
- 1 cup flour
- ½ cup chopped nuts (optional)
For the Frosting:
- 1 ½ cups white sugar
- 6 tablespoons margarine
- 6 tablespoons milk
- ½ cup chocolate chips
Equipment Needed
- 9 x 13-inch baking pan
- Mixing bowls
- Electric mixer (optional, but recommended)
- Measuring cups and spoons
- Saucepan
- Rubber spatula or spoon
Instructions
- Preheat your oven to 350 degrees Fahrenheit (175 degrees Celsius). Make sure your oven rack is in the center position for even baking.
- Prepare your 9 x 13-inch baking pan by greasing it lightly with butter or cooking spray. This prevents the brownies from sticking and makes them easier to remove once cooled.
- In a large mixing bowl, cream together the softened butter or margarine and the white sugar. This step is crucial for creating a light and airy texture. If using an electric mixer, beat on medium speed for 2-3 minutes until light and fluffy. If mixing by hand, ensure the butter is very soft and thoroughly incorporated.
- Add the eggs one at a time, beating well after each addition. This helps emulsify the mixture and creates a smoother batter. Make sure to scrape down the sides of the bowl occasionally to ensure everything is evenly mixed.
- Pour in the entire can (16 ounces) of Hershey’s Chocolate Syrup. Mix until well blended and the batter is a uniform, rich chocolate color. Don’t be afraid to overmix at this stage; the chocolate syrup needs to be fully incorporated.
- Gradually add the flour to the wet ingredients. Mix until just combined. Be careful not to overmix at this point, as overmixing can lead to tough brownies. A few streaks of flour are okay.
- If desired, stir in the chopped nuts. Walnuts or pecans work particularly well, adding a pleasant crunch to the brownies. Feel free to use other nuts or omit them altogether if you prefer.
- Pour the batter into the prepared 9 x 13-inch baking pan and spread it evenly.
- Bake in the preheated oven for 30 minutes. To check for doneness, insert a toothpick into the center of the brownies. If it comes out with a few moist crumbs attached, they are done. Be careful not to overbake, as this can make the brownies dry.
- While the brownies are baking, prepare the frosting. In a saucepan, combine the white sugar, margarine, and milk.
- Bring the mixture to a boil over medium heat, stirring constantly. Once boiling, continue to boil for exactly 1 minute, still stirring constantly. This step is critical for achieving the correct consistency of the frosting.
- Remove the saucepan from the heat and add the chocolate chips.
- Stir until the chocolate chips are completely melted and the frosting is smooth and thick. The frosting will thicken very quickly.
- Once the brownies are cool (but not completely cold), quickly spread the frosting evenly over the top. The frosting sets up quickly, so work fast to ensure a smooth finish. If you wait too long, the frosting will become difficult to spread.
- Let the frosted brownies cool completely before cutting and serving. This allows the frosting to set properly and prevents the brownies from crumbling.
Expert Tips & Tricks
- For extra fudgy brownies: slightly underbake them, removing them from the oven when the toothpick still has some very wet batter clinging to it. They will continue to set as they cool.
- To prevent a hard crust: place a pan of water on the rack below the brownies while baking. The steam will help keep the surface moist.
- Add a pinch of salt: to the brownie batter to enhance the chocolate flavor.
- Spice it up: add a teaspoon of cinnamon or a dash of cayenne pepper to the brownie batter for a unique flavor twist.
- Make them ahead: The brownies can be baked a day ahead of time and stored, unfrosted, at room temperature. Frost them just before serving.
- Frosting Troubleshooting: If the frosting becomes too thick before you can spread it, add a teaspoon or two more of milk to thin it out. If it’s too thin, return it to low heat and stir until it thickens slightly.
Serving & Storage Suggestions
Serve these delicious brownies at room temperature for the best texture. They are fantastic on their own, but also pair wonderfully with a scoop of vanilla ice cream, a dollop of whipped cream, or a sprinkle of powdered sugar.
To store, keep the brownies in an airtight container at room temperature. They will stay fresh for up to 3 days. For longer storage, you can refrigerate them for up to a week. The brownies can also be frozen for up to 2 months. Thaw them at room temperature before serving. If frozen, the frosting may become slightly sticky upon thawing, but the taste will remain delicious.
Nutritional Information
| Nutrient | Amount per Serving | % Daily Value |
|---|---|---|
| Calories | 513 kcal | N/A |
| Total Fat | 20.8 g | 32% |
| Saturated Fat | 9.5 g | 47% |
| Cholesterol | 83.8 mg | 27% |
| Sodium | 294.6 mg | 12% |
| Total Carbohydrate | 78.6 g | 26% |
| Dietary Fiber | 1.8 g | 7% |
| Sugars | 58.8 g | 235% |
| Protein | 5.6 g | 11% |
Note: Nutritional information is an estimate and may vary based on specific ingredients and serving sizes.
Variations & Substitutions
- Gluten-Free: Substitute the all-purpose flour with a gluten-free blend. Ensure the blend contains xanthan gum for proper binding.
- Dairy-Free: Replace the butter/margarine with a plant-based butter alternative. Use a dairy-free milk alternative, such as almond, soy, or oat milk. Ensure your chocolate chips are also dairy-free.
- Nuttier Brownies: Add more chopped nuts, or use a variety of nuts like pecans, walnuts, or almonds. Toast the nuts before adding them to enhance their flavor.
- Chocolate Chunk Brownies: Substitute some of the chocolate syrup with chopped chocolate chunks for a richer, more intense chocolate flavor.
- Espresso Brownies: Add a teaspoon of instant espresso powder to the batter to enhance the chocolate flavor and add a subtle coffee note.
FAQs (Frequently Asked Questions)
Q: Can I use a different size pan?
A: While a 9×13 inch pan is recommended for the best results, you can use an 8×8 inch pan for thicker brownies. Just reduce the baking time by a few minutes and keep a close eye on them.
Q: Can I use unsalted butter instead of salted butter/margarine?
A: Yes, you can use unsalted butter. Just add a pinch of salt (about 1/4 teaspoon) to the brownie batter to balance the sweetness.
Q: The frosting is too thick. What should I do?
A: Add a teaspoon or two of milk to the frosting and stir until it reaches the desired consistency. Be careful not to add too much milk, as this can make the frosting too thin.
Q: Can I freeze the brownies?
A: Yes, you can freeze the brownies for up to 2 months. Wrap them tightly in plastic wrap and then in foil to prevent freezer burn. Thaw them at room temperature before serving.
Q: My brownies are dry. What did I do wrong?
A: Overbaking is the most common cause of dry brownies. Next time, try reducing the baking time by a few minutes and checking for doneness with a toothpick. Also, be careful not to overmix the batter, as this can also contribute to dryness.
Final Thoughts
These brownies are more than just a recipe; they are a connection to the past, a reminder of simpler times, and a taste of pure comfort. I encourage you to try Grandma’s Chocolate Syrup Brownies and experience the joy they bring. Don’t be afraid to put your own spin on them with different nuts, spices, or chocolate additions. And most importantly, share them with loved ones and create your own sweet memories. Enjoy!