
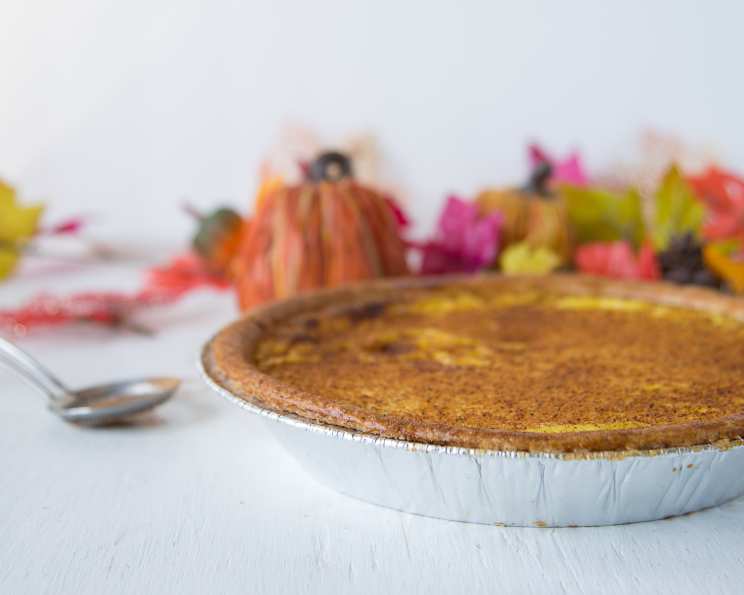
Grandma’s Egg Custard Pie: A Slice of Nostalgia
There’s a reason some recipes become family heirlooms, whispered from one generation to the next, their true worth measured not just in flavor but in the memories they evoke. For me, Grandma’s Egg Custard Pie is more than just dessert; it’s a warm hug on a Sunday afternoon, the scent of nutmeg that instantly transports me back to her sun-drenched kitchen. I can still picture her, humming softly, as she carefully poured the golden custard into the pie shell, her hands steady and sure, a lifetime of baking wisdom etched in every movement. This pie isn’t just delicious, it’s a little piece of my heart, and I’m thrilled to share it with you.
Recipe Overview
- Prep Time: 15 minutes
- Cook Time: 40-50 minutes
- Total Time: 55-65 minutes
- Servings: 8
- Yield: 1 pie
- Dietary Type: Not Gluten-Free
Ingredients
- 1 (9 inch) unbaked pie shell, deep dish
- 3 eggs, beaten
- ¾ cup white sugar
- ¼ teaspoon salt
- 1 teaspoon vanilla extract
- 1 egg white
- 2 ½ cups scalded whole milk
- ¼ teaspoon ground nutmeg
- 3 drops yellow food coloring (optional)
Equipment Needed
- 9-inch deep dish pie plate
- Whisk
- Measuring cups and spoons
- Saucepan for scalding milk
- Oven
- Cooling rack
Instructions
-
Preheat your oven to 400 degrees F (200 degrees C). This initial high heat will help set the crust and prevent it from becoming soggy.
-
In a large mixing bowl, mix together the beaten eggs, white sugar, salt, and vanilla extract. Ensure everything is well combined using a whisk until the sugar is mostly dissolved and the mixture is smooth. A smooth base will ensure a smooth custard.
-
Slowly blend in the scalded milk into the egg mixture, whisking constantly to prevent the eggs from scrambling. Scalding the milk helps create a richer, creamier custard. Don’t pour it in all at once; add it gradually while whisking vigorously to temper the eggs.
-
If desired, for a more vibrant color, add a few drops of yellow food coloring. This is purely for aesthetics and doesn’t affect the flavor. Remember, a little food coloring goes a long way, so start with one drop and add more until you reach your desired shade.
-
In a small bowl, lightly beat the egg white. Then, using a pastry brush, brush the inside bottom and sides of the unbaked pie crust with the egg white. This step is crucial as it creates a moisture barrier, helping to prevent a soggy crust. The egg white will cook and seal the surface.
-
Carefully pour the custard mixture into the prepared pie crust. Avoid overfilling to prevent spills during baking.
-
Sprinkle the top of the custard generously with ground nutmeg. This adds a warm, aromatic note that complements the creamy custard beautifully. Freshly grated nutmeg is preferable for the best flavor.
-
Bake in the preheated oven for 40 to 50 minutes, or until a knife inserted near the center comes out clean. Start checking for doneness around the 40-minute mark. If the crust begins to brown too quickly, tent the pie loosely with foil to prevent burning. The center of the pie should be set but still have a slight wobble. Please adjust the baking time according to your oven, as oven temperatures can vary. If the pie is browning too quickly, reduce the oven temperature by 25 degrees F (15 degrees C).
-
Cool completely on a wire rack before serving. This allows the custard to fully set and the flavors to meld together. Resist the urge to cut into it while it’s still warm, as it will be too soft and may fall apart.
Expert Tips & Tricks
- Preventing a Soggy Crust: Besides the egg white wash, you can also pre-bake the pie crust (blind baking) for about 10-15 minutes before adding the filling. This will ensure a crispier bottom crust. Use pie weights or dried beans to prevent the crust from puffing up during pre-baking.
- Achieving a Smooth Custard: Scalding the milk and slowly adding it to the egg mixture are key to preventing curdling. If you do see any small lumps, strain the custard mixture through a fine-mesh sieve before pouring it into the crust.
- Perfecting the Bake: If your oven tends to brown the top of pies too quickly, try placing a baking sheet on the rack above the pie for the last 15-20 minutes of baking to shield it from the direct heat.
- Ingredient Swaps: While whole milk is classic, you can experiment with using half-and-half or even cream for an extra rich custard. For a slightly different flavor profile, try using almond extract instead of vanilla.
- Make Ahead Tip: You can bake the pie a day ahead of serving. Just be sure to store it properly in the refrigerator. The flavors will actually meld together and become even more delicious overnight.
Serving & Storage Suggestions
Grandma’s Egg Custard Pie is best served chilled or at room temperature. A dollop of whipped cream or a sprinkle of extra nutmeg adds a nice touch. It pairs beautifully with a cup of hot coffee or tea.
To store leftovers, cover the pie tightly with plastic wrap or transfer it to an airtight container and refrigerate. It will keep well in the refrigerator for up to 3-4 days. While you can freeze egg custard pie, the texture may change slightly upon thawing, becoming a bit watery. If freezing, wrap the pie tightly in several layers of plastic wrap and then foil. Thaw in the refrigerator overnight before serving. Reheating is not recommended, as it can alter the texture of the custard.
Nutritional Information
| Nutrient | Amount per Serving | % Daily Value |
|---|---|---|
| Calories | 263.6 kcal | N/A |
| Calories from Fat | 105 g | 40% |
| Total Fat | 11.8 g | 18% |
| Saturated Fat | 3.9 g | 19% |
| Cholesterol | 77.4 mg | 25% |
| Sodium | 256.1 mg | 10% |
| Total Carbohydrate | 32.9 g | 10% |
| Dietary Fiber | 0.8 g | 3% |
| Sugars | 22.8 g | N/A |
| Protein | 6.6 g | 13% |
Note: Nutritional information is an estimate and may vary based on specific ingredients and preparation methods.
Variations & Substitutions
- Gluten-Free: Use a gluten-free pie crust to make this pie suitable for those with gluten sensitivities.
- Dairy-Free: While it changes the nature of the recipe significantly, you could attempt this recipe with a combination of coconut milk and cashew cream to replace the scalded milk. The custard will be much thicker and will require adjusting baking times.
- Spice it Up: Add a pinch of cinnamon or cardamom to the custard mixture along with the nutmeg for a warmer, more complex flavor.
- Citrus Zest: A teaspoon of lemon or orange zest adds a bright, refreshing note to the custard.
- Bourbon Vanilla: Substitute regular vanilla extract with bourbon vanilla extract for a richer, more sophisticated flavor.
FAQs (Frequently Asked Questions)
Q: Why is my custard pie cracking?
A: Cracking usually occurs due to rapid temperature changes or overbaking. Try reducing the oven temperature slightly and cooling the pie gradually.
Q: How do I know when the pie is done?
A: A knife inserted near the center should come out clean, but the very center may still have a slight wobble. The pie will continue to set as it cools.
Q: Can I use a store-bought pie crust?
A: Absolutely! A store-bought crust is a convenient option. Just be sure to blind bake it if you want a crispier bottom crust.
Q: Can I make this pie without scalding the milk?
A: While you can skip the scalding step, scalding helps to dissolve the sugar more effectively and creates a smoother, creamier custard. It’s highly recommended for the best results.
Q: My crust is browning too quickly. What should I do?
A: Tent the pie loosely with aluminum foil to protect the crust from direct heat and prevent it from burning.
Final Thoughts
This recipe for Grandma’s Egg Custard Pie is more than just a set of instructions; it’s an invitation to create a little bit of magic in your own kitchen. Don’t be afraid to experiment with variations, make it your own, and most importantly, share it with the people you love. I hope this pie brings you as much joy and comfort as it has brought me over the years. So, preheat your oven, gather your ingredients, and get ready to bake a slice of pure nostalgia!