
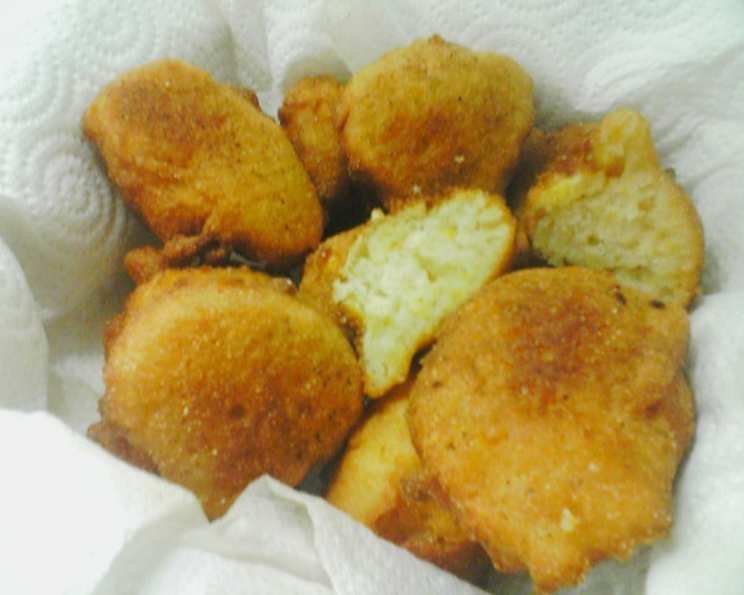
Grandma’s Hush Puppies: A Southern Classic
The memory still makes my mouth water. I can almost smell the humid summer air, feel the rough-hewn picnic table under my elbows, and hear the cicadas buzzing in the oak trees. It was always at my Grandma Betty’s house where the magic happened. A monumental fish fry was a tradition, and no fish fry was complete without her hush puppies. Crispy on the outside, tender and sweet on the inside, they were the perfect counterpoint to the savory, golden-fried catfish. These aren’t just hush puppies; they are a taste of home, a bite of pure, unadulterated nostalgia.
Recipe Overview
Here are some quick facts about Grandma’s Hush Puppies:
- Prep Time: 15 minutes
- Cook Time: 5-8 minutes per batch
- Total Time: 20-25 minutes
- Servings: 6
- Yield: 15-20 hush puppies
- Dietary Type: Vegetarian
Ingredients
Here’s what you’ll need to recreate this Southern staple:
- 1 1/2 cups yellow cornmeal
- 1/2 cup all-purpose flour
- 2 tablespoons sugar
- 1 tablespoon baking powder
- 1 teaspoon salt
- 1/2 cup milk
- 1 egg, beaten
- 1 (16 ounce) can creamed corn
- 1 small onion, diced
Equipment Needed
- Deep fryer or large, heavy-bottomed pot
- Metal spoon
- Large mixing bowl
- Paper towels
Instructions
Let’s get cooking! Follow these steps to create hush puppies just like Grandma used to make:
-
Begin by pouring vegetable oil into your deep fryer or a large, heavy-bottomed pot. You’ll want enough oil to completely submerge the hush puppies, usually about 3-4 inches deep. Turn the fryer on to 375°F (190°C) or heat the oil on the stovetop over medium-high heat. Allow the oil to heat up while you prepare the batter. It’s crucial to get the oil hot enough, or the hush puppies will absorb too much oil and become greasy.
-
In a large mixing bowl, combine the dry ingredients: yellow cornmeal, all-purpose flour, sugar, baking powder, and salt. Whisk them together to ensure they are evenly distributed. This prevents pockets of baking powder or salt in the finished hush puppies.
-
Add the wet ingredients to the bowl with the dry ingredients: milk, the beaten egg, creamed corn, and the diced onion. Mix everything together thoroughly until just combined. Be careful not to overmix the batter, as this can develop the gluten in the flour and make the hush puppies tough.
-
Assess the consistency of the batter. It should be similar to pancake batter – thick enough to hold its shape but still pourable. If the batter is too thick, add a little more milk, one tablespoon at a time, until you reach the desired consistency. If it’s too thin, add a little more flour, one tablespoon at a time, until it thickens up. The consistency is important for proper cooking and texture.
-
Dip a metal spoon into the hot grease. This seemingly small step is crucial! The hot spoon will help the batter slide easily into the hot oil and prevent it from sticking.
-
Using the hot, greased spoon, scoop about 1 tablespoon of batter per hush puppy and carefully drop it into the hot oil. Don’t overcrowd the fryer; work in batches to maintain the oil temperature. Overcrowding will lower the oil temperature and result in soggy hush puppies.
-
Cook the hush puppies for approximately 5 minutes, or until they are golden brown on the bottom. Then, gently turn them over with a slotted spoon and cook for another 3 minutes, or until they are golden brown on the other side. The exact cooking time will depend on the temperature of your oil, so keep a close eye on them.
-
Remove the cooked hush puppies from the oil with a slotted spoon and place them on a plate lined with paper towels to drain off any excess oil. This step is essential for achieving that perfectly crispy, non-greasy texture.
-
Repeat the process with the remaining batter, always remembering to grease the spoon before scooping each hush puppy.
-
Serve the hush puppies hot and fresh, alongside fried fish, coleslaw, and your favorite Southern sides.
Expert Tips & Tricks
- Oil Temperature is Key: Maintaining the correct oil temperature is crucial. If the oil is too cold, the hush puppies will be greasy. If it’s too hot, they’ll burn on the outside before cooking through on the inside. A deep-fry thermometer is your best friend here.
- Don’t Overmix: Overmixing the batter develops the gluten in the flour, resulting in tough hush puppies. Mix just until the ingredients are combined.
- Spice it Up: For a little kick, add a pinch of cayenne pepper or a dash of hot sauce to the batter.
- Make Ahead: The batter can be made ahead of time and stored in the refrigerator for up to 24 hours. Just give it a good stir before frying.
- Troubleshooting: If your hush puppies are sinking to the bottom of the fryer, the oil isn’t hot enough. If they’re browning too quickly, lower the heat slightly.
Serving & Storage Suggestions
Serve these delightful hush puppies hot, ideally straight from the fryer for the best texture and flavor. They are traditionally served alongside fried fish, coleslaw, and other Southern favorites like baked beans and potato salad.
Leftover hush puppies can be stored in an airtight container in the refrigerator for up to 3 days. To reheat, bake them in a preheated oven at 350°F (175°C) for about 5-10 minutes, or until heated through and crispy. You can also reheat them in an air fryer for a similar result. Avoid microwaving them, as they will become soggy. Hush puppies are best enjoyed fresh, so freezing is not recommended as it can significantly alter their texture.
Nutritional Information
Here’s an estimate of the nutritional information per serving:
| Nutrient | Amount per Serving | % Daily Value |
|---|---|---|
| Calories | 258 kcal | 13% |
| Total Fat | 3.1 g | 4% |
| Saturated Fat | 0.9 g | 4% |
| Cholesterol | 38.1 mg | 12% |
| Sodium | 835.6 mg | 34% |
| Total Carbohydrate | 53.9 g | 17% |
| Dietary Fiber | 3.8 g | 15% |
| Sugars | 7.9 g | 31% |
| Protein | 6.9 g | 13% |
Variations & Substitutions
- Gluten-Free: Substitute the all-purpose flour with a gluten-free all-purpose flour blend. Ensure the blend contains xanthan gum for binding.
- Dairy-Free: Use a plant-based milk alternative such as almond milk or soy milk in place of the regular milk.
- Spicy Hush Puppies: Add a finely chopped jalapeño pepper or a pinch of cayenne pepper to the batter for a spicy kick.
- Herbaceous Hush Puppies: Incorporate fresh herbs like chopped chives, parsley, or cilantro into the batter for a more complex flavor.
- Cheese Hush Puppies: Add shredded cheddar cheese or Monterey Jack cheese to the batter for a cheesy twist.
FAQs (Frequently Asked Questions)
Q: Why are my hush puppies greasy?
A: The most common reason for greasy hush puppies is that the oil wasn’t hot enough. Make sure your oil is at 375°F (190°C) before adding the batter.
Q: Can I bake these instead of frying?
A: While traditionally fried, you can bake them for a healthier option. Preheat your oven to 400°F (200°C), spray a baking sheet with non-stick spray, and bake for 15-20 minutes, or until golden brown. Note that the texture will be different from fried hush puppies.
Q: Can I use self-rising cornmeal?
A: If using self-rising cornmeal, omit the baking powder and salt from the recipe.
Q: How do I prevent the onion from overpowering the hush puppies?
A: Make sure to dice the onion very finely. You can also sauté it lightly before adding it to the batter to mellow out its flavor.
Q: Can I add other vegetables to the batter?
A: Yes! Diced bell peppers, corn kernels (in addition to the creamed corn), or even shredded zucchini can be added for extra flavor and texture.
Final Thoughts
These hush puppies are more than just a side dish; they are a taste of tradition, a comforting reminder of home-cooked goodness. Don’t be intimidated by the frying – with a little practice, you’ll be whipping up batches of these golden, crispy treats in no time. Gather your loved ones, fry up some fish, and enjoy these classic hush puppies alongside your favorite Southern sides. I encourage you to try this recipe and share your own variations and experiences. Let me know what you think and what you paired them with. Happy cooking!