
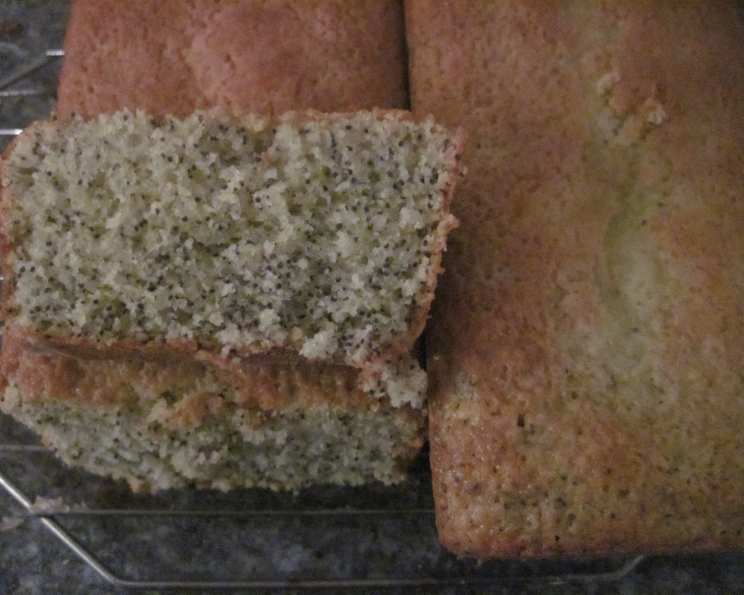
Grandma’s Mini Lemon Breads: A Sweet Secret Revealed
The memory is as vivid as the bright yellow glaze that crowned those miniature loaves: my grandmother, a woman known more for her sharp wit than her culinary prowess, carefully wrapping each lemon bread in festive cellophane. These weren’t just stocking stuffers; they were tiny tokens of love, a rare and tangible expression of affection from a woman who usually showed it through teasing and playful jabs. Every Christmas, the anticipation of that sweet, citrusy bite was almost unbearable – a moment of pure joy amidst the chaos of the holidays. The aroma alone – sunshine and sugar – was enough to transport me back to her cozy kitchen, a place of warmth and laughter.
Recipe Overview
- Prep Time: 10 minutes
- Cook Time: 40 minutes
- Total Time: 50 minutes
- Yields: 5 mini loaves
- Dietary Type: Vegetarian
Ingredients
- 1 (18 ounce) package lemon cake mix
- 1 (3 1/2 ounce) package instant lemon pudding mix
- 1 cup water
- 1/2 cup oil (I prefer Wesson)
- 4 eggs
- 1/4 cup poppy seeds
- 1/2 teaspoon lemon extract
Equipment Needed
- 5 mini loaf pans (aluminum foil or regular)
- Mixing bowl
- Electric mixer or whisk
- Measuring cups and spoons
- Grease (cooking spray or shortening)
- Flour
Instructions
-
Preheat your oven to 350 degrees F (175 degrees C). This temperature is crucial for even baking and a moist crumb. Make sure your oven is properly calibrated for the best results.
-
Prepare your mini loaf pans. Generously grease each of the 5 mini loaf pans with cooking spray or shortening. Then, flour the pans, ensuring every surface is coated. This will prevent the breads from sticking and allow for easy removal after baking. Tap out any excess flour. This step is essential, even with non-stick pans.
-
Combine all ingredients in a large mixing bowl. Add the lemon cake mix, instant lemon pudding mix, water, oil, eggs, poppy seeds, and lemon extract.
-
Mix well. Using an electric mixer or a whisk, mix all the ingredients together until well combined. Be careful not to overmix, as this can result in a tough bread. Mix until just incorporated; a few small lumps are okay.
-
Fill the loaf pans. Carefully fill each loaf pan halfway with the batter. It’s important not to overfill the pans, as the breads will rise during baking. Filling them halfway ensures they have enough room to expand without overflowing.
-
Bake. Place the loaf pans in the preheated oven and bake for approximately 40 minutes. The exact baking time may vary depending on your oven, so it’s important to check for doneness.
-
Check for doneness. To check if the mini lemon breads are done, insert a toothpick into the center of one of the loaves. If the toothpick comes out clean or with only a few moist crumbs attached, the breads are done. If the toothpick comes out with wet batter, continue baking for a few more minutes and check again.
-
Cool. Remove the loaf pans from the oven and let them cool in the pans for about 10-15 minutes. This allows the breads to set slightly and makes them easier to remove.
-
Remove from pans. After cooling slightly, carefully remove the mini lemon breads from the pans and place them on a wire rack to cool completely.
-
Glaze (Optional). For an extra touch of sweetness and a beautiful presentation, consider making a simple lemon glaze. Mix powdered sugar with lemon juice until you reach a smooth, pourable consistency. Drizzle the glaze over the cooled breads.
-
Enjoy! Slice and serve these delightful mini lemon breads.
Expert Tips & Tricks
- Enhance the Lemon Flavor: To really amp up the lemon flavor, add the zest of one lemon to the batter. This will provide a bright, citrusy aroma and a more intense lemon taste.
- Prevent Sticking: Even with greasing and flouring, the breads can sometimes stick. For extra insurance, line the bottom of the loaf pans with parchment paper, leaving some overhang to easily lift the breads out.
- Make-Ahead Tip: These mini lemon breads can be made ahead of time. Once cooled, wrap them tightly in plastic wrap and store them at room temperature for up to 3 days, or freeze them for longer storage.
- Adjust Baking Time: If using a convection oven, reduce the baking time by a few minutes. Keep a close eye on the breads to prevent them from drying out.
- Revive Day-Old Bread: If the breads become slightly dry after a day or two, warm them slightly in the microwave or oven before serving. This will help to restore their moisture and flavor.
- Elevate the Presentation: Once cooled and glazed, top with a light dusting of powdered sugar, chopped nuts, or candied lemon peel for an elegant presentation.
Serving & Storage Suggestions
These mini lemon breads are perfect served as a light dessert, a sweet treat with afternoon tea, or as a thoughtful homemade gift. They can be served plain, with a dusting of powdered sugar, or with a lemon glaze.
- Room Temperature: Store cooled breads in an airtight container at room temperature for up to 3 days.
- Refrigerator: For longer storage, wrap the breads tightly in plastic wrap and store them in the refrigerator for up to a week.
- Freezer: To freeze the breads, wrap them individually in plastic wrap, then place them in a freezer bag. They can be stored in the freezer for up to 2 months. Thaw completely before serving.
- Reheating: To reheat, wrap a bread in foil and warm it in a 350°F (175°C) oven for about 10-15 minutes, or until heated through. Alternatively, microwave for short intervals until warm.
Nutritional Information
| Nutrient | Amount per Serving | % Daily Value |
|---|---|---|
| Calories | 804.4 kcal | N/A |
| Calories from Fat | 364 g | 45% |
| Total Fat | 40.5 g | 62% |
| Saturated Fat | 6.2 g | 30% |
| Cholesterol | 150.8 mg | 50% |
| Sodium | 995.5 mg | 41% |
| Total Carbohydrate | 101 g | 33% |
| Dietary Fiber | 2.5 g | 10% |
| Sugars | 44.7 g | N/A |
| Protein | 10.8 g | 21% |
Note: Nutritional information is an estimate and may vary based on specific ingredients and serving sizes.
Variations & Substitutions
- Gluten-Free: Use a gluten-free lemon cake mix to make this recipe gluten-free. Be sure to check that the instant lemon pudding mix is also gluten-free.
- Different Citrus: Substitute the lemon extract with orange or lime extract for a different citrus flavor. You can also use a different type of cake mix, such as a vanilla or yellow cake mix, and add lemon zest for the lemon flavor.
- Nuts: Add chopped nuts, such as pecans or walnuts, to the batter for added texture and flavor. About 1/2 cup of chopped nuts would be a good amount.
- Berries: Fold in fresh or frozen berries, such as blueberries or raspberries, for a burst of fruity flavor.
- Mini Muffins: Bake the batter in mini muffin tins for individual lemon bites. Reduce the baking time accordingly.
FAQs (Frequently Asked Questions)
Q: Can I use regular loaf pans instead of mini loaf pans?
A: Yes, you can use two regular-sized loaf pans. The baking time will likely need to be increased; check for doneness after about 50 minutes.
Q: Can I skip the poppy seeds?
A: Absolutely! The poppy seeds add a subtle texture and visual appeal, but they are not essential to the recipe.
Q: Why is it important to grease and flour the pans so carefully?
A: This prevents the breads from sticking to the pans, ensuring they come out cleanly and maintain their shape.
Q: My breads are browning too quickly. What should I do?
A: Tent the loaf pans with aluminum foil to prevent the tops from browning excessively while the insides continue to bake.
Q: Can I make a glaze without lemon juice?
A: Yes, you can use milk or water in place of lemon juice. The flavor will be less intensely lemon, but still sweet and delicious.
Final Thoughts
These mini lemon breads are more than just a recipe; they’re a taste of nostalgia, a sweet reminder of simpler times and cherished memories. Baking them is a way to connect with the past, to recreate the warmth and love that my grandmother poured into each tiny loaf. I encourage you to try this recipe and share these delightful treats with your loved ones. Whether you bake them for a special occasion or simply as a gesture of affection, they are sure to bring a smile to anyone’s face. Don’t hesitate to experiment with variations and make this recipe your own! Enjoy the baking journey and the delicious results!