
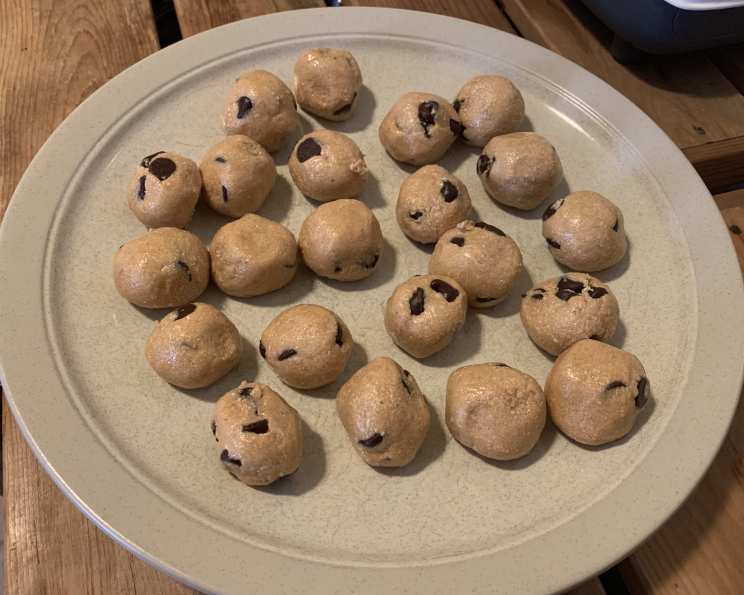
Grandma’s Peanut Butter Balls: A Nostalgic Treat
The aroma of peanut butter still instantly transports me back to Grandma’s cozy kitchen. It was always filled with warmth, laughter, and the promise of a sweet treat. While elaborate pies and cakes occasionally graced her table, it was her simple peanut butter balls that truly captured my heart. She’d let us roll them, sticky fingers and all, and I remember feeling so proud presenting my imperfect spheres on a platter. These weren’t just candies; they were edible nuggets of pure, unadulterated love.
Recipe Overview
- Prep Time: 10 minutes
- Cook Time: 0 minutes
- Total Time: 10 minutes
- Yields: 24-36 balls
- Dietary Type: No-Bake
Ingredients
- ½ cup peanut butter (creamy or chunky, your preference!)
- ½ cup honey
- 1 cup powdered milk
- ½ cup chocolate chips (semi-sweet, milk chocolate, or dark chocolate – your choice!)
Equipment Needed
- Mixing bowl
- Measuring cups
- Measuring spoons
- Spoon or spatula for mixing
- Baking sheet or plate
- Wax paper or parchment paper (optional, for easier cleanup)
Instructions
-
In a medium-sized mixing bowl, combine the peanut butter and honey. It’s easiest if the peanut butter is at room temperature – this will help everything mix together smoothly.
-
Using a spoon or spatula, mix the peanut butter and honey until they are well combined and form a uniform mixture. Don’t worry if it’s a bit sticky at this point.
-
Gradually add the powdered milk to the peanut butter and honey mixture. Begin by adding about half of the powdered milk and mix it in thoroughly.
-
Continue adding the remaining powdered milk, a little at a time, mixing well after each addition. As you add the powdered milk, the mixture will become thicker and less sticky.
-
Once all the powdered milk has been incorporated, mix in the chocolate chips. Gently fold them into the mixture until they are evenly distributed.
-
Now it’s time to form the peanut butter balls. Take about a tablespoon of the mixture and roll it between your palms to form a ball approximately 1 inch in diameter.
-
Place the formed peanut butter ball on a baking sheet or plate. If desired, line the baking sheet or plate with wax paper or parchment paper to prevent sticking, but it’s usually not necessary.
-
Repeat steps 6 and 7 until all of the peanut butter mixture has been used. You should end up with approximately 24 to 36 peanut butter balls, depending on the size you make them.
-
Once all of the peanut butter balls have been formed, refrigerate them for at least 30 minutes to allow them to firm up. This will make them easier to handle and prevent them from becoming too soft.
-
After refrigerating, the peanut butter balls are ready to enjoy! Store any leftovers in an airtight container in the refrigerator.
Expert Tips & Tricks
-
Peanut Butter Selection: The type of peanut butter you use will affect the final texture and flavor. Creamy peanut butter will result in a smoother ball, while chunky peanut butter will add a bit of crunch. Natural peanut butter can also be used, but be sure to stir it well before measuring to ensure proper consistency.
-
Honey Consistency: If your honey is very thick or crystallized, you can gently warm it in the microwave for a few seconds to make it easier to mix.
-
Powdered Milk Addition: Adding the powdered milk gradually is key to preventing clumps and ensuring a smooth mixture.
-
Melting Chocolate Chips (Optional): For an extra-indulgent treat, you can melt the chocolate chips and dip the peanut butter balls in the melted chocolate. Simply melt the chocolate chips in a double boiler or microwave, then dip each ball in the chocolate and place it on wax paper to set.
-
Preventing Sticking: If the peanut butter mixture is too sticky to roll easily, try lightly dampening your hands with water before forming the balls.
-
Adjusting Sweetness: If you prefer a less sweet treat, you can reduce the amount of honey slightly.
Serving & Storage Suggestions
These peanut butter balls are perfect as a quick snack, a sweet treat after dinner, or a delightful addition to a party platter. Serve them chilled straight from the refrigerator.
To store, place the peanut butter balls in an airtight container and refrigerate them. They will keep in the refrigerator for up to a week. For longer storage, you can freeze them for up to a month. Thaw them in the refrigerator before serving. They’re best served cold, but can be eaten at room temperature if you prefer.
Nutritional Information
Here’s an approximate nutritional breakdown per serving (assuming 30 balls):
| Nutrient | Amount per Serving | % Daily Value |
|---|---|---|
| Calories | 96 kcal | 5% |
| Total Fat | 5.2g | 7% |
| Saturated Fat | 2.1g | 10% |
| Cholesterol | 5.2mg | 1% |
| Sodium | 45.1mg | 2% |
| Total Carbohydrate | 11.1g | 3% |
| Dietary Fiber | 0.5g | 2% |
| Sugars | 10.2g | 20% |
| Protein | 2.9g | 6% |
Note: Nutritional information is an estimate and may vary based on specific ingredients and portion sizes.
Variations & Substitutions
-
Nut Butter Alternatives: Experiment with different nut butters like almond butter, cashew butter, or sunflower seed butter for a unique flavor.
-
Sweetener Swaps: Replace the honey with maple syrup or agave nectar for a different sweetener profile.
-
Chocolate Chip Alternatives: Use white chocolate chips, butterscotch chips, or even chopped nuts instead of chocolate chips.
-
Protein Boost: Add a scoop of your favorite protein powder to the mixture for a boost of protein.
-
Coconut Flakes: Roll the finished peanut butter balls in shredded coconut for added texture and flavor.
-
Spices: Add a pinch of cinnamon, nutmeg, or ginger to the mixture for a warm and festive twist.
-
Vegan Option: Substitute the honey with agave or maple syrup, and ensure your chocolate chips are dairy-free to make this recipe completely vegan.
FAQs (Frequently Asked Questions)
Q: Can I use natural peanut butter for this recipe?
A: Yes, you can! Just make sure to stir it well before measuring, as the oil tends to separate in natural peanut butter.
Q: My peanut butter mixture is too sticky. What should I do?
A: Add a little more powdered milk, one tablespoon at a time, until the mixture reaches a less sticky consistency.
Q: Can I freeze these peanut butter balls?
A: Absolutely! Place them in an airtight container and freeze for up to a month. Thaw in the refrigerator before serving.
Q: How long will these peanut butter balls last in the refrigerator?
A: They will stay fresh for up to a week when stored in an airtight container in the refrigerator.
Q: Can I make these without chocolate chips?
A: Yes, you can omit the chocolate chips or substitute them with chopped nuts or dried fruit.
Final Thoughts
Grandma’s peanut butter balls are a testament to the fact that the simplest things in life are often the most satisfying. This recipe is more than just a collection of ingredients; it’s a cherished memory, a warm embrace, and a reminder of the love that can be found in a homemade treat. I encourage you to try this recipe and experience the joy of sharing these delightful peanut butter balls with your loved ones. Feel free to add your own personal touches and make it your own family tradition. And don’t forget to share your creations and feedback – I’d love to hear how they turned out!