
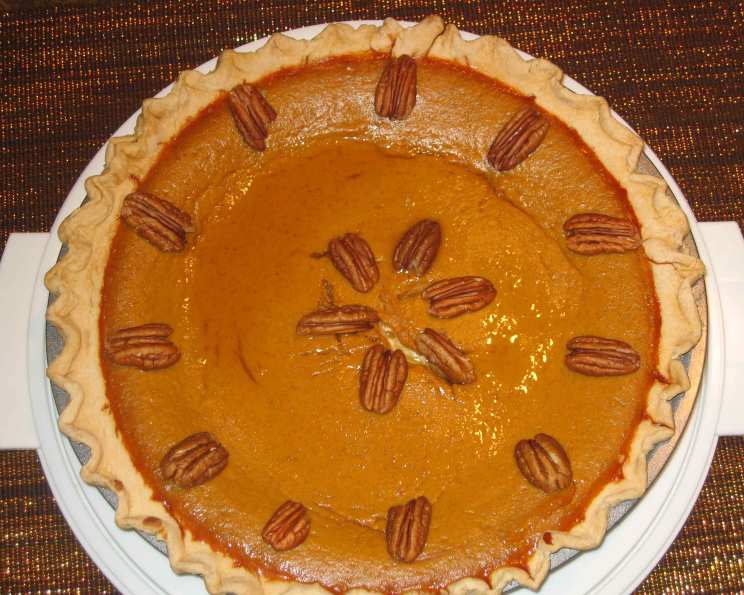
Grandma’s Pumpkin Pie: A Slice of Home
The aroma alone transports me back to crisp autumn afternoons in my grandmother’s kitchen. As soon as October arrived, the scent of cinnamon and ginger would mingle with the earthy fragrance of baking pumpkin, a promise of the holiday season to come. Grandma’s pumpkin pie wasn’t just dessert; it was a warm hug, a tradition passed down through generations, and a symbol of love baked into every slice.
Recipe Overview
- Prep Time: 25 minutes
- Cook Time: 1 hour 10 minutes
- Total Time: 1 hour 35 minutes
- Servings: 16
- Yield: 2 pies
- Dietary Type: Vegetarian
Ingredients
- 1 (29 ounce) can pumpkin
- 1 1/2 cups white sugar
- 2 teaspoons ground cinnamon
- 2 teaspoons ground ginger
- 1/2 teaspoon ground cloves
- 4 eggs, slightly beaten
- 3 cups milk (1 can evaporated milk 12 oz size plus additional water to make a total of 3 cups. Warm this slightly)
- 2 unbaked 9-inch pie crusts (homemade or store-bought)
Ingredient Notes: You can use pumpkin pie spice instead of individual spices. Start with 2-3 teaspoons and adjust to taste. For a richer flavor, substitute half-and-half or heavy cream for some of the milk.
Equipment Needed
- Large mixing bowl
- Whisk
- Measuring cups and spoons
- Two 9-inch pie pans
- Oven
- Knife or toothpick for testing doneness
- Cloth strips or foil for crust protection (optional)
- Pie shield (optional)
Instructions
-
Preheat your oven to 450 degrees Fahrenheit (232 degrees Celsius). This initial high temperature helps set the crust.
-
In a large mixing bowl, combine the pumpkin puree, white sugar, ground cinnamon, ground ginger, and ground cloves. Whisk thoroughly until all ingredients are evenly distributed and the mixture is smooth. This ensures that the spices are well incorporated and the pumpkin flavor is consistent throughout the pie.
-
Add the slightly beaten eggs to the pumpkin mixture. Gently whisk the eggs in until they are fully incorporated. Be careful not to overmix at this stage, as it can lead to a tougher pie filling.
-
Gradually add the warmed milk to the mixture, whisking constantly to prevent lumps from forming. Pour slowly to ensure a smooth and creamy texture. Warmed milk blends more easily and helps prevent curdling.
-
Place your two unbaked 9-inch pie crusts into the pie pans. Whether you’re using homemade crusts or a store-bought variety, make sure they are snug in the pans and crimped or decorated around the edges.
-
Evenly distribute the pumpkin mixture between the two prepared pie crusts. Pour carefully to avoid spilling.
-
To prevent the crust from burning, especially during the initial high-heat baking, wrap the edges with 1 1/2-inch strips of cloth or foil. Alternatively, use a pie shield. These methods protect the delicate crust from over-browning and ensure a beautifully golden finish.
-
Place the pies into the preheated oven and bake at 450 degrees Fahrenheit (232 degrees Celsius) for 10 minutes. This initial blast of heat helps to set the crust and give it a good start.
-
After 10 minutes, reduce the oven temperature to 350 degrees Fahrenheit (175 degrees Celsius) and continue baking for up to 1 hour, or until the filling is set. Baking at a lower temperature for a longer time ensures that the filling cooks evenly without cracking or becoming overly browned.
-
Test for doneness by inserting a knife or toothpick into the center of the pie. If it comes out clean, the pie is ready. If there is still wet filling clinging to the knife, continue baking for a few more minutes and test again.
-
Remove the pies from the oven and let them cool completely on a wire rack before serving. Cooling allows the filling to set further and prevents it from being runny when sliced.
Expert Tips & Tricks
- For a more intense pumpkin flavor, roast your own pumpkin instead of using canned puree. Halve a sugar pumpkin, scoop out the seeds, and roast it cut-side down at 375°F (190°C) until tender, about an hour. Let it cool, then scoop out the flesh and puree it.
- Blind bake your pie crust for 10-15 minutes before adding the filling. This helps prevent a soggy bottom crust.
- To avoid cracks in the filling, place a pan of water on the bottom rack of the oven while baking. The steam helps to keep the filling moist and prevents it from drying out too quickly.
- If the crust starts to brown too quickly, tent the pie with foil.
- For a smooth filling, use an immersion blender to blend the filling ingredients before pouring it into the crust.
- Add a tablespoon of molasses to the filling for a deeper, richer flavor.
- If you don’t have ground cloves, you can substitute with a pinch of allspice.
Serving & Storage Suggestions
Grandma’s pumpkin pie is best served chilled or at room temperature. A dollop of whipped cream or a scoop of vanilla ice cream makes a delightful addition. You can also dust the top with a sprinkle of cinnamon or nutmeg for a festive touch.
Leftover pie can be stored in the refrigerator for up to 3-4 days. Cover it loosely with plastic wrap or foil to prevent it from drying out. For longer storage, you can freeze the pie. Wrap it tightly in plastic wrap and then in foil. It can be stored in the freezer for up to 2-3 months. Thaw in the refrigerator overnight before serving.
Nutritional Information
Here is an estimate of the nutritional information per serving:
| Nutrient | Amount per Serving | % Daily Value |
|---|---|---|
| Calories | 135 kcal | N/A |
| Calories from Fat | 27 g | 20% |
| Total Fat | 3 g | 4% |
| Saturated Fat | 1.5 g | 7% |
| Cholesterol | 59.3 mg | 19% |
| Sodium | 40.8 mg | 1% |
| Total Carbohydrate | 24.7 g | 8% |
| Dietary Fiber | 0.5 g | 1% |
| Sugars | 19.5 g | N/A |
| Protein | 3.6 g | 7% |
Note: Nutritional information is an estimate and may vary based on specific ingredients and portion sizes.
Variations & Substitutions
- Gluten-Free: Use a gluten-free pie crust.
- Dairy-Free: Substitute the milk with almond milk, soy milk, or coconut milk.
- Vegan: Use a vegan pie crust and replace the eggs with a flax egg (1 tablespoon ground flaxseed mixed with 3 tablespoons water per egg, let sit for 5 minutes to thicken).
- Spiced Up: Add a pinch of cayenne pepper to the filling for a little heat.
- Maple Syrup Sweetened: Substitute the white sugar with maple syrup. You may need to adjust the amount of liquid.
FAQs (Frequently Asked Questions)
Q: Can I use fresh pumpkin instead of canned?
A: Yes, absolutely! Roasting your own pumpkin adds a wonderful depth of flavor. Just make sure to puree it smoothly before adding it to the other ingredients.
Q: How do I prevent the pie crust from getting soggy?
A: Blind baking the crust and avoiding overfilling it are the best ways to prevent a soggy bottom.
Q: Can I make this pie ahead of time?
A: Yes, pumpkin pie is a great make-ahead dessert. It can be stored in the refrigerator for up to 3 days.
Q: My pie filling cracked. What did I do wrong?
A: Cracking is often caused by baking the pie at too high a temperature or for too long. Using a water bath can help prevent cracks.
Q: Can I freeze pumpkin pie?
A: Yes, you can freeze baked pumpkin pie for up to 2-3 months. Wrap it tightly in plastic wrap and foil to prevent freezer burn. Thaw overnight in the refrigerator.
Final Thoughts
Grandma’s pumpkin pie is more than just a recipe; it’s a memory, a tradition, and a taste of home. I encourage you to try this recipe and create your own memories in the kitchen. Don’t be afraid to add your personal touch or experiment with variations. Whether you’re a seasoned baker or a beginner, the warmth and comfort of a homemade pumpkin pie are sure to bring joy to your table. Serve it with a cup of hot coffee or spiced cider and share it with the ones you love. And most importantly, enjoy every delicious bite!