
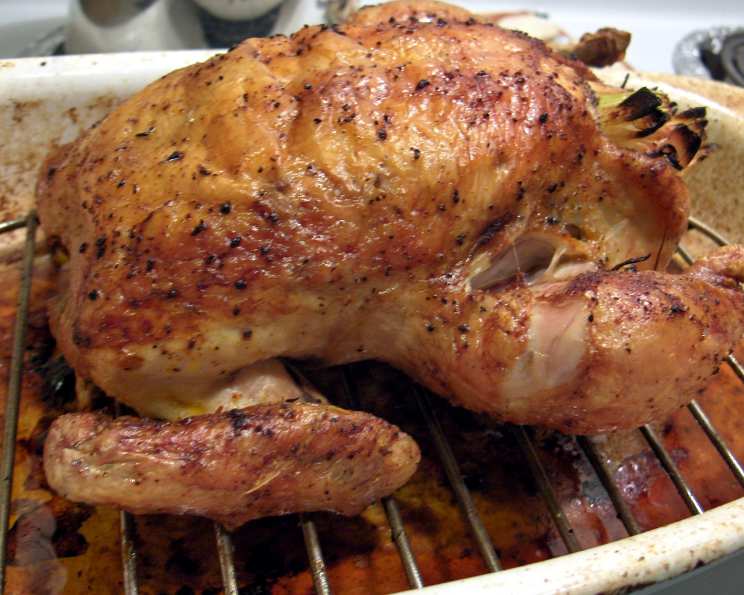
Grandma’s Simple Roast Chicken
The scent of roasting chicken is more than just a smell; it’s a memory. I can almost hear my grandmother humming in the kitchen, the sizzle of fat in the pan, and the promise of a comforting meal shared with loved ones. While this particular recipe hails from a well-loved magazine, it embodies that same feeling of simple, honest cooking that I associate with my grandmother’s kitchen – a culinary hug on a plate.
Recipe Overview
- Prep Time: 15 minutes
- Cook Time: 1 hour
- Total Time: 1 hour 15 minutes
- Servings: 6-8
- Dietary Type: Gluten-Free, Dairy-Free
Ingredients
- 1 (4-5 lb) roasting chicken
- ½ teaspoon salt
- ½ teaspoon black pepper
- ½ teaspoon paprika
- 1 small onion, trimmed and quartered
- 1 celery stalk, cut into 3-inch pieces
- 1 carrot, cut into 3-inch pieces
- 1 garlic clove
- 1 bay leaf
- Cooking spray
Equipment Needed
- Broiler pan (or a rack inside another pan)
- Small bowl
- Meat thermometer
- Kitchen twine (optional)
Instructions
-
Preheat your oven to 400 degrees F (200 degrees C). Make sure your oven rack is positioned in the center.
-
Remove any giblets or innards from the cavity of the chicken and discard. Rinse the chicken thoroughly under cold running water, both inside and out. Pat the chicken dry with paper towels; this step is crucial for achieving crispy skin. Trim any excess fat around the cavity opening.
-
In a small bowl, combine the salt, pepper, and paprika. Mix well to ensure the spices are evenly distributed.
-
Sprinkle the salt, pepper, and paprika mixture all over the chicken, both inside and out. Be generous and make sure to coat every part of the skin. Don’t forget to season the cavity as well!
-
Place the quartered onion, celery pieces, carrot pieces, whole garlic clove, and bay leaf inside the cavity of the chicken. These aromatics will infuse the chicken with flavor as it roasts.
-
(Optional) Tie the ends of the chicken’s legs together with kitchen twine. This helps the chicken cook more evenly and makes for a more presentable final product. If you don’t have twine or don’t want to bother, it will still turn out delicious. Lift the wing tips up and over the back and tuck them under the chicken. This helps prevent the wing tips from burning during roasting.
-
Coat a broiler pan (or a rack inside another pan) with cooking spray. Place the chicken, breast side up, on the prepared pan. Using a broiler pan allows for better air circulation and helps the skin crisp up nicely, but a regular roasting pan with a rack works just fine too.
-
Bake at 400 degrees F (200 degrees C) for one hour, or until a meat thermometer inserted into the thickest part of the thigh (without touching bone) registers 180 degrees F (82 degrees C). Cooking times may vary depending on your oven, so it’s important to use a thermometer to ensure the chicken is cooked through. If the skin starts to brown too quickly, tent the chicken loosely with foil during the last 15-20 minutes of cooking.
-
Once the chicken reaches 180 degrees F (82 degrees C), remove it from the oven and cover it loosely with foil. Let the chicken rest for about 10 minutes before carving. This allows the juices to redistribute, resulting in a more tender and flavorful bird.
-
After resting, remove the vegetables from inside the chicken and discard them. They have done their job of flavoring the chicken, but they are generally not very appetizing to eat.
Expert Tips & Tricks
- Brining: For an extra juicy and flavorful chicken, consider brining it before roasting. Submerge the chicken in a salt and sugar water solution for several hours or overnight. This will help the chicken retain moisture during cooking.
- Dry Brining: An easier alternative to wet brining is dry brining. A day or two before roasting, liberally salt the chicken all over, including under the skin of the breast. Place it uncovered in the refrigerator. The salt will draw out moisture, then get reabsorbed into the meat, seasoning it from the inside out.
- Herbs: Add fresh herbs like rosemary, thyme, or sage to the cavity along with the vegetables for an even more aromatic chicken.
- Lemon: Stuff half a lemon into the cavity for added citrus flavor.
- Veggies in the Pan: Instead of discarding the cavity vegetables, roughly chop some carrots, potatoes, and onions and roast them in the pan with the chicken. They’ll soak up all the delicious chicken drippings.
Serving & Storage Suggestions
Serve the roast chicken immediately after carving. Pair it with your favorite sides, such as mashed potatoes, roasted vegetables, a green salad, or stuffing.
Leftover roast chicken can be stored in an airtight container in the refrigerator for up to 3-4 days. You can also freeze cooked chicken for up to 2-3 months.
To reheat leftover chicken, you can bake it in a preheated oven at 350 degrees F (175 degrees C) until heated through, or microwave it in short intervals, adding a little water or broth to prevent it from drying out. Leftover chicken is also fantastic in sandwiches, salads, soups, and casseroles.
Nutritional Information
| Nutrient | Amount per Serving | % Daily Value |
|---|---|---|
| Calories | 433.6 kcal | N/A |
| Calories from Fat | 279 g | 64% |
| Total Fat | 31 g | 47% |
| Saturated Fat | 8.9 g | 44% |
| Cholesterol | 142.6 mg | 47% |
| Sodium | 339.7 mg | 14% |
| Total Carbohydrate | 2.7 g | 0% |
| Dietary Fiber | 0.7 g | 2% |
| Sugars | 1.1 g | N/A |
| Protein | 33.8 g | 67% |
Variations & Substitutions
- Spatchcock Chicken: For a quicker roasting time, spatchcock the chicken (remove the backbone and flatten it). This allows the chicken to cook more evenly and quickly.
- Different Seasonings: Experiment with different spice blends to customize the flavor of your chicken. Try Italian seasoning, poultry seasoning, or a Cajun spice mix.
- Citrus Herb Chicken: Replace the cavity vegetables with lemon and herbs like rosemary and thyme for a bright, fragrant chicken.
- Sheet Pan Chicken and Veggies: Roast the chicken on a sheet pan with a variety of vegetables like potatoes, carrots, broccoli, and bell peppers for a complete meal.
FAQs (Frequently Asked Questions)
Q: How do I know when the chicken is done?
A: The best way to check for doneness is to use a meat thermometer. Insert it into the thickest part of the thigh, without touching the bone. The internal temperature should reach 180 degrees F (82 degrees C).
Q: My chicken skin isn’t crispy enough. What can I do?
A: Make sure the chicken skin is completely dry before roasting. You can also increase the oven temperature slightly during the last 15-20 minutes of cooking to help crisp up the skin.
Q: Can I use bone-in, skin-on chicken pieces instead of a whole chicken?
A: Yes, you can. Adjust the cooking time accordingly, and make sure the internal temperature reaches 165 degrees F (74 degrees C).
Q: Can I make this recipe ahead of time?
A: You can prep the chicken by seasoning it and stuffing the cavity with vegetables a few hours ahead of time. However, it’s best to roast the chicken just before serving for optimal flavor and texture.
Q: What can I do with the leftover chicken carcass?
A: Use the leftover chicken carcass to make chicken broth! Simply simmer it in a large pot with water, vegetables, and herbs for a few hours.
Final Thoughts
So, there you have it: a recipe that might not actually be from Grandma’s kitchen, but certainly evokes the same warm, comforting feeling. This roast chicken is a testament to the fact that simple ingredients and straightforward techniques can yield incredibly delicious results. Don’t be afraid to experiment with different herbs and spices to make it your own. Gather your loved ones, share a delicious meal, and create some new memories. And please, let me know how it turns out!