
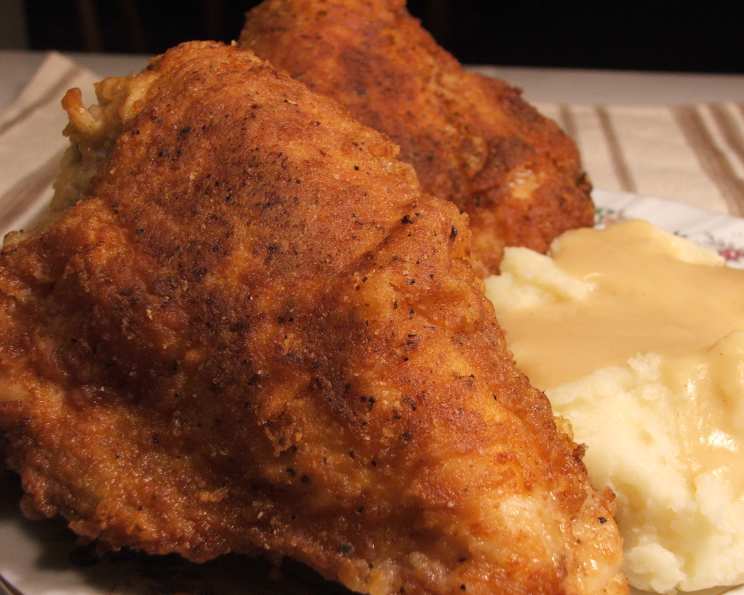
Grandma’s Southern Fried Chicken
The scent still lingers in my memory: a blend of hot oil, seasoned flour, and pure, unadulterated comfort. Every Sunday at Grandma’s house meant the rhythmic sizzle of chicken in her well-worn cast iron skillet. She’d hum softly, a symphony of love and tradition, as she turned each piece, its golden crust promising a taste of heaven. It wasn’t just food; it was a connection to family, a taste of home that transcended generations.
Recipe Overview
- Prep Time: 2 hours 15 minutes
- Cook Time: 45 minutes
- Total Time: 3 hours
- Servings: 4-6
- Dietary Type: Varies (Not inherently Gluten-Free, Dairy-Free, or Vegan)
Ingredients
- 1 (2 1/2-3 lb) broiler-fryer chicken, cut up
- Buttermilk, enough to cover the chicken
- 1 tablespoon hot sauce
- Butter flavor shortening, for frying
- 1 cup all-purpose flour
- 1 tablespoon garlic powder
- 1 teaspoon onion powder
- 1 teaspoon paprika
- 1 teaspoon Italian seasoning
- 1/8 teaspoon chili powder
- 1/2 teaspoon sugar
- 3 teaspoons seasoning salt
- 1/8 teaspoon poultry seasoning
- 1 1/4 teaspoons black pepper
- 1/4 teaspoon ground cayenne red pepper powder
- 1/4 teaspoon dried thyme, crushed between your fingers when adding
- 1/4 teaspoon dried basil
Equipment Needed
- Deep bowl
- Cast iron skillet
- Brown paper lunch sack
- Waxed paper
- Tongs
- Sharp spatula
- Brown paper grocery bags or paper towels (for draining)
- Cookie sheet (optional, for keeping warm)
Instructions
-
Thoroughly wash the chicken pieces and place them in a deep bowl.
-
Cover the chicken completely with buttermilk and hot sauce. This marinade tenderizes the chicken and adds a subtle tang and warmth. Refrigerate for at least 2 hours, or even longer for maximum flavor penetration.
-
In a cast iron skillet, melt butter flavor shortening to a depth of about 1 inch. The amount of shortening ensures even frying and a crispy crust.
-
Heat the shortening to approximately 370ºF (188°C). While a thermometer isn’t strictly necessary, aim for medium heat on your stovetop. The shortening should be hot enough to sizzle immediately when the chicken is added, but not so hot that it smokes. If it starts to smoke, immediately reduce the heat.
-
In a doubled brown paper lunch sack, combine all the dry ingredients: flour, garlic powder, onion powder, paprika, Italian seasoning, chili powder, sugar, seasoning salt, poultry seasoning, black pepper, cayenne pepper, thyme, and basil. Seal the bag and shake well to ensure the spices are evenly distributed. The paper bag allows for easy coating and minimizes mess.
-
Remove the chicken pieces from the buttermilk marinade. Don’t discard the buttermilk right away! You’ll need it again shortly.
-
Season the chicken lightly with additional seasoning salt and pepper. This adds a base layer of flavor before the flour coating.
-
Place the chicken in the flour mixture-filled bag, one piece at a time. Shake the bag vigorously until the chicken is thoroughly coated with the flour mixture. Ensure every nook and cranny is covered.
-
Dip each flour-coated chicken piece back into the buttermilk, then coat with the flour mixture once again. This double coating creates a thicker, crispier crust.
-
Shake off any excess flour. This prevents the shortening from becoming overly murky and ensures a cleaner, crisper fry.
-
Place the coated chicken pieces on waxed paper and let them rest for 15 minutes, or until the coating appears dry. This allows the coating to adhere better during frying.
-
Gently place the chicken, skin side down, into the hot shortening. Be careful not to overcrowd the skillet; this will lower the oil temperature and result in soggy chicken. Work in batches if necessary.
-
Fry the chicken until it is golden brown on the bottom (skin) side. This is the “good” side that you want to develop a beautiful color and crisp texture.
-
When the chicken pieces are golden brown on one side, turn them over. Cover the skillet with a tight-fitting lid. Reduce the heat to a simmer.
-
Continue cooking, turning the chicken pieces occasionally, for 35 to 40 minutes, or until the juices run clear when pierced with a fork and the chicken is tender. The lid helps to cook the chicken evenly and prevent it from drying out. The initial “good” side should be facing up for the first 10 minutes after the lid goes on, then flipped back to skin-down for another 10, then skin-up for the final 10-15.
-
Uncover the skillet and cook for an additional 5 minutes for an extra-crispy crust. If you prefer a softer crust, skip this step.
-
Remove the fried chicken from the skillet immediately and drain it on brown paper grocery bags or paper towels. Grandma always used brown paper bags, and I find they work exceptionally well for absorbing excess oil.
-
(Optional): If you’re making a large batch of chicken or want to keep it warm until serving, place the drained chicken on a brown paper bag-lined cookie sheet in a very low oven.
Expert Tips & Tricks
- Don’t overcrowd the pan: Frying in batches is crucial for maintaining the oil temperature and achieving crispy results.
- Temperature Control is Key: Pay close attention to the oil temperature. If it’s too low, the chicken will be greasy; too high, and the outside will burn before the inside is cooked.
- Spice it Up: Adjust the amount of cayenne pepper to control the heat level.
- Double Dredge is Essential: The double coating of flour ensures a thick, crispy crust that won’t fall off during frying.
- Don’t use a fork to turn the chicken: Piercing the chicken with a fork will cause the juices to run out, resulting in dry meat. Always use tongs and a sharp spatula to prevent sticking and preserve the flavorful breading.
Serving & Storage Suggestions
Serve Grandma’s Southern Fried Chicken hot, straight from the skillet (or oven!), alongside classic Southern sides like mashed potatoes, collard greens, cornbread, or coleslaw. Leftover chicken can be stored in an airtight container in the refrigerator for up to 3-4 days. For longer storage, freeze the chicken for up to 2 months. Reheat in the oven at 350°F (175°C) until warmed through for the best results. Microwaving is possible but may result in a less crispy crust.
Nutritional Information
(Estimated values; actual values may vary based on specific ingredients and portion sizes)
| Nutrient | Amount per Serving | % Daily Value |
|---|---|---|
| Calories | 741 kcal | – |
| Total Fat | 43 g | 66% |
| Saturated Fat | 12 g | 61% |
| Cholesterol | 213 mg | 70% |
| Sodium | 296 mg | 12% |
| Total Carbohydrate | 28 g | 9% |
| Dietary Fiber | 2 g | 6% |
| Sugars | 1 g | – |
| Protein | 57 g | 113% |
Variations & Substitutions
- Gluten-Free Fried Chicken: Substitute the all-purpose flour with a gluten-free blend, such as a mix of rice flour, tapioca starch, and potato starch.
- Spicy Fried Chicken: Increase the amount of cayenne pepper in the flour mixture for a fiery kick. You can also add a pinch of smoked paprika for a deeper flavor.
- Buttermilk Substitute: If you don’t have buttermilk on hand, you can make a quick substitute by adding 1 tablespoon of lemon juice or white vinegar to 1 cup of milk. Let it sit for 5 minutes to curdle slightly.
- Chicken Strips: Use boneless, skinless chicken breasts cut into strips for a quicker-cooking, kid-friendly version. Follow the alternate cooking instructions provided in the original recipe.
- Herb Variations: Experiment with different herbs in the flour mixture, such as rosemary, oregano, or sage, to create unique flavor profiles.
FAQs (Frequently Asked Questions)
Q: Can I use olive oil instead of shortening for frying?
A: While olive oil can be used, butter-flavored shortening is recommended for its high smoke point and the flavor it imparts to the chicken. Olive oil might not achieve the same crispy texture.
Q: How do I know when the chicken is fully cooked?
A: The internal temperature of the chicken should reach 165°F (74°C). You can also check for doneness by piercing the chicken with a fork; the juices should run clear, not pink.
Q: My fried chicken is often soggy. What am I doing wrong?
A: Soggy chicken is usually caused by overcrowding the pan, frying at too low a temperature, or not allowing the chicken to drain properly after frying. Ensure you fry in batches, maintain the correct oil temperature, and drain the chicken on paper bags or towels.
Q: Can I make this recipe ahead of time?
A: While fried chicken is best served fresh, you can prepare the chicken up to the point of frying and store it in the refrigerator for a few hours. Bring it to room temperature for about 30 minutes before frying.
Q: What are the best side dishes to serve with fried chicken?
A: Classic Southern sides like mashed potatoes, coleslaw, mac and cheese, collard greens, cornbread, and biscuits are all excellent choices.
Final Thoughts
There’s just something special about the crispy, savory delight of homemade fried chicken, especially when it’s inspired by cherished family recipes. Don’t be intimidated by the process; take your time, follow the steps carefully, and embrace the aroma that fills your kitchen. Gather your loved ones, share this comforting dish, and create new memories around the table. I encourage you to try this recipe and experience a taste of Southern comfort that’s been passed down through generations. I hope you enjoy this dish as much as my family does!