
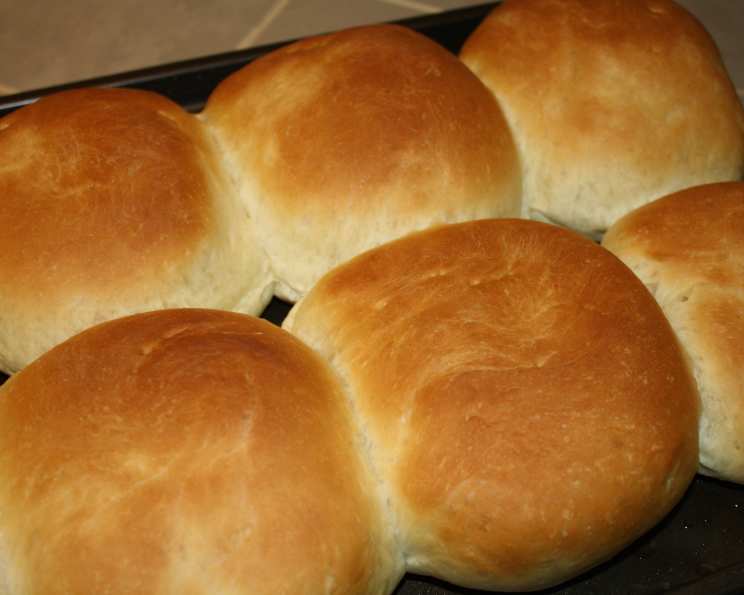
Grandpa’s Bread: A Taste of Home
The scent of yeast and warm flour is a time machine for me. It instantly whisks me back to Grandpa’s cozy kitchen, a place perpetually bathed in sunlight and the aroma of baking bread. I can almost feel the warmth radiating from the ancient, cast-iron stove as he’d pull out a loaf, its crust a perfect shade of golden brown. That first slice, slathered with butter that melted instantly, was pure, unadulterated happiness. He always said, “Bread made with love tastes the sweetest,” and Grandpa’s bread was a testament to that simple truth.
Recipe Overview
- Prep Time: 20 minutes
- Rise Time: 2 hours 30 minutes
- Cook Time: 30 minutes
- Total Time: 3 hours 20 minutes
- Yield: 1 loaf
- Dietary Type: Vegetarian
Ingredients
- 3 1/2 cups unbleached flour
- 1/2 cup wheat bran
- 2 teaspoons salt
- 1/4 ounce fast-rising yeast (Quick or Rapid)
- 1 1/2 cups warm water
- Cornmeal, for dusting
Equipment Needed
- Food processor (optional, but recommended)
- Large mixing bowl
- Plastic wrap
- Cookie sheet
- Warm, damp towel
- Sharp knife or lame
Instructions
- Begin by combining the dry ingredients in your food processor. This ensures that the flour, wheat bran, salt, and fast-rising yeast are evenly distributed. If you don’t have a food processor, you can use a large mixing bowl. In either case, pulse or whisk the ingredients together for about 30 seconds to thoroughly combine.
- With the food processor running on low, slowly add the warm water until the dough begins to bind together. If mixing by hand, gradually add the water while stirring with a wooden spoon until a shaggy dough forms.
- Turn the dough out onto a lightly floured board. Knead it gently for 3-4 times. This initial kneading helps to develop the gluten structure.
- Shape the dough into a ball and place it in a warm bowl. Cover the bowl with plastic wrap to prevent the dough from drying out. Let it rise in a warm place for approximately 30 minutes. This first rise allows the yeast to activate and begin the fermentation process. A slightly warm oven (turned off!) or a sunny spot in your kitchen works well.
- After the first rise, remove the plastic wrap and knead the dough again, this time for approximately 10 times. This second kneading helps to redistribute the yeast and further develop the gluten.
- Return the dough to the warm bowl, cover it again with plastic wrap, and let it rise for a second time, this time for 2 hours. This longer rise is crucial for developing the flavor and texture of the bread.
- While the dough is rising for the second time, prepare your cookie sheet by sprinkling it generously with cornmeal. The cornmeal will prevent the bread from sticking and add a pleasant texture to the bottom crust.
- Once the second rise is complete, gently deflate the dough and knead it until it is smooth. Shape the dough into a loaf.
- Place the shaped loaf on the prepared cookie sheet. Cover the loaf with a warm, damp towel and let it rest for another 30 minutes. This final rest allows the dough to relax and rise slightly before baking.
- Preheat your oven to 400 degrees Fahrenheit (200 degrees Celsius). Make sure your oven is fully preheated before placing the bread inside.
- Remove the towel and use a sharp knife or lame to score the top of the loaf several times. Scoring allows the bread to expand evenly during baking and prevents it from cracking unpredictably. Make swift, shallow cuts.
- Bake the loaf in the preheated oven for approximately 30 minutes, or until the crust is a deep golden brown and the internal temperature reaches 200-210°F (93-99°C). You can test for doneness by inserting a thermometer into the center of the loaf. If you don’t have a thermometer, you can tap the bottom of the loaf; it should sound hollow.
- Remove the bread from the oven and let it cool on a wire rack before slicing and serving.
Expert Tips & Tricks
- Achieving the Perfect Crust: For a truly crispy crust, you can create steam in the oven during the first 10 minutes of baking. Place a cast-iron skillet on the bottom rack of your oven while it preheats. When you put the bread in, carefully pour a cup of hot water into the skillet. The steam will help create a beautiful, crackly crust. Be careful not to burn yourself!
- Kneading Technique: Don’t over-knead the dough. Over-kneading can result in a tough loaf. Knead just until the dough is smooth and elastic.
- Yeast Activation: Make sure your water is warm, not hot. Hot water can kill the yeast, preventing the bread from rising. Aim for a temperature of around 105-115°F (40-46°C).
- Room Temperature Matters: The temperature of your kitchen will affect the rising time. On a warm day, the dough will rise faster. On a cold day, it will take longer. Be patient and adjust the rising time accordingly.
- Flavor Boost: Consider adding a tablespoon of honey or molasses to the dough for a subtle sweetness and richer flavor.
- Make Ahead: The dough can be made ahead of time and stored in the refrigerator for up to 24 hours. This will slow down the rising process and allow the flavors to develop even further. Let the dough come to room temperature for about 30 minutes before shaping and baking.
Serving & Storage Suggestions
Grandpa’s bread is best enjoyed fresh, warm from the oven, with a generous slather of butter. It’s also delicious with soups, stews, or as a base for sandwiches. For a truly nostalgic experience, pair it with a simple bowl of homemade tomato soup.
To store leftovers, wrap the bread tightly in plastic wrap or place it in an airtight container. It will keep at room temperature for 2-3 days, in the refrigerator for up to a week, or in the freezer for up to 3 months. To reheat, wrap a slice of bread in foil and warm it in a 350°F (175°C) oven for about 5-10 minutes, or until heated through. You can also toast slices for a crispier texture.
Nutritional Information
| Nutrient | Amount per Serving | % Daily Value |
|---|---|---|
| Calories | 1662.8 kcal | N/A |
| Calories from Fat | 51 g | 3% |
| Total Fat | 5.7 g | 8% |
| Saturated Fat | 0.9 g | 4% |
| Cholesterol | 0 mg | 0% |
| Sodium | 4672.2 mg | 194% |
| Total Carbohydrate | 353.5 g | 117% |
| Dietary Fiber | 24.9 g | 99% |
| Sugars | 1.3 g | 5% |
| Protein | 50.7 g | 101% |
Note: Nutritional information is an estimate and may vary based on specific ingredients and preparation methods.
Variations & Substitutions
- Whole Wheat Bread: Substitute up to half of the unbleached flour with whole wheat flour for a nuttier, heartier flavor.
- Seeded Bread: Add a handful of your favorite seeds (such as sunflower seeds, pumpkin seeds, or sesame seeds) to the dough during the second kneading. You can also sprinkle seeds on top of the loaf before baking.
- Herb Bread: Incorporate fresh or dried herbs into the dough for a flavorful twist. Rosemary, thyme, or oregano would all be delicious additions.
- Sweet Bread: Add 1/4 cup of sugar and 1/2 teaspoon of cinnamon to the dough for a sweeter, breakfast-style bread.
- Gluten-Free: While this recipe is not inherently gluten-free, you can experiment with gluten-free flour blends designed for bread making. Be aware that the texture and rise may be different.
- Dairy-Free: This recipe is already dairy-free!
FAQs (Frequently Asked Questions)
Q: Can I use active dry yeast instead of rapid rise yeast?
A: Yes, but you’ll need to proof the active dry yeast first. Dissolve it in the warm water with a teaspoon of sugar and let it sit for 5-10 minutes until it foams before adding it to the other ingredients. You might also need to increase the rising time slightly.
Q: Why is my bread so dense?
A: Several factors can contribute to dense bread, including using old yeast, not kneading enough, or not allowing the dough to rise sufficiently. Make sure your yeast is fresh, knead the dough until it’s smooth and elastic, and give it enough time to rise in a warm place.
Q: Can I freeze the dough instead of baking it right away?
A: Yes, you can freeze the dough after the second rise. Shape it into a loaf, wrap it tightly in plastic wrap, and then in foil. When ready to bake, thaw it in the refrigerator overnight, then let it come to room temperature for about 30 minutes before baking as directed.
Q: How do I prevent the crust from getting too dark?
A: If the crust is browning too quickly, tent the loaf with aluminum foil during the last 10-15 minutes of baking.
Q: What can I do if I don’t have a food processor?
A: No problem! Simply mix the dry ingredients in a large bowl and then add the warm water, mixing with a wooden spoon until a shaggy dough forms. Then, turn the dough out onto a floured surface and knead as directed.
Final Thoughts
Grandpa’s bread is more than just a recipe; it’s a connection to family, tradition, and the simple pleasures of life. I encourage you to try this recipe and experience the warmth and comfort of homemade bread. Don’t be afraid to experiment with variations and make it your own. And most importantly, share it with loved ones – because, as Grandpa always said, bread made with love tastes the sweetest. Let me know how your loaf turns out, and what memories it brings to your table!