
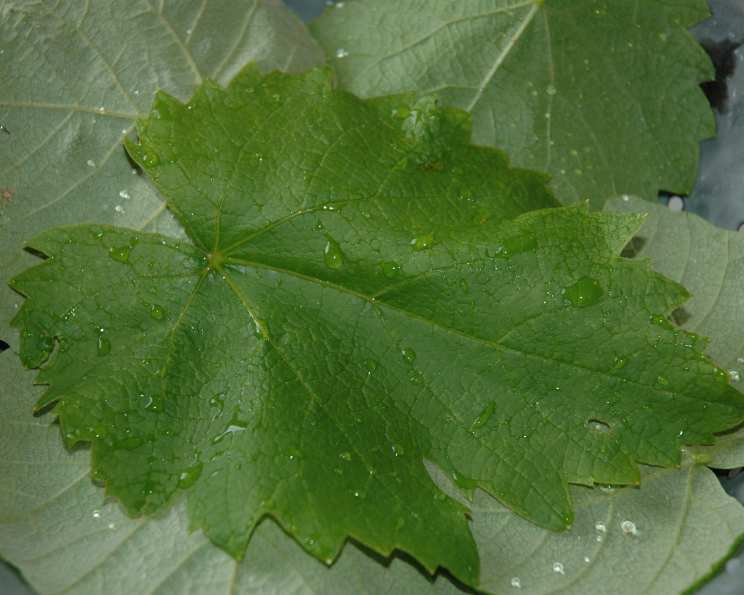
Preserving Summer: Canning Grape Leaves for Culinary Delights
The scent of grape leaves always transports me back to my grandmother’s sun-drenched garden. As a child, I remember watching her carefully harvest the vibrant green leaves, her hands moving with a practiced grace honed over years of tradition. The air would be thick with the earthy fragrance of the vine, promising the delightful dolmades that would grace our table for weeks to come. These memories are not just about food; they are about family, heritage, and the simple joy of preserving nature’s bounty.
Recipe Overview
- Prep Time: 30 minutes
- Cook Time: 20 minutes
- Total Time: 50 minutes
- Yields: 3 quarts
- Dietary Type: Vegetarian, Vegan
Ingredients
- 120 grape leaves
- 1/4 cup coarse salt
- 1 quart water
Equipment Needed
- Large pot (6 quart or larger)
- Ice bath (bowl with ice and water)
- Sterile, hot quart jars
- Canning equipment (jar lifter, boiling water bath canner)
Instructions
- Harvesting and Preparing the Grape Leaves: Select young, tender grape leaves that are light green in color. These will be the most pliable and have the best flavor. Once harvested, cut off the stems from each leaf and thoroughly wash them in cold water to remove any dirt or debris.
- Blanching the Leaves: In a large pot – 6 quart or larger – bring water to a rolling boil. Prepare an ice bath (a bowl filled with ice and cold water) nearby.
- Blanching Process: Carefully drop in the grape leaves, about 12 at a time, into the boiling water. Cook the leaves for precisely 30 seconds. Immediately remove the blanched leaves from the boiling water and plunge them into the ice bath. This step is crucial for preserving their vibrant color and preventing them from becoming overly soft.
- Drying and Stacking: Once cooled in the ice bath, remove the grape leaves and gently pat them dry with a clean kitchen towel or paper towels. Then, stack the leaves into piles of 6 each.
- Rolling and Tying (Optional): Roll each stack of 6 leaves tightly. Traditionally, the rolls are tied with string to keep them together during canning. However, the original recipe notes that you can remove the string later. It is important to use food-safe string if you choose to tie the leaves.
- Preparing the Brine: In a separate saucepan, bring the 1 quart of water to a full rolling boil. Add the 1/4 cup of coarse salt to the boiling water and continue to boil for 5 minutes. This creates the brine that will help preserve the grape leaves.
- Packing the Jars: Pack the rolls of grape leaves into sterile, hot quart jars. Aim for about 6 rolls per jar, though this may vary depending on the size of your leaves. If you tied the rolls with string, you can remove the string at this point, as mentioned in the original recipe.
- Adding the Brine: Carefully pour the hot brine over the grape leaves in each jar, ensuring that the leaves are fully submerged. Use a non-metallic utensil (like a chopstick or plastic spatula) to remove any air bubbles that may be trapped within the jars. Leave 1/8 inch of headspace (the space between the top of the liquid and the lid) in each jar.
- Sealing the Jars: Wipe the rims of the jars clean with a damp cloth to ensure a proper seal. Place the lids on the jars and screw on the bands until they are fingertip tight (not too tight).
- Processing in a Boiling Water Bath: Place the filled jars into a boiling water bath canner. The water should cover the jars by at least 1 inch. Bring the water to a rolling boil and process the jars for 15 minutes at altitudes up to 1000 feet above sea level. Consult a reliable canning chart for processing times at higher elevations, as they will need to be adjusted to ensure safe preservation.
- Cooling and Checking the Seals: After processing, carefully remove the jars from the canner using a jar lifter and place them on a towel-lined surface to cool. Allow the jars to cool completely, undisturbed, for 12-24 hours. As the jars cool, you should hear a “popping” sound as the lids seal.
- Verifying the Seal: After the jars have cooled completely, check the seals by pressing down on the center of each lid. If the lid does not flex or move, it is properly sealed. If the lid flexes, the jar is not sealed and should be refrigerated and used promptly, or reprocessed with a new lid.
Expert Tips & Tricks
- Leaf Selection: Choose grape leaves early in the season for the best texture. Older leaves can be tougher.
- Rolling Technique: For easier rolling, lay the leaf flat, stem-side down, and fold in the sides before rolling tightly from the bottom up.
- Preventing Discoloration: Adding a tablespoon of lemon juice to the blanching water can help preserve the vibrant green color of the leaves.
- Headspace is Key: Ensure you leave the correct amount of headspace (1/8 inch) to create a proper vacuum seal during processing.
- Jar Preparation: Always use sterile jars and lids for canning to prevent spoilage. Sterilize by boiling the jars and lids in water for 10 minutes prior to filling.
- Salt Quality: Use coarse canning salt. Table salt contains iodine and anti-caking agents that can discolor the leaves and brine.
Serving & Storage Suggestions
To use the canned grape leaves, open a jar and remove the number of rolls needed. Rinse the leaves thoroughly in cold water to remove excess salt. The grape leaves are now ready to be used in your favorite recipes, such as dolmades (stuffed grape leaves). Store any remaining grape leaves in their brine in the refrigerator. They should be used within a week. Properly canned and sealed jars can be stored in a cool, dark place for up to one year.
Nutritional Information
Please note that the nutritional information below is an estimate, as the exact values can vary based on factors such as leaf size and salt content.
| Nutrient | Amount per Serving | % Daily Value |
|---|---|---|
| Calories | 110 kcal | N/A |
| Calories from Fat | 28 g | 26% |
| Total Fat | 3.1 g | 4% |
| Saturated Fat | 0.5 g | 2% |
| Cholesterol | 0 mg | 0% |
| Sodium | 14002.2 mg | 583% |
| Total Carbohydrate | 18.7 g | 6% |
| Dietary Fiber | 0 g | 0% |
| Sugars | 0 g | 0% |
| Protein | 6.8 g | 13% |
Note: Daily values are based on a 2,000 calorie diet. Sodium content is extremely high due to the preserving process.
Variations & Substitutions
- Herb-Infused Brine: Add sprigs of fresh dill, mint, or oregano to the brine for added flavor.
- Spicy Grape Leaves: Include a pinch of red pepper flakes in the brine for a hint of spice.
- Vinegar Brine: Substitute half of the water with white wine vinegar for a more tangy flavor.
- Stuffed Grape Leaves Brine Variation: Add a squeeze of fresh lemon juice to the brine.
FAQs (Frequently Asked Questions)
Q: Why do I need to blanch the grape leaves before canning?
A: Blanching helps to soften the leaves, making them more pliable for rolling, and also helps to preserve their color.
Q: Can I use table salt instead of coarse salt?
A: It’s best to use coarse canning salt, as table salt contains iodine and anti-caking agents that can discolor the leaves and brine and affect the taste.
Q: How do I know if my jars are properly sealed?
A: After cooling, the lid should be concave and not flex when pressed in the center. If the lid flexes, it’s not sealed and needs to be reprocessed or refrigerated.
Q: What do I do if my grape leaves turn brown after canning?
A: Some discoloration is normal, but excessive browning can be due to using older leaves or not blanching them properly. Use younger, tender leaves and ensure they are fully submerged in the brine.
Q: Can I skip the rolling and tying step?
A: Yes, you can pack the leaves flat in the jars if you prefer. Rolling and tying is mainly for aesthetic purposes and ease of use later.
Final Thoughts
Canning grape leaves is a wonderful way to capture the fresh flavors of summer and enjoy them throughout the year. It might seem like a time-consuming process, but the effort is well worth it when you savor homemade dolmades on a cold winter evening. So, gather your leaves, follow these steps, and create a jar of sunshine that you can share with family and friends. And, as always, don’t hesitate to experiment with different flavor combinations to make this recipe your own. Happy canning!