
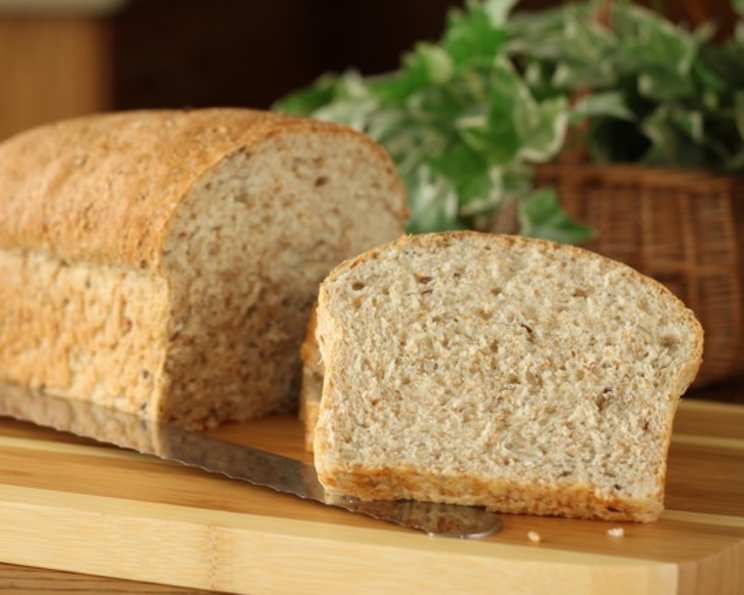
Great Grainery Bread – Robin Hood: A Symphony of Seeds and Grains
I can still picture my grandmother’s kitchen, the air thick with the aroma of freshly baked bread. Every Saturday, without fail, she would embark on her bread-making ritual, and though she made many different kinds, it was always her multigrain loaf that captured my heart. Its hearty texture, the subtle sweetness, and the satisfying crunch of seeds were simply irresistible. This recipe reminds me of those warm, comforting weekends spent learning at her elbow, a legacy I am thrilled to share.
Recipe Overview
- Prep Time: 2 hours 15 minutes
- Cook Time: 45-50 minutes
- Total Time: 3 hours
- Yields: 1 loaf plus 16 rolls
- Serves: 16
- Dietary Type: Vegetarian
Ingredients
- 1 teaspoon sugar
- ½ cup warm water
- 2 ¼ teaspoons active dry yeast (1 envelope)
- 1 cup water
- ¾ cup milk
- 2 tablespoons brown sugar
- 2 tablespoons butter
- 2 cups multi-grain flour
- ⅓ cup oats
- ⅓ cup wheat bran
- ¼ cup sesame seeds
- ¼ cup salted sunflower seeds
- 1 ½ teaspoons salt
- 3 ¼ cups multi-grain flour, plus more for kneading
Equipment Needed
- Large Bowl
- Wooden Spoon or Electric Mixer
- Floured Board
- Lightly Greased Bowl
- Greased Waxed Paper
- Tea Towel
- Greased 8 ½” x 4 ½” loaf pan (or 9″ x 5″)
- Greased 9″ (23 cm) square pan (or 10″ quiche dish)
- Wire Racks
Instructions
-
Begin by activating the yeast. In a large bowl, dissolve 1 teaspoon of sugar in ½ cup of warm water. Sprinkle in 2 ¼ teaspoons (1 envelope) of active dry yeast. Let it stand for 10 minutes, then stir well to ensure the yeast is fully dissolved. This process is crucial, so don’t skip it. If the yeast doesn’t foam, it’s likely old and you’ll need to start with fresh yeast.
-
Next, prepare the liquid mixture. In a separate saucepan or microwave-safe bowl, heat 1 cup of water, ¾ cup of milk, 2 tablespoons of brown sugar, and 2 tablespoons of butter together until lukewarm. Stir to dissolve the sugar and melt the butter completely. The temperature should be warm to the touch, not hot, to avoid killing the yeast.
-
Now, combine the wet and dry ingredients. Add the lukewarm milk mixture and 2 cups of multi-grain flour to the yeast mixture. Beat with a wooden spoon or an electric mixer until the mixture is smooth and elastic. This step is important for developing the gluten structure, which gives the bread its texture.
-
Incorporate the grains, seeds, and remaining flour. Stir in ⅓ cup of oats, ⅓ cup of wheat bran, ¼ cup of sesame seeds, ¼ cup of salted sunflower seeds, and 1 ½ teaspoons of salt. Gradually add 2 ¾ cups of the remaining multi-grain flour. If necessary, add more flour to create a soft dough that pulls away from the sides of the bowl. Be careful not to add too much flour, as this can result in a dry loaf.
-
Time to knead. Turn the dough out onto a floured board. Round it up into a ball. Knead the dough, adding more flour as needed, until it is smooth, elastic, and no longer sticky (about 10 minutes). Kneading develops the gluten further, resulting in a lighter, more airy bread. The dough should be soft and pliable, not tough.
-
First rise. Place the kneaded dough in a lightly greased bowl. Cover it with greased waxed paper and a tea towel. This creates a warm, humid environment that encourages rising.
-
Let the dough rise in a warm place (75°- 85°F/ 24°- 29°C) until it has doubled in size (45-60 minutes). The warmer the environment, the faster the dough will rise. Avoid placing the dough in direct sunlight or near a draft, as this can inhibit the rising process.
-
Punch down. After the first rise, punch down the dough to release the air. Turn it out onto a lightly floured surface. This helps to redistribute the yeast and create a more even texture in the final product.
-
Shape and divide. Divide the dough into two portions. Shape one portion into a loaf and place it seam side down in a greased 8 ½” x 4 ½” loaf pan (a 9″ x 5″ pan may work better, depending on your preference). Shape the other portion into 16 balls and place them in a greased 9″ (23 cm) square pan (or a 10″ quiche dish).
-
Second rise. Cover both the loaf pan and the roll pan with a tea towel. Let them rise in a warm place until doubled (35-45 minutes).
-
Baking time. Bake the loaf at 400°F (200°C) for 25-30 minutes. Bake the rolls at 375°F (190°C) for 15-20 minutes. Ovens can vary, so check for doneness. The loaf should be golden brown and sound hollow when tapped on the bottom. The rolls should be lightly golden and spring back when touched.
-
Cooling. Remove the loaf and rolls from the pans immediately and cool them on wire racks. This prevents the bottom of the bread from becoming soggy. Allow the bread to cool completely before slicing to prevent it from becoming gummy.
Expert Tips & Tricks
- Proof the yeast: Always proof your yeast before beginning. This ensures it is active and will properly leaven the bread.
- Don’t over-knead: Over-kneading can result in a tough bread. Knead until the dough is smooth and elastic, but not overworked.
- Control the rise: The rising time can vary depending on the temperature. Keep an eye on the dough and adjust the rising time accordingly.
- Use a bread thermometer: For a more accurate way to check doneness, use a bread thermometer. The internal temperature of the loaf should be around 200-210°F (93-99°C).
- Add steam: For a crustier loaf, place a pan of hot water on the bottom rack of the oven during baking. The steam will create a crispier crust.
Serving & Storage Suggestions
Serve this Great Grainery Bread warm with a pat of butter, your favorite jam, or as a hearty base for sandwiches. It pairs wonderfully with soups, salads, and cheese platters.
Store leftover bread in an airtight container at room temperature for up to 3 days. For longer storage, wrap tightly in plastic wrap and freeze for up to 2 months. To reheat, thaw completely and warm in a 350°F (175°C) oven for 10-15 minutes. Alternatively, you can slice the bread and toast it.
Nutritional Information
| Nutrient | Amount per Serving | % Daily Value |
|---|---|---|
| Calories | 69 kcal | N/A |
| Calories from Fat | N/A | 56% |
| Total Fat | 4.3 g | 6% |
| Saturated Fat | 1.5 g | 7% |
| Cholesterol | 5.4 mg | 1% |
| Sodium | 243.8 mg | 10% |
| Total Carbohydrate | 6.6 g | 2% |
| Dietary Fiber | 1.4 g | 5% |
| Sugars | 2 g | 7% |
| Protein | 2.1 g | 4% |
Variations & Substitutions
- Gluten-Free: Use a gluten-free multi-grain flour blend. You may need to add a binder like xanthan gum to help with the texture.
- Dairy-Free: Substitute the milk with almond milk, soy milk, or oat milk.
- Sweetener: Replace brown sugar with honey or maple syrup for a different flavor profile.
- Seeds: Experiment with different seeds, such as flax seeds, chia seeds, or pumpkin seeds.
- Nuts: Add chopped walnuts, pecans, or almonds for extra crunch and flavor.
FAQs (Frequently Asked Questions)
Q: Can I use a bread machine for this recipe?
A: Yes, you can adapt this recipe for a bread machine. Follow your bread machine’s instructions for adding ingredients, but generally, add the wet ingredients first, followed by the dry ingredients.
Q: Why is my bread dense and not rising properly?
A: This could be due to several factors, including old yeast, not enough kneading, or not allowing the dough to rise in a warm enough environment. Ensure your yeast is fresh, knead the dough adequately, and provide a warm, draft-free space for rising.
Q: Can I freeze the dough instead of baking it immediately?
A: Yes, you can freeze the dough after the first rise. Punch it down, wrap it tightly in plastic wrap, and freeze for up to 2 months. Thaw completely in the refrigerator before shaping and baking.
Q: What if I don’t have multi-grain flour?
A: You can create your own multi-grain flour by combining different types of flour, such as whole wheat flour, rye flour, and spelt flour.
Q: How can I make the crust softer?
A: To make the crust softer, brush the loaf with melted butter or milk immediately after baking.
Final Thoughts
This Great Grainery Bread recipe is more than just a set of instructions; it’s an invitation to create something wholesome and delicious that fills your home with warmth. Don’t be intimidated by the process. Each step, from activating the yeast to kneading the dough, is a small act of culinary love. I encourage you to try this recipe and experience the satisfaction of baking your own bread. Share your creations and feedback – I’m eager to hear about your own multigrain bread adventures! And don’t forget, a slice of this bread pairs perfectly with a comforting bowl of homemade soup on a chilly evening.