
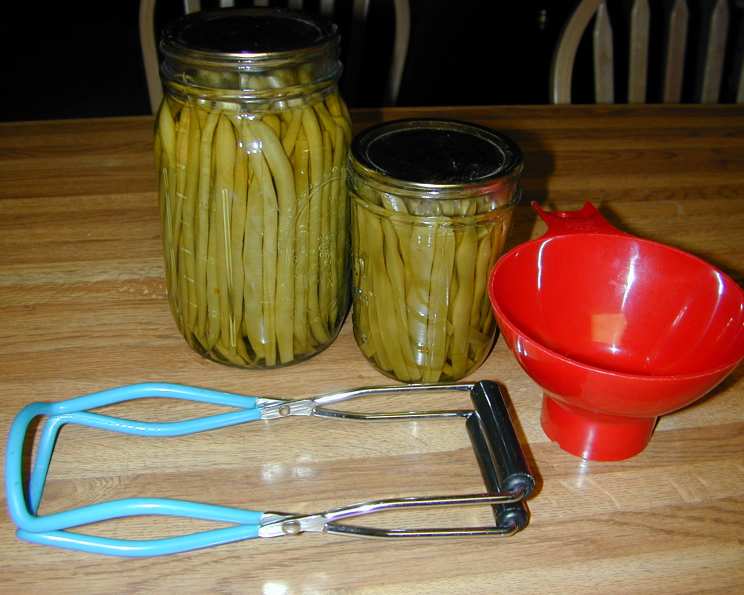
Canning Green Beans: A Taste of Summer All Year Round
My grandmother, bless her heart, was a canning queen. Every summer, our family would gather in her steamy kitchen, the air thick with the scent of vinegar, dill, and whatever bounty the garden decided to bestow upon us that year. While pies and jams were always welcome, it was the rows upon rows of gleaming jars filled with emerald green beans that always held a special place in my heart. There was something so satisfying about cracking open a jar in the dead of winter, that simple green bean conjuring up memories of sunshine, laughter, and family togetherness. This recipe brings that tradition home.
Recipe Overview
- Prep Time: 30 minutes
- Cook Time: 25 minutes
- Total Time: 55 minutes
- Yields: 4 quarts
- Dietary Type: Vegan, Gluten-Free
Ingredients
- 2 ½ lbs young tender green beans, pods
- 1 teaspoon salt
- 4 cups boiling water
Equipment Needed
- Large pot for boiling water
- Large bowl
- Colander
- Cutting board
- Knife
- Quart jars (4)
- Jar lifter
- Canning pot with rack
- Lid wand (magnetic)
- Clean kitchen towels
Instructions
- Begin by thoroughly washing the green beans. This step is crucial to remove any dirt or debris that may be clinging to the pods.
- Once washed, drain the beans well in a colander.
- Next, remove the strings from the sides of the beans and trim the ends. This can be done with a paring knife or even by snapping them off with your fingers.
- Cut the beans into approximately 2-inch pieces. This size is ideal for both packing into jars and for easy eating later on.
- Pack the cut beans tightly into hot quart jars, leaving 1 inch of headspace at the top. Headspace is the space between the top of the food and the lid, and it’s important for proper sealing during the canning process. Packing tightly helps prevent excessive floating of the beans during processing.
- Add ½ teaspoon of salt to each pint jar, or 1 teaspoon salt to each quart jar. Salt acts as a flavor enhancer and also helps to preserve the color of the beans.
- Carefully ladle boiling water over the beans in each jar, again leaving 1 inch of headspace. Make sure to distribute the water evenly to help remove any trapped air bubbles.
- Using a clean, damp cloth, wipe the rims of each jar thoroughly. This ensures a clean surface for the lids to seal properly.
- Using a lid wand, carefully place the lids on the jars.
- Adjust the two-piece caps (rings) until they are fingertip tight. This means tight enough to hold the lid in place during processing, but not so tight that air cannot escape during the canning process. Over-tightening can prevent proper sealing.
- Process quarts for 25 minutes at 10 pounds pressure in a pressure canner. If you’re using pints, process for 20 minutes at 10 pounds pressure. Always follow the manufacturer’s instructions for your specific pressure canner model. Ensure the canner has been properly vented before bringing it up to pressure.
- After processing, turn off the heat and allow the pressure to drop naturally to zero inside the canner. Do not attempt to speed up this process, as it can cause the jars to break or the seals to fail.
- Once the pressure has returned to zero, carefully remove the jars from the canner using a jar lifter and place them on a towel-lined surface.
- Let the jars cool completely, undisturbed, for 12-24 hours. As the jars cool, you should hear a popping sound, indicating that the lids have sealed properly.
- After the cooling period, check the seals of each jar by pressing down on the center of the lid. If the lid flexes up and down, it is not properly sealed and should be refrigerated and used promptly, or reprocessed with a new lid.
- Remove the rings from the sealed jars and wash the jars. Label the jars with the contents and the date. Store your home-canned green beans in a cool, dark, and dry place.
Expert Tips & Tricks
- For the best flavor and texture, use freshly picked, young, and tender green beans. Avoid beans that are tough, stringy, or have blemishes.
- Don’t overpack the jars. Leaving the specified headspace is critical for proper sealing.
- Before canning, inspect your jars for any chips or cracks, especially around the rim. Discard any damaged jars, as they may not seal properly.
- Use new lids for each batch of canning. Lids are designed for one-time use and may not seal properly if reused.
- If you live at a high altitude, you will need to adjust the processing time or pressure according to your altitude. Consult a reputable canning guide for specific recommendations.
- If you don’t have a pressure canner, this recipe is not suitable for boiling water bath canning due to the low acidity of green beans. Pressure canning is essential for safe preservation.
Serving & Storage Suggestions
Serve your home-canned green beans as a side dish, straight from the jar or reheated gently on the stovetop or in the microwave. They can be seasoned with a pat of butter, a drizzle of olive oil, or your favorite herbs and spices. They also make a great addition to salads, soups, and casseroles. Properly canned green beans can be stored in a cool, dark, and dry place for up to a year. Once opened, refrigerate any unused portion and consume within a week. Do not store canned goods at room temperature after opening. If the jar is not properly sealed, discard it immediately.
Nutritional Information
| Nutrient | Amount per Serving (approx. 1 cup) | % Daily Value* |
|---|---|---|
| Calories | 60 kcal | 3% |
| Total Fat | 0.5g | 1% |
| Saturated Fat | 0g | 0% |
| Cholesterol | 0mg | 0% |
| Sodium | 300mg | 13% |
| Total Carbohydrate | 14g | 5% |
| Dietary Fiber | 6g | 24% |
| Sugars | 6g | |
| Protein | 3g | 6% |
| Vitamin C | 20% | |
| Vitamin A | 15% | |
| Iron | 4% |
*Percent Daily Values are based on a 2,000 calorie diet.
Variations & Substitutions
- Garlic Green Beans: Add 1-2 cloves of minced garlic to each jar before packing the beans for a flavorful twist.
- Dilled Green Beans: Add a sprig of fresh dill or 1/2 teaspoon of dried dill seeds to each jar for a classic flavor combination.
- Spicy Green Beans: Add a pinch of red pepper flakes to each jar for a touch of heat.
- Italian Green Beans: Add a pinch of dried oregano, basil, and thyme to each jar for an Italian-inspired flavor.
- Instead of salt: you can omit it entirely or use a salt substitute if you are on a low-sodium diet.
FAQs (Frequently Asked Questions)
Q: Why is pressure canning necessary for green beans?
A: Green beans are a low-acid food, which means they require the high temperatures achieved in a pressure canner to kill potentially harmful bacteria, such as Clostridium botulinum, that can cause botulism.
Q: Can I use frozen green beans for this recipe?
A: No, it is not recommended to use frozen green beans for canning. Frozen vegetables can become mushy during the canning process and may not result in a safe product.
Q: What if I don’t hear a popping sound after processing the jars?
A: If you don’t hear a popping sound, check the seal by pressing down on the center of the lid. If the lid flexes, it is not sealed properly and should be refrigerated and used promptly, or reprocessed with a new lid.
Q: Can I reuse the canning rings?
A: Yes, you can reuse the canning rings as long as they are not rusty or damaged. However, you should always use new lids for each batch of canning.
Q: How long will home-canned green beans last?
A: Properly canned green beans can be stored in a cool, dark, and dry place for up to a year. Always check for signs of spoilage, such as bulging lids or unusual odors, before consuming.
Final Thoughts
Canning green beans is a rewarding way to preserve the flavors of summer and enjoy them throughout the year. Don’t be intimidated by the process – with careful attention to detail and proper techniques, you can create delicious and safe home-canned goods that will delight your family and friends. Gather your fresh green beans, follow this guide, and savor the taste of homegrown goodness all year long. I’d love to hear how your canning experience goes. Bon appétit!