
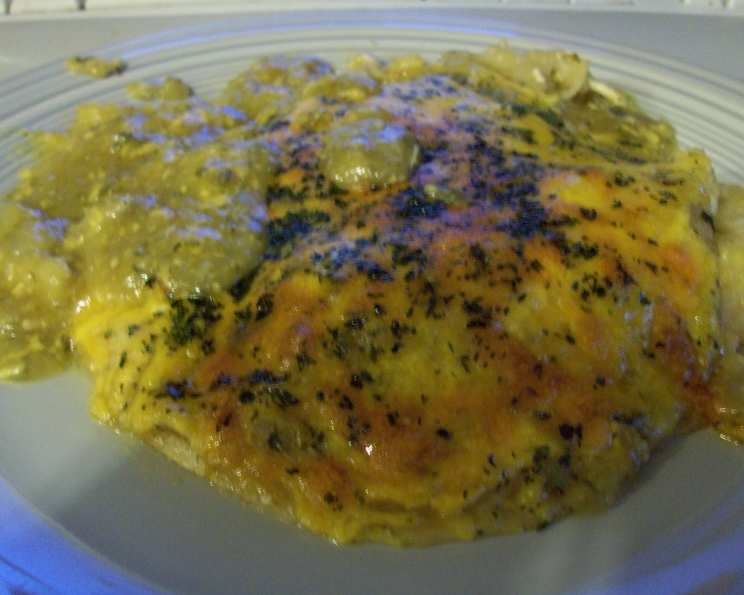
Green Chile Chicken Stacked Enchiladas: A Southwest Culinary Adventure
Growing up in Santa Fe, the aroma of roasted green chiles was the unofficial scent of autumn. Every year, my family would gather for the ritual, the air thick with the smoky, earthy fragrance as we blistered the peppers over an open flame. While we made countless dishes with our chile harvest, one always stood out: stacked green chile chicken enchiladas. The layers of flavor, the creamy sauce, the tender chicken – it was pure comfort food, a taste of home in every bite. This recipe, adapted from a friend’s version, brings back those cherished memories, and I hope it does the same for you.
Recipe Overview
- Prep Time: 45 minutes
- Cook Time: 35 minutes
- Total Time: 1 hour 20 minutes
- Servings: 4
- Yield: 4 stacks
- Dietary Type: Gluten-Free
Ingredients
- 1 1/2 lbs fresh Anaheim chilies
- 7-8 ounces tomatillos
- 4 cups chicken broth
- 1 garlic clove, minced
- 2 teaspoons onions, minced
- 1 teaspoon dried oregano
- 1/2 teaspoon kosher salt (to taste)
- 1/4 teaspoon black pepper (to taste)
- 2 tablespoons cornstarch
- 2 tablespoons water
- 2 boneless skinless chicken breasts (or thighs)
- 3 tablespoons oil
- 12 corn tortillas (yellow recommended)
- 6 ounces grated cheese (Cheddar or Mexican blend)
- Hot sauce, your favorite (optional)
- Sour cream (optional)
- Cilantro (optional)
Equipment Needed
- Baking sheet
- Paper bag
- Plastic bag
- Large pot
- 3-quart saucepan
- Stick blender or regular blender
- Tongs
- Paper towels
- 2 9×13 inch casserole dishes
Instructions
-
Roast the Anaheim chilies: Place the fresh Anaheim chilies on a baking sheet. Roast them under a broiler or over an open flame on a gas stovetop, turning frequently with tongs, until the skins are blackened and blistered on all sides. The goal is to char the skins without completely cooking the pepper inside.
-
Steam the chilies: Immediately transfer the roasted chilies to a paper bag, seal it tightly, and then place the paper bag inside a plastic bag and seal it. This steaming process helps loosen the skins for easier removal. Allow the chilies to come to room temperature. This usually takes about 30 minutes.
-
Prepare the tomatillos: While the chilies are roasting, bring a large pot of water to a boil. Remove the papery husks from the tomatillos. Wash the tomatillos thoroughly with a little soap and plenty of water to remove any sticky residue.
-
Cook the tomatillos: Once the water is boiling, carefully drop the tomatillos into the pot and cook for 8-10 minutes, or until they are soft and have changed color. Remove the tomatillos from the boiling water and set aside to cool slightly. Remove the stems, and if desired remove the seed pods if they are hard.
-
Peel and seed the chilies: Once the chilies are at room temperature, remove them from the bags. Peel off the blackened skins. The skins should slip off easily if the chilies are still slightly warm. Remove the stems and seeds. Don’t worry if a few seeds remain.
-
Make the sauce base: Place the cooked tomatillos, peeled and seeded chilies, chicken broth, minced garlic, and minced onion in a 3-quart saucepan.
-
Puree the sauce: Using a stick blender (or carefully transferring to a regular blender), puree the mixture until it is completely smooth.
-
Season the sauce: Add the dried oregano, kosher salt (to taste), and black pepper to the pureed sauce. Puree again to combine the seasonings.
-
Simmer the sauce: Bring the sauce to a boil over medium-high heat. Once boiling, reduce the heat to low and simmer gently for 10 minutes, allowing the flavors to meld.
-
Cook the chicken: Grill, broil, or boil the chicken breasts until cooked through. An internal temperature of 165°F (74°C) ensures doneness. Let the chicken rest for a few minutes before shredding.
-
Thicken the sauce: In a small bowl, combine the cornstarch with the water, mixing until a smooth slurry forms. Pour the cornstarch slurry into the simmering chile sauce, stirring constantly. Return the sauce to a boil, then reduce the heat and simmer for another 10-15 minutes, or until the sauce has thickened to your desired consistency. You should have about 5 cups of sauce.
-
Shred the chicken: Pull, chop, or shred the cooked chicken into bite-sized pieces. Set aside.
-
Soften the tortillas: Heat the oil in a skillet over medium heat. Soften one corn tortilla at a time in the hot oil. Using tongs, place a tortilla in the oil for 10-15 seconds per side, until pliable but not crispy. Remove the softened tortilla and place it on paper towels to drain excess oil.
-
Assemble the enchiladas: Spread a thin layer of the tomatillo sauce on the bottom of each of the two 9×13 inch casserole dishes.
-
Layer 1: Place two softened tortillas side by side in each casserole dish.
-
Layer 2: Ladle a generous amount of the sauce over the tortillas.
-
Layer 3: Sprinkle half of the shredded chicken evenly over the four tortillas (dividing between the two dishes).
-
Layer 4: Sprinkle one-third of the grated cheese over the chicken in each dish.
-
Layer 5: Ladle more sauce over the cheese and chicken.
-
Layer 6: Top each serving (each set of two tortillas) with another tortilla, followed by more sauce, the remaining chicken, and another one-third of the cheese. Ladle more sauce over this layer.
-
Final Layer: Top each serving with the last two tortillas, the remaining sauce, and the remaining cheese.
-
Bake the enchiladas: Bake in a preheated 350°F (175°C) oven for 15-20 minutes, or until the cheese is melted, bubbly, and beginning to brown.
-
Garnish and Serve: Garnish with chopped cilantro and sour cream, if desired. Serve immediately.
Expert Tips & Tricks
- For a smokier flavor, try grilling the chicken over charcoal or using smoked paprika in the sauce.
- If you don’t have fresh Anaheim chilies, you can substitute canned green chilies, but the flavor won’t be quite as vibrant. Adjust the amount to taste.
- To prevent the tortillas from sticking to the bottom of the dish, make sure to spread a generous layer of sauce on the bottom before assembling the enchiladas.
- If the cheese starts to brown too quickly in the oven, cover the dish loosely with aluminum foil.
- Make the green chile sauce a day in advance to allow the flavors to develop even further.
Serving & Storage Suggestions
Serve the Green Chile Chicken Stacked Enchiladas hot, directly from the oven. They are delicious on their own or paired with a side of rice and beans.
Leftovers can be stored in an airtight container in the refrigerator for up to 3 days. To reheat, bake in a preheated oven at 350°F (175°C) until heated through, or microwave in short intervals until warm. You can also freeze the enchiladas for up to 2 months. Thaw overnight in the refrigerator before reheating.
Nutritional Information
| Nutrient | Amount per Serving | % Daily Value |
|---|---|---|
| Calories | 593 kcal | N/A |
| Total Fat | 25.6g | 39% |
| Saturated Fat | 8.9g | 44% |
| Cholesterol | 61.4mg | 20% |
| Sodium | 1476mg | 61% |
| Total Carbohydrate | 59.9g | 19% |
| Dietary Fiber | 8.2g | 33% |
| Sugars | 12.1g | N/A |
| Protein | 34.9g | 69% |
Note: Nutritional information is an estimate and may vary based on specific ingredients and preparation methods.
Variations & Substitutions
- Vegetarian: Substitute the chicken with black beans, pinto beans, or a mixture of roasted vegetables like corn, zucchini, and bell peppers.
- Spicier: Add a pinch of cayenne pepper or a serrano pepper to the sauce for extra heat.
- Dairy-Free: Use a dairy-free cheese alternative and omit the sour cream garnish.
- Low-Carb: Use low-carb tortillas or skip the tortillas altogether and serve the chicken and sauce over a bed of cauliflower rice.
FAQs (Frequently Asked Questions)
Q: Can I use canned green chiles instead of fresh?
A: Yes, you can substitute canned green chiles. However, the flavor will be different and not as vibrant as using fresh roasted Anaheim chiles. Adjust the amount to your preference.
Q: Can I make the green chile sauce ahead of time?
A: Absolutely! Making the sauce a day in advance actually allows the flavors to meld and deepen, resulting in an even more delicious enchilada. Store it in the refrigerator until ready to use.
Q: What kind of cheese works best for this recipe?
A: Cheddar cheese, a Mexican blend, Monterey Jack, or even a sharp provolone are all great choices. Use your favorite melting cheese for the best results.
Q: How do I prevent the tortillas from getting soggy?
A: Softening the tortillas in oil before assembling the enchiladas helps to create a barrier that prevents them from absorbing too much sauce and becoming soggy. Also, don’t over-sauce the enchiladas during assembly.
Q: Can I freeze these enchiladas?
A: Yes, you can freeze assembled, unbaked enchiladas. Wrap them tightly in plastic wrap and then in aluminum foil. Thaw overnight in the refrigerator before baking as directed.
Final Thoughts
These Green Chile Chicken Stacked Enchiladas are more than just a meal; they’re a culinary journey to the heart of the Southwest. I hope this recipe inspires you to gather your loved ones, fire up the oven, and create your own memories around this classic dish. Don’t be afraid to experiment with variations and substitutions to make it your own. And most importantly, enjoy the process and savor every delicious bite! I encourage you to share your experiences and any modifications you try with me, and perhaps pair these enchiladas with a crisp Mexican beer for a truly authentic experience.