
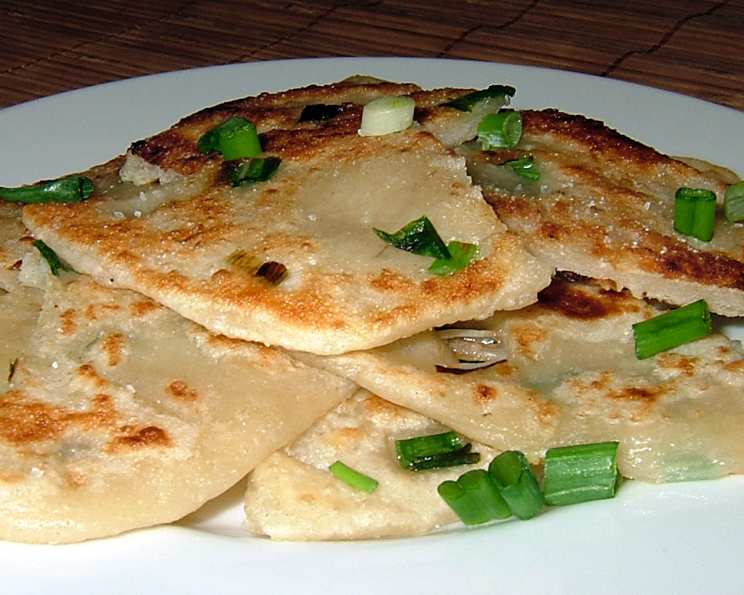
Green Onion Cakes: A Taste of Home
I remember the first time I tried a green onion cake. I was wandering through a vibrant night market, the air thick with the aroma of street food. Amidst the sizzling meats and sweet pastries, a simple stall stood out, the vendor deftly flipping golden discs on a hot griddle. The savory scent of green onions mingled with the buttery richness of the dough, instantly drawing me in. One bite, and I was hooked. The crisp, flaky layers, the burst of fresh onion, and the satisfying chewiness transported me to a world of simple, comforting flavors. It was a taste of pure culinary joy, a memory I cherish to this day.
Recipe Overview
- Prep Time: 20 minutes
- Cook Time: 20 minutes
- Total Time: 40 minutes
- Servings: 12
- Yield: 12 cakes
- Dietary Type: Vegetarian
Ingredients
- 2 cups flour
- ½ teaspoon salt
- ¾ cup very hot water (not boiling)
- ¾ cup thinly sliced green onion
- 2 tablespoons cooking oil
Equipment Needed
- Food processor (optional, can be mixed by hand)
- Rolling pin
- Non-stick frying pan
- Lifter/Spatula
- Paper towels
Instructions
-
Measure the flour and salt into a food processor. If you don’t have a food processor, you can do this in a large bowl.
-
With the lid in place and the machine running (or mixing by hand), slowly pour the very hot water into the chute (or bowl) until the dough starts to form a ball. It should come together relatively quickly.
-
Turn the dough onto a lightly floured surface. Knead for about 1 minute, or until the dough becomes smooth. Don’t over-knead; you’re just aiming for a cohesive dough.
-
Cover the dough with plastic wrap and let it rest for 30 minutes. This allows the gluten to relax, making it easier to roll out later.
-
Shape the dough into a long roll, and divide it into 12 equal portions.
-
Place the thinly sliced green onion in a bowl.
-
Take one of the 12 portions of dough and slightly flatten it between your palms.
-
Press each side of the flattened dough into the bowl of green onions, ensuring the onions adhere to the dough.
-
Knead the green onions into the dough, distributing them evenly. Shape the dough into a flattened circle.
-
Roll out the dough on a slightly greased surface with a greased rolling pin into a 4.5-inch circle. The thinner you roll the dough, the flakier the final product will be.
-
Repeat steps 7-10 with the remaining portions of dough. Keep the formed onion cakes covered with plastic wrap to prevent them from drying out.
-
Heat the oil in a non-stick frying pan over medium-high heat. Make sure the pan is hot before adding the cakes.
-
Arrange 4 onion cakes in a single layer in the pan. Avoid overcrowding the pan, as this will lower the temperature and result in soggy cakes.
-
Cook on both sides, flattening them down with a lifter or spatula, until brown patches appear. This should take about 2-3 minutes per side. Don’t overcook them; they should remain soft, pliable, and chewy. Adjust the heat if they are browning too quickly.
-
Remove the cooked onion cakes to a plate lined with paper towels to drain any excess oil.
-
Sprinkle with salt to taste.
-
Cut each onion cake into 2-4 pieces and serve hot.
Expert Tips & Tricks
- Hot Water is Key: The hot water helps to create a softer, more pliable dough, which results in a chewier final product. Make sure the water is hot, but not boiling, to avoid cooking the flour prematurely.
- Resting the Dough: Don’t skip the resting period! This allows the gluten to relax, making the dough easier to roll out thinly without snapping back.
- Even Green Onion Distribution: Kneading the green onions into the dough ensures that each cake has a consistent flavor throughout.
- Don’t Overcrowd the Pan: Cooking in batches ensures that the pan remains hot, resulting in crispy, golden-brown cakes.
- Pressing for Crispy Edges: Pressing down on the cakes with a spatula during cooking helps to create crispy edges, adding to the overall texture.
- Freezing for later: These cakes freeze very well after cooking. Cool them completely and then wrap them individually or stack them with parchment paper between each cake before placing them in a freezer-safe bag or container. Reheat in a dry pan for a few minutes on each side.
Serving & Storage Suggestions
Serve these delectable green onion cakes hot off the pan for the best taste and texture. They are fantastic as a snack, appetizer, or as a side dish to accompany soups or stir-fries. They pair well with a simple dipping sauce like soy sauce or a chili garlic sauce.
Leftover green onion cakes can be stored at room temperature for up to 24 hours or in the refrigerator for up to 3 days. To reheat, warm them in a dry skillet over medium heat until heated through. You can also reheat them in the oven or microwave, but the texture may not be as crispy.
Nutritional Information
| Nutrient | Amount per Serving | % Daily Value |
|---|---|---|
| Calories | 97.9 kcal | N/A |
| Calories from Fat | 22 g | 23% |
| Total Fat | 2.5 g | 3% |
| Saturated Fat | 0.3 g | 1% |
| Cholesterol | 0 mg | 0% |
| Sodium | 98.8 mg | 4% |
| Total Carbohydrate | 16.4 g | 5% |
| Dietary Fiber | 0.7 g | 2% |
| Sugars | 0.2 g | 0% |
| Protein | 2.3 g | 4% |
Note: Nutritional information is an estimate and may vary based on specific ingredients and preparation methods.
Variations & Substitutions
- Gluten-Free Green Onion Cakes: Use a gluten-free flour blend instead of all-purpose flour. You may need to adjust the amount of water to achieve the right dough consistency.
- Different Oils: Experiment with different oils for cooking. Sesame oil adds a nutty flavor, while peanut oil provides a higher smoke point for crispier cakes.
- Spicy Green Onion Cakes: Add a pinch of red pepper flakes to the dough or incorporate some finely minced chili peppers along with the green onions for a spicy kick.
- Herbs and Spices: Try adding other herbs like chives or cilantro, or experiment with spices such as ginger or garlic powder, to the dough to create your own unique flavor profile.
- Filling Substitutions: While green onions are the star of this dish, you could try adding other fillings such as finely chopped mushrooms, cabbage, or even some shredded cheese.
FAQs (Frequently Asked Questions)
Q: Can I make the dough ahead of time?
A: Yes, you can make the dough ahead of time and store it in the refrigerator for up to 2 days. Bring it to room temperature before rolling out.
Q: Can I use cold water instead of hot water?
A: Using hot water is recommended for a softer, chewier dough. Cold water will result in a tougher texture.
Q: How do I prevent the green onion cakes from sticking to the pan?
A: Use a non-stick pan and ensure it is properly greased. Avoid overcrowding the pan, as this can lower the temperature and cause sticking.
Q: Can I bake these instead of frying them?
A: While frying provides the best texture, you can bake them at 375°F (190°C) for about 15-20 minutes, flipping halfway through. Brush with oil before baking for a golden-brown finish.
Q: What dipping sauce goes well with green onion cakes?
A: Soy sauce, chili garlic sauce, sesame oil with a splash of vinegar, or even a simple sriracha mayo are all great options.
Final Thoughts
Green onion cakes are more than just a recipe; they’re a delightful culinary experience that connects us to traditions and shared moments. The simple combination of ingredients transforms into something extraordinary – a testament to the power of simple, well-executed cooking. I encourage you to try this recipe and experience the joy of creating these flavorful cakes in your own kitchen. Share your creations with friends and family, and don’t hesitate to experiment with variations to make them your own. After all, the best recipes are the ones we personalize and share with love.