
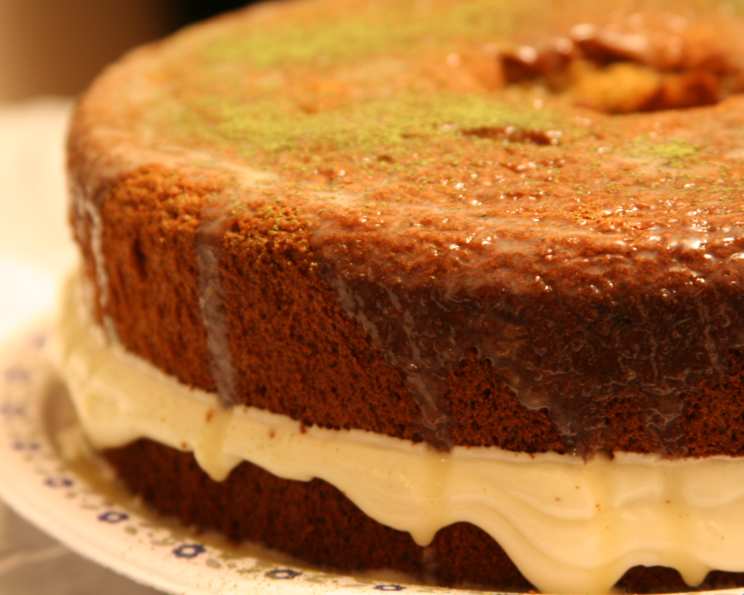
Green Tea Kasutera: A Taste of Japanese Serenity
My first encounter with Kasutera wasn’t in a bustling Tokyo bakery, but rather in a quiet corner of my grandmother’s sun-drenched kitchen. She had received a beautifully wrapped box from a friend returning from Japan, and inside lay this golden, subtly sweet sponge cake. The delicate aroma of green tea filled the air as she carefully sliced a piece, its texture impossibly soft and airy. That first bite transported me; it was a taste of serenity, a moment of quiet joy that I’ve been chasing ever since. This recipe attempts to recreate that treasured memory.
Recipe Overview
- Prep Time: 20 minutes
- Cook Time: 35-45 minutes
- Total Time: 55-65 minutes
- Servings: 8-10
- Yield: 2 loaf cakes
- Dietary Type: Not Gluten-Free
Ingredients
- 1 cup white flour
- 1 cup granulated sugar
- 1/4 cup honey
- 1 teaspoon vanilla extract
- 1 tablespoon green tea powder (matcha)
- 1/4 teaspoon salt
- 7 large eggs
- 1/8 teaspoon cream of tartar
Equipment Needed
- Two loaf pans
- Parchment paper
- Two large mixing bowls
- Electric mixer
- Whisk or spatula
- Large pan for water bath
Instructions
-
Begin by separating the egg whites from the yolks into two large bowls. Ensure no yolk contaminates the whites, as this will hinder their ability to whip properly.
-
In the bowl with the egg yolks, add the sugar, honey, vanilla, green tea powder, and salt. Whisk these ingredients together until well combined and smooth.
-
Place the bowl with the egg yolk mixture in a large pan of hot (but not boiling) water. This creates a gentle warmth that helps to emulsify the mixture and develop a richer flavor.
-
Using an electric mixer, beat the egg yolk mixture for about 5 minutes on medium-high speed. The mixture should become pale yellow in color and approximately double in volume. This step is crucial for incorporating air, which contributes to the cake’s light and airy texture.
-
Gently fold in the flour into the yolk mixture. Be careful not to overmix, as this can develop the gluten in the flour and result in a tough cake. Mix until just combined.
-
In the other large bowl, beat the egg whites with an electric mixer on low speed for 1 minute. Then, increase the speed to medium-high until the egg whites become foamy.
-
Once the egg whites are foamy, sprinkle in the cream of tartar and one tablespoon of the sugar. The cream of tartar helps to stabilize the egg whites and prevents them from collapsing.
-
Continue to beat the egg whites until they form stiff peaks. The peaks should hold their shape when the beaters are lifted. Be careful not to overwhip the egg whites, as this can make them dry and difficult to incorporate into the batter.
-
Using a spatula, gently fold the egg whites into the egg yolk and flour mixture. It is essential to fold the egg whites in gently to avoid deflating them. Work in batches, adding a third of the egg whites at a time and folding until just combined before adding the next batch.
-
Preheat your oven to 325 degrees Fahrenheit (160 degrees Celsius).
-
Prepare your loaf pans by lining the bottoms with parchment paper. This will prevent the cake from sticking and make it easier to remove after baking. Lightly grease the parchment paper with butter or cooking spray.
-
Pour the batter evenly into the prepared loaf pans.
-
Place the loaf pans on the middle rack of the preheated oven and bake for 35 to 45 minutes, or until the cakes are golden brown. To check for doneness, insert a toothpick into the center of the cake. If it comes out clean, the cake is done. The sides of the cake should also pull away from the pan slightly, and the top should be flat and feel spongy when lightly pressed with your finger.
-
Once the cakes are done, remove them from the oven and let them cool in the pans for 20 minutes.
-
After 20 minutes, run a small knife between the edge of the cake and the pan to loosen it. Carefully remove the cakes from the pans.
-
Gently peel off the parchment paper and let the cakes cool completely on a wire rack before cutting and serving.
Expert Tips & Tricks
- Use room-temperature eggs. They whip up to a greater volume, creating a lighter cake.
- Sift the flour to remove any lumps and ensure a smoother batter.
- Don’t skip the water bath for the egg yolk mixture! This gentle heat helps create a silky, stable base for the cake.
- Fold, don’t stir! Gentle folding of the egg whites is crucial for maintaining the airiness of the batter. Be patient and take your time.
- If your oven runs hot, reduce the temperature by 25 degrees Fahrenheit to prevent the cake from browning too quickly. You can also tent the cakes with foil during the last 15 minutes of baking.
- Resting is key. Resist the urge to cut into the cake immediately. Allowing it to cool completely allows the flavors to meld and the texture to stabilize.
Serving & Storage Suggestions
Green Tea Kasutera is best enjoyed at room temperature. Slice it into thick pieces and serve with a cup of hot green tea or coffee. It’s also delicious with a dollop of whipped cream or a scoop of vanilla ice cream.
To store, wrap the cake tightly in plastic wrap or place it in an airtight container. It will keep at room temperature for up to 3 days or in the refrigerator for up to a week. You can also freeze the cake for up to 2 months. Thaw it in the refrigerator overnight before serving.
Nutritional Information
| Nutrient | Amount per Serving | % Daily Value |
|---|---|---|
| Calories | 250 kcal | N/A |
| Calories from Fat | 38 g | 16% |
| Total Fat | 4.3 g | 6% |
| Saturated Fat | 1.4 g | 6% |
| Cholesterol | 162.8 mg | 54% |
| Sodium | 135.8 mg | 5% |
| Total Carbohydrate | 46.1 g | 15% |
| Dietary Fiber | 0.4 g | 1% |
| Sugars | 33.9 g | N/A |
| Protein | 7.1 g | 14% |
Note: Nutritional information is an estimate and may vary based on specific ingredients and serving sizes.
Variations & Substitutions
- Hojicha Kasutera: Substitute the green tea powder with hojicha (roasted green tea) powder for a nutty, earthy flavor.
- Citrus Kasutera: Add the zest of one lemon or orange to the egg yolk mixture for a bright, citrusy twist.
- Matcha Swirl Kasutera: Reserve a small portion of the batter and mix it with extra green tea powder. Swirl this concentrated matcha batter into the main batter before baking for a marbled effect.
- Gluten-Free Option: While traditional Kasutera relies on wheat flour, experimenting with gluten-free flour blends designed for baking could yield interesting results. Be mindful of potential texture differences.
FAQs (Frequently Asked Questions)
Q: Why is it important to use a water bath for the egg yolk mixture?
A: The water bath provides gentle, even heat that helps to emulsify the egg yolks, sugar, and honey. This creates a stable base for the cake and prevents the egg yolks from scrambling.
Q: How do I know when the egg whites are whipped to stiff peaks?
A: The egg whites are whipped to stiff peaks when they hold their shape when the beaters are lifted. The peaks should stand straight up or slightly droop at the tip.
Q: Can I use a different type of honey?
A: Yes, you can use any type of honey you prefer. Different types of honey will impart slightly different flavors to the cake.
Q: Why did my Kasutera sink in the middle?
A: This could be due to a few factors: the oven temperature was too high, the egg whites were not whipped properly, or the batter was overmixed. Make sure to follow the recipe carefully and avoid opening the oven door during baking.
Q: Can I bake this in a different shaped pan?
A: While loaf pans are traditional, you can experiment with other shapes. Adjust baking time accordingly, checking for doneness with a toothpick.
Final Thoughts
Green Tea Kasutera is more than just a cake; it’s an experience. The delicate flavor of green tea, the light and airy texture, and the simple elegance of this Japanese classic make it a perfect treat for any occasion. I encourage you to try this recipe and share your own memories and experiences with this delightful cake. Perhaps you’ll even create your own version, adding a personal touch to this timeless treat. Enjoy the journey of baking and the simple pleasures it brings!