
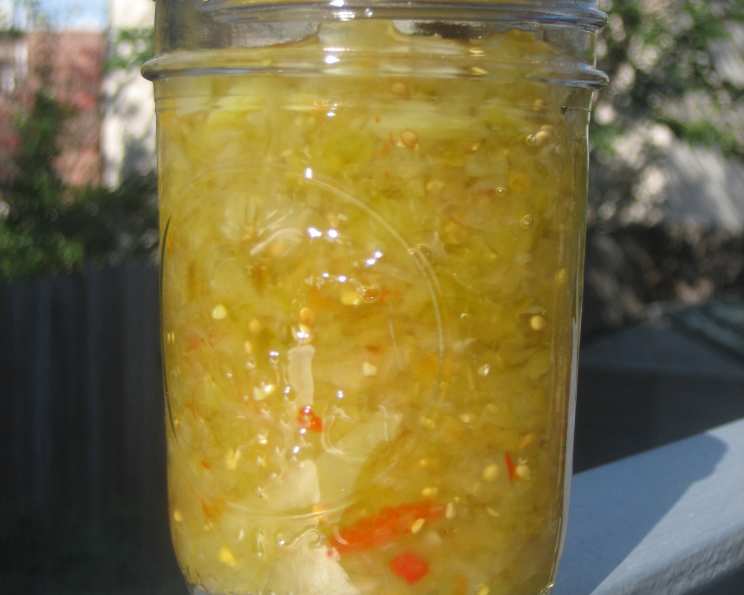
Zesty Green Tomato Relish: A Culinary Ode to Late-Season Gardens
My grandmother, bless her heart, had a way with green tomatoes. While most folks bemoaned the early frost that turned their summer dreams to tart, unripened fruits, she’d be out there, basket in hand, collecting her bounty. I remember standing on a wobbly stool beside her, the late-autumn sun glinting off the green orbs as she transformed them into the most incredible relish. The tangy sweetness, the satisfying crunch, the hint of spice – it was sunshine in a jar, a reminder that even as the garden slumbered, its flavors could still sing. This Green Tomato Relish recipe, inspired by her, is a celebration of resourcefulness and flavor, a testament to the magic that can be found in the unexpected.
Recipe Overview
- Prep Time: 8 hours 10 minutes
- Cook Time: Approximately 30 minutes
- Total Time: 8 hours 40 minutes
- Yields: 6 pints
- Dietary Type: Vegetarian, Gluten-Free, Dairy-Free
Ingredients
- 5 lbs green tomatoes
- 2 red bell peppers
- 1 green bell pepper
- 2 large white onions
- 1 jalapeno pepper (red preferred, but green is acceptable)
- ½ cup canning salt (non-iodized) Note: If using kosher salt, double the amount to 1 cup.
- 3 cups sugar
- 1 quart distilled white vinegar
- 1 cinnamon stick
- 1 teaspoon whole cloves
- 1 teaspoon whole allspice
- 1 teaspoon celery seed
- ½ teaspoon mustard seeds
- ½ teaspoon peppercorns
- 1 bay leaf
Equipment Needed
- Large stainless steel pot or plastic bowl
- Food processor
- Large non-reactive pot (stainless steel or enamel-coated)
- Cheesecloth
- String or twine
- Canning jars (6 pint jars)
- Jar lifter
- Boiling water bath canner
- Chopstick or other thin, non-metal utensil
Instructions
-
Begin by thoroughly washing the green tomatoes, and carefully cut out the stem scar from each. Then cut the tomatoes into large pieces and set aside.
-
Chop the bell peppers, onions, and jalapeno pepper into large pieces.
-
Place all the vegetables in a food processor, and process until the mixture has the consistency of a relish. Be exceedingly careful not to over process; you don’t want the mixture to turn into mush. It should be finely chopped, but still retain some texture.
-
Now for the soaking process: place the processed vegetables in a large stainless steel pot or plastic bowl and combine with the ½ cup of canning salt. Mix well so that the salt dissolves. Then, add enough water to cover the vegetables, and mix again. Cover the bowl, and let it sit on the counter overnight or for at least 8 hours. This step is crucial as it draws out excess moisture and helps to firm up the relish.
-
The next morning, line a counter with plenty of paper towels – I typically use 5 layers to ensure adequate absorption. You’ll be placing the drained vegetables on these paper towels, so make sure you cover a fairly large space; at least 2 feet by 1 ½ feet.
-
Drain the tomato/onion/pepper mixture in a colander and then rinse thoroughly with cold water to remove excess salt. Drain well again.
-
Using your hands (which you have just washed in hot water with soap, of course!), squeeze the remaining moisture out of the vegetables. You’ll be surprised at how much water still comes out. Place the drained and squeezed vegetables evenly on the prepared paper towels.
-
Make a spice bag out of a quadruple layer of cheesecloth. Place the cinnamon stick, whole cloves, whole allspice, celery seed, mustard seeds, peppercorns, and bay leaf inside and tie it securely with string or twine. This will allow the spices to infuse their flavor without leaving bits in the relish.
-
In a non-reactive pan (i.e., one not made of aluminum) large enough to comfortably hold all the vegetables, combine the distilled white vinegar and sugar. Add the spice bag and bring to a boil over medium-high heat, stirring constantly to dissolve the sugar. Boil for 5 minutes.
-
Add the drained vegetable mixture to the simmering vinegar-sugar mixture.
-
Bring the relish to a boil over high heat, then lower the heat to medium-low and simmer, stirring occasionally to prevent sticking, for approximately 30 minutes, or until the relish has thickened slightly and the vegetables are tender.
-
Remove the spice bag and discard it.
-
Ladle the hot relish into sterilized canning jars, leaving ½” headspace. Use a chopstick or other thin, non-metal utensil to run around the sides of the jar to make sure there are no air bubbles left in the jar.
-
Wipe the rims of the jars with damp paper towels to remove any relish which got on the rims or the threads. This ensures a proper seal. Place the lids and the bands on the jars, just tightening the bands fingertip tight (not too tight!).
-
Process in a boiling water bath for 10 minutes, adjusting processing time for altitude if necessary.
-
Remove the jars from the canner using a jar lifter and let sit, undisturbed, for at least 12 hours before checking seals. It’s crucial to let them sit undisturbed for 12 hours because the sealing compound on the lids is still cooling and hardening, completing the seal. While the jars cool, you may hear a “plink” type sound from each jar – this indicates that the vacuum seal is forming.
-
After 12 hours have passed, remove the bands and check the lids. Press down in the center of the lid. If you cannot push the lid down any further, the jar is sealed. If the lid “gives” a bit, and you can push it down, the jar did not seal. You can either put the band back on the jar and reprocess it for another 10 minutes, or you can just put it in the fridge and use it within 3 months.
-
The relish should sit for at least a month before you use it, so the flavors can combine and improve. Patience is a virtue!
Expert Tips & Tricks
- For a spicier relish: Leave the seeds and membranes in the jalapeno pepper.
- To avoid a mushy relish: Be diligent about squeezing out as much moisture as possible from the vegetables after soaking.
- If you don’t have cheesecloth: Use a coffee filter secured with kitchen twine.
- Don’t skip the soaking step: It helps remove bitterness from the green tomatoes.
- Adjust sweetness: Taste the relish during the simmering process and add more sugar if you prefer a sweeter flavor.
Serving & Storage Suggestions
This Green Tomato Relish is incredibly versatile! Serve it on hamburgers, hot dogs, sandwiches (especially ham!), grilled sausages, or as a flavorful accompaniment to cheese and crackers. Once opened, refrigerate the relish. Sealed jars can be stored in a cool, dark place for up to a year. After opening, the relish will last in the refrigerator for several weeks.
Nutritional Information
| Nutrient | Amount per Serving | % Daily Value |
|---|---|---|
| Calories | 550 kcal | N/A |
| Total Fat | 1.3 g | 2% |
| Saturated Fat | 0.2 g | 1% |
| Cholesterol | 0 mg | 0% |
| Sodium | 9489 mg | 395% |
| Total Carbohydrate | 130.3 g | 43% |
| Dietary Fiber | 7 g | 28% |
| Sugars | 119.5 g | N/A |
| Protein | 6.1 g | 12% |
Note: These values are estimates and may vary based on specific ingredients and portion sizes.
Variations & Substitutions
- Spicier version: Add a pinch of red pepper flakes or a second jalapeno.
- Sweeter version: Use brown sugar instead of white sugar.
- Different vegetables: Add finely diced carrots or celery for added texture and flavor.
- Herbaceous version: Add fresh herbs like parsley or cilantro after simmering.
FAQs (Frequently Asked Questions)
Q: Why do I need to soak the vegetables overnight?
A: Soaking the vegetables in salt water helps to draw out excess moisture and bitterness from the green tomatoes, resulting in a better-tasting relish.
Q: Can I use regular table salt instead of canning salt?
A: No, canning salt is preferred because it doesn’t contain iodine or anti-caking agents, which can darken the relish and affect its flavor. If you must use table salt, use kosher salt, but double the amount.
Q: How long does the relish need to sit before I can eat it?
A: It’s best to let the relish sit for at least a month before consuming it. This allows the flavors to meld together and develop fully.
Q: My relish is too watery. What did I do wrong?
A: You may not have squeezed out enough moisture from the vegetables after soaking. Be sure to thoroughly drain and squeeze the vegetables before adding them to the vinegar-sugar mixture.
Q: Do I have to use a boiling water bath canner?
A: Yes, if you want to store the relish at room temperature. Boiling water bath canning is essential for creating a vacuum seal and preventing spoilage. If you are not canning the relish, you can store it in the refrigerator for up to 3 months.
Final Thoughts
I hope this Green Tomato Relish recipe inspires you to embrace the unexpected bounty of your garden and create something truly special. Don’t be afraid to experiment with different variations and find what suits your taste. Share your creations with friends and family, and let the flavors of late summer brighten up your meals all year round. I’d love to hear your feedback and see your culinary masterpieces, so please share your thoughts and photos!