
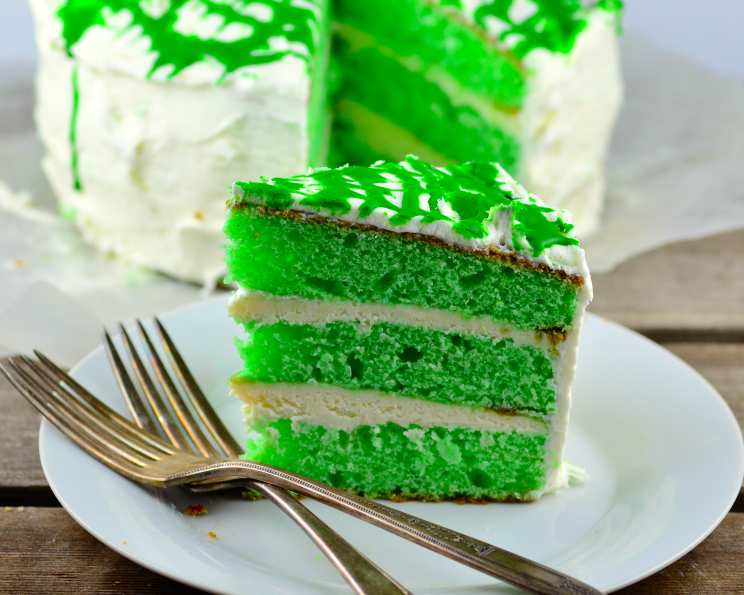
Emerald Dream: Baking the Perfect Green Velvet Cake
The first time I saw a Green Velvet Cake, it was at my eccentric Aunt Millie’s St. Patrick’s Day bash. I remember being mesmerized by its vibrant green hue, a stark contrast to the usual beige and brown desserts. Aunt Millie, with a twinkle in her eye, declared it was “kissed by the leprechauns themselves!” While I’m sure there were no actual leprechauns involved, that cake was a revelation—moist, tender, and surprisingly delicate in flavor. It sparked a lifelong quest to recreate that magical, emerald dream.
Recipe Overview
- Prep Time: 20 minutes
- Cook Time: 25 minutes
- Total Time: 45 minutes
- Servings: 12
- Yield: One 3-layer cake
- Dietary Type: Not specified (Contains dairy, eggs)
Ingredients
- 1 1⁄2 cups oil
- 2 eggs
- 1⁄2 teaspoon green food coloring
- 1 tablespoon vinegar
- 1 cup buttermilk
- 1 1⁄2 cups sugar
- 1 teaspoon vanilla extract
- 2 1⁄2 cups flour
- 1 teaspoon baking soda
- 1⁄4 teaspoon salt
- Your favorite frosting (Cream cheese frosting pairs exceptionally well!)
Equipment Needed
- 3 x 8-inch round cake pans
- Mixing bowls
- Electric mixer (stand or hand-held)
- Measuring cups and spoons
- Sifter or fine-mesh sieve
- Rubber spatula
- Cooling rack
- Offset spatula or knife for frosting
Instructions
-
Preheat your oven to 350°F (175°C). While the oven heats, grease and flour three 8-inch round cake pans. This ensures the cakes release cleanly after baking. A light coating of cooking spray followed by a dusting of flour works perfectly. Tap out any excess flour.
-
In a large mixing bowl, combine the eggs, sugar, oil, and vinegar. Use an electric mixer on medium speed to beat these ingredients together until well combined and slightly lightened in color. This step is crucial for creating a smooth and emulsified batter.
-
In a separate bowl, sift together the flour, baking soda, and salt. Sifting ensures there are no lumps and evenly distributes the baking soda and salt throughout the flour. This results in a lighter and more uniform cake texture.
-
Now, gradually add the dry ingredients to the wet ingredients alternately with the buttermilk, mixing well after each addition. Begin and end with the dry ingredients. This alternating method helps prevent the gluten in the flour from developing too much, which can lead to a tough cake. Be careful not to overmix; mix just until the ingredients are combined. Overmixing develops gluten and results in a dense cake.
-
Blend in the vanilla extract and green food coloring. Start with the specified amount of food coloring and add more, drop by drop, until you achieve your desired shade of green. Remember, the color will deepen slightly during baking.
-
Pour the batter evenly into the prepared cake pans. Use a scale for ultimate precision, or simply eyeball it, aiming for equal amounts in each pan. Evenly distributed batter ensures uniform baking and level cake layers.
-
Bake at 350°F (175°C) for 25 minutes. To check for doneness, insert a toothpick into the center of one of the cakes. If the toothpick comes out clean or with just a few moist crumbs attached, the cakes are done. Be careful not to overbake, as this will dry out the cakes.
-
Cool the cakes in the pans for 10 minutes before inverting them onto a wire cooling rack to cool completely. Cooling the cakes in the pans allows them to set slightly, making them easier to remove without breaking.
-
Once the cakes are completely cool, frost between the layers, on top, and on the sides of the cake with your favorite frosting. Cream cheese frosting is a classic pairing, but any frosting you enjoy will work well.
Expert Tips & Tricks
-
For an extra moist cake, brush the cooled cake layers with a simple syrup before frosting. You can infuse the simple syrup with a hint of vanilla or almond extract for added flavor.
-
If you don’t have buttermilk, you can make a quick substitute by adding 1 tablespoon of vinegar or lemon juice to a measuring cup, then filling the cup with milk to reach 1 cup. Let it sit for 5 minutes before using.
-
To prevent the cake layers from doming during baking, use baking strips wrapped around the outside of the cake pans. These strips help to insulate the sides of the pan, ensuring more even baking. You can purchase baking strips or make your own by wrapping wet towels around the pans.
-
To ensure even layers, level the cake layers with a serrated knife after they have cooled completely. This will create a flat surface for frosting and prevent the cake from wobbling.
-
For a striking presentation, consider using different shades of green food coloring to create an ombre effect on the frosting.
Serving & Storage Suggestions
Serve the Green Velvet Cake chilled or at room temperature. A slice of this cake pairs beautifully with a scoop of vanilla ice cream or a dollop of whipped cream.
Store leftover cake in an airtight container at room temperature for up to 2 days, in the refrigerator for up to 5 days, or in the freezer for up to 3 months. If freezing, wrap the cake tightly in plastic wrap and then in foil to prevent freezer burn. Thaw frozen cake in the refrigerator overnight before serving.
Nutritional Information
Note: Nutritional information is an estimate and may vary based on specific ingredients and serving size.
| Nutrient | Amount per Serving | % Daily Value |
|---|---|---|
| Calories | 453.8 kcal | N/A |
| Calories from Fat | 256 g | 56% |
| Total Fat | 28.5 g | 43% |
| Saturated Fat | 3.9 g | 19% |
| Cholesterol | 31.8 mg | 10% |
| Sodium | 187.4 mg | 7% |
| Total Carbohydrate | 46 g | 15% |
| Dietary Fiber | 0.7 g | 2% |
| Sugars | 26.1 g | N/A |
| Protein | 4.4 g | 8% |
Variations & Substitutions
- For a Red Velvet Cake: Simply substitute red food coloring for the green food coloring. The remaining ingredients and instructions remain the same.
- Dairy-Free Option: Replace the buttermilk with a plant-based alternative like almond or soy milk mixed with 1 tablespoon of vinegar.
- Vegan Option: In addition to the dairy-free buttermilk substitution, replace the eggs with flax eggs (1 tablespoon ground flaxseed mixed with 3 tablespoons water per egg, let sit for 5 minutes to thicken).
- Flavor Variations: Add a teaspoon of peppermint extract for a festive holiday flavor, or a tablespoon of cocoa powder for a richer, more chocolatey cake.
FAQs (Frequently Asked Questions)
Q: Why is there vinegar in the cake?
A: The vinegar reacts with the baking soda to create carbon dioxide, which helps the cake rise and become light and fluffy. It also helps to tenderize the gluten in the flour.
Q: Can I use gel food coloring instead of liquid?
A: Yes, you can use gel food coloring. Start with a small amount and add more until you achieve the desired color. Gel food coloring is more concentrated than liquid, so you’ll need less of it.
Q: My cake layers are sinking in the middle. What did I do wrong?
A: This could be due to several factors, including overmixing the batter, using too much leavening agent (baking soda), or opening the oven door too frequently during baking. Make sure to follow the recipe carefully and avoid overmixing.
Q: Can I make this cake ahead of time?
A: Yes, you can bake the cake layers ahead of time and store them tightly wrapped in the refrigerator for up to 2 days or in the freezer for up to 3 months. Frost the cake shortly before serving.
Q: What is the best way to frost this cake?
A: A simple cream cheese frosting is a classic choice, but any frosting you enjoy will work well. Use an offset spatula to create a smooth and even finish.
Final Thoughts
The Green Velvet Cake is more than just a dessert; it’s a statement. A burst of vibrant color and a taste of pure delight, it’s a treat that will undoubtedly impress. Whether it’s for a St. Patrick’s Day celebration, a birthday, or simply a special occasion, this cake is sure to bring a smile to everyone’s face. So, go ahead, gather your ingredients, and embark on this culinary adventure. And don’t hesitate to share your creations and feedback – I’d love to see your own Emerald Dream cakes come to life!