
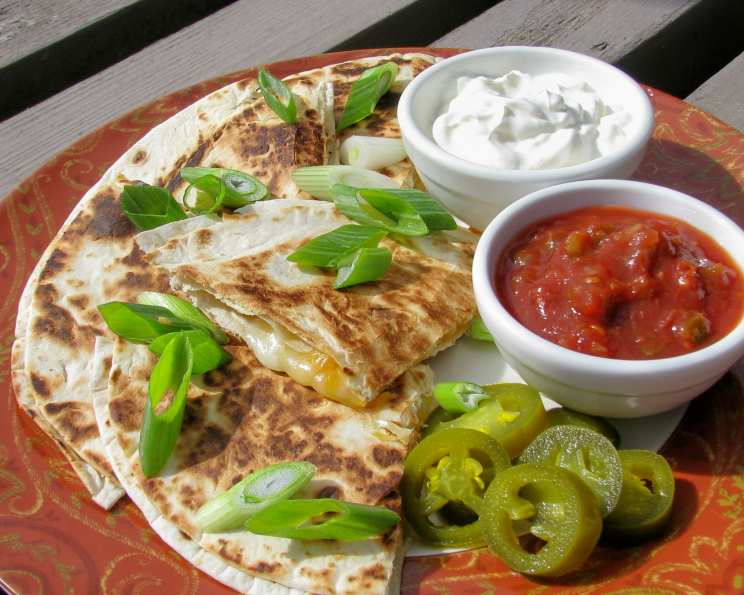
Grilled Cheese Quesadillas: A Tex-Mex Throwback
The scent of melting cheddar always takes me back to my college days. Late-night study sessions, fueled by caffeine and pure desperation, were often punctuated by the sizzle of grilled cheese sandwiches – a simple comfort that somehow made daunting deadlines feel a little less terrifying. But one summer, a friend introduced me to a game-changer: the grilled cheese quesadilla. Suddenly, scallions and extra cheese elevated this student staple into something almost sophisticated, and perfect for sharing around the grill on those warm summer evenings. It was quick, satisfying, and infinitely customizable – the perfect antidote to exam-induced stress.
Recipe Overview
- Prep Time: 10 minutes
- Cook Time: 8 minutes
- Total Time: 18 minutes
- Servings: 6
- Yield: 3 quesadillas
- Dietary Type: Vegetarian
Ingredients
- 1 1⁄4 cups shredded sharp cheddar cheese (about 4-1/2 oz.)
- 1 cup shredded monterey jack cheese (about 4 oz.)
- 6 flour tortillas (6-8 inches)
- 4 scallions, cut diagonally into thin slices
Equipment Needed
- Aluminum foil
- Grill
- Knife
Instructions
-
Begin by combining the shredded cheddar and Monterey Jack cheeses in a medium bowl. Ensure the cheeses are well mixed for even distribution in the quesadillas.
-
Tear off a sheet of aluminum foil that is approximately 3-4 inches larger than your tortillas. Lightly butter the foil. This will prevent the quesadillas from sticking and will also help achieve a golden-brown crust.
-
Place one tortilla in the middle of the prepared foil.
-
Sprinkle one-third of the cheese mixture evenly over the tortilla, ensuring it covers the surface but isn’t piled too high. This even distribution will help the cheese melt uniformly.
-
Next, sprinkle one-third of the sliced scallions over the cheese. The scallions add a mild onion flavor and a vibrant green color.
-
Top with a second tortilla, pressing lightly to ensure the layers adhere together. This helps to create a cohesive quesadilla that’s easier to handle on the grill.
-
Fold the foil loosely over the edge of the tortillas, leaving most of the top exposed. This allows heat to circulate, melting the cheese while also preventing the tortillas from becoming soggy.
-
Repeat steps 3-7 with the remaining tortillas, cheese, and scallions, creating two more quesadillas.
-
When your grill is warming up (and before it becomes hot enough to grill meat), place 1 or 2 foil packages, foil side down, directly on the grill grates. If you don’t have a grill, you can also broil the quesadillas in your oven.
-
If broiling, place the foil packages, foil side down, about 6 inches from the heat source. Broil for approximately 4 minutes, or until the cheese begins to melt.
-
Grill (or broil) until the cheese is melted, about 4 minutes. Keep a close eye on them to prevent burning, especially if your grill is running hot.
-
Carefully flip the foil packages and grill (or broil) until the top tortilla is lightly toasted, about 1-2 minutes. This will give the quesadillas a pleasant crispness and enhance their flavor.
-
Remove the foil packages from the grill. Immediately cut each quesadilla into 6 wedges using a sharp knife. This makes them easier to serve and eat.
-
Serve the quesadillas hot. If you grilled them in batches, keep the cooked quesadillas warm in a low oven (around 200°F) until ready to serve.
Expert Tips & Tricks
- Cheese Selection: While cheddar and Monterey Jack are a classic combination, feel free to experiment with other cheeses. Pepper jack adds a spicy kick, while Oaxaca cheese offers a mild, stringy melt.
- Preventing Sticking: Even though the foil is buttered, sometimes the quesadillas can stick. Gently lift the foil occasionally during grilling to ensure they aren’t adhering to the grates.
- Spice it Up: Add a pinch of chili flakes or a dash of your favorite hot sauce to the cheese mixture for a spicy twist.
- Even Cooking: Ensure your grill is preheated properly. Uneven heat can lead to some parts of the quesadilla cooking faster than others.
- Foil Alternatives: If you’re without aluminum foil, you can use parchment paper, but be extra careful to watch for burning as the paper is thinner than foil.
- Pre-Shredded vs. Block Cheese: While pre-shredded cheese is convenient, freshly shredded cheese melts more smoothly due to the lack of added cellulose.
Serving & Storage Suggestions
Serve these grilled cheese quesadillas immediately while the cheese is melty and the tortillas are warm and crispy. They are fantastic on their own or with a side of salsa, guacamole, or sour cream.
Leftover quesadillas can be stored in an airtight container in the refrigerator for up to 3 days. Reheat them in a skillet over medium heat, or in a toaster oven, until warmed through and the cheese is melted again. Note that the tortillas may not be as crispy after reheating. These quesadillas are best enjoyed fresh, but reheating works in a pinch.
Nutritional Information
| Nutrient | Amount per Serving | % Daily Value |
|---|---|---|
| Calories | 261.9 kcal | N/A |
| Calories from Fat | 142 g | 54% |
| Total Fat | 15.8 g | 24% |
| Saturated Fat | 9.1 g | 45% |
| Cholesterol | 41.5 mg | 13% |
| Sodium | 439.5 mg | 18% |
| Total Carbohydrate | 16.6 g | 5% |
| Dietary Fiber | 1.2 g | 4% |
| Sugars | 1 g | 4% |
| Protein | 13.1 g | 26% |
Variations & Substitutions
- Add Protein: Incorporate shredded cooked chicken, ground beef, or black beans for a heartier meal.
- Vegetarian Delight: Include finely chopped bell peppers, onions, or mushrooms for added nutrients and flavor.
- Different Cheeses: Experiment with different cheese combinations, such as provolone and mozzarella, or a blend of cheddar, Colby, and Monterey Jack.
- Tortilla Alternatives: Try using whole wheat or corn tortillas for a different texture and flavor profile.
- Spicy Kick: Add jalapeños, diced green chilies, or a dash of cayenne pepper for extra heat.
- Sweet and Savory: Add a thin layer of your favorite barbecue sauce for a slightly sweet and smoky flavor.
FAQs (Frequently Asked Questions)
Q: Can I make these ahead of time?
A: You can assemble the quesadillas ahead of time and store them in the refrigerator, but they are best cooked fresh. If you do make them ahead, add a minute or two to the grilling time.
Q: Can I use a panini press instead of a grill?
A: Yes, a panini press works great! Just skip the foil and press until the cheese is melted and the tortillas are golden brown.
Q: How do I keep the quesadillas warm while I’m grilling them in batches?
A: Preheat your oven to 200°F (93°C) and place the cooked quesadillas on a baking sheet inside to keep them warm until ready to serve.
Q: Can I freeze these quesadillas?
A: Freezing is not recommended as the tortillas can become soggy and the cheese texture may change.
Q: What kind of salsa goes best with these quesadillas?
A: A classic tomato salsa, a smoky chipotle salsa, or a vibrant salsa verde would all be delicious choices.
Final Thoughts
So, ditch the same-old grilled cheese routine and embark on a flavor adventure with these grilled cheese quesadillas. The combination of melty cheese, savory scallions, and crispy tortillas is a guaranteed crowd-pleaser. Gather your friends and family, fire up the grill, and let the good times (and delicious food) roll. Don’t be afraid to experiment with different fillings and flavors to create your own signature quesadilla masterpiece. And be sure to let me know what tasty creations you come up with!