
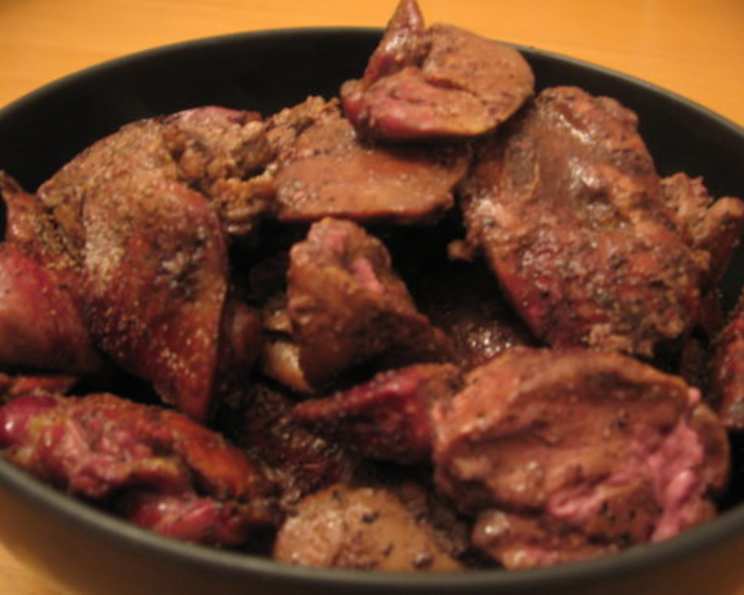
Grilled Chicken Livers in 7-Up: An Unexpected Culinary Delight
I’ll admit, the first time I heard about grilling chicken livers marinated in 7-Up, my initial reaction wasn’t exactly enthusiastic. Visions of my grandmother’s overcooked liver and onions danced in my head, a culinary memory I wasn’t particularly keen on reliving. But then, at a summer barbecue, hosted by a friend whose culinary adventurousness I deeply respected, I found myself facing a platter of these surprisingly fragrant skewers. Curiosity, fueled by a healthy dose of peer pressure, won out. One bite, and I was a convert. The sweet tang of the 7-Up, the smoky char from the grill, and the delicately cooked liver created a symphony of flavors I never expected. Now, it’s a summer staple in my own kitchen, a testament to the fact that even the most unexpected combinations can lead to extraordinary culinary experiences.
Recipe Overview
- Prep Time: 35 minutes
- Cook Time: 8 minutes
- Total Time: 43 minutes
- Servings: 6
- Yield: Approximately 12 skewers
- Dietary Type: Gluten-Free, Dairy-Free
Ingredients
- 12 chicken livers, two halves separated
- 1 quart 7-Up soda (or any other carbonated beverage like cola or apple cider)
- Salt, to taste
- Fresh ground black pepper, to taste
Equipment Needed
- Large bowl
- Bamboo skewers (soaked in water for at least 30 minutes to prevent burning)
- Grill
- Tongs
Instructions
- Begin by gently washing the chicken livers under cold running water. Ensure all traces of blood are removed.
- Drain the livers thoroughly and transfer them to a large bowl.
- Pour the 7-Up soda over the livers, ensuring they are completely submerged in the liquid.
- Marinate the livers in the refrigerator for approximately 30 minutes. This step is crucial for tenderizing the livers and infusing them with the sweet, citrusy flavor of the soda. The carbonation also helps to break down some of the tougher tissues in the liver.
- While the livers are marinating, prepare your grill. Preheat it to a medium-high heat. If using a charcoal grill, ensure the coals are glowing red and covered with a light layer of ash. For a gas grill, set the burners to medium-high.
- Carefully remove the livers from the marinade, discarding the used 7-Up. You can pat them dry with paper towels to help them achieve a better sear on the grill.
- Thread every two pieces of liver onto two separate bamboo skewers. Using two skewers per serving prevents the liver from spinning around the skewer during grilling, ensuring even cooking.
- Carefully lay the skewers over the hot grill grates.
- Season the livers generously with salt and freshly ground black pepper.
- Grill the livers for approximately 4 minutes on each side, until they are browned on the outside and slightly pink on the inside. The internal temperature should reach 165°F (74°C) for food safety. Use a meat thermometer to check the temperature at the thickest part of the liver. Be careful not to overcook the livers, as they can become tough and dry.
- Once cooked to your liking, remove the skewers from the grill and let them rest for a minute or two before serving.
Expert Tips & Tricks
- Don’t over-marinate: While marinating is crucial, avoid marinating the livers for longer than 30 minutes. The acidity in the 7-Up can start to break down the liver too much, resulting in a mushy texture.
- Temperature Control: The key to perfectly grilled chicken livers is temperature control. Medium-high heat is ideal for achieving a nice sear without burning the outside before the inside is cooked.
- Skewers are Key: Using two skewers for each serving helps to prevent the liver from spinning and ensures even cooking. Soaking the skewers in water prevents them from burning on the grill.
- Don’t overcrowd the grill: Grill the livers in batches to maintain the grill’s temperature and ensure even cooking.
- Resting is Important: Allowing the livers to rest for a couple of minutes after grilling allows the juices to redistribute, resulting in a more tender and flavorful final product.
- Spice it up! Add a pinch of red pepper flakes to the livers before grilling for a little kick.
Serving & Storage Suggestions
Serve the grilled chicken livers immediately after cooking for the best flavor and texture. They are delicious served as an appetizer or as part of a larger meal. Consider pairing them with a fresh green salad or grilled vegetables.
Leftovers can be stored in an airtight container in the refrigerator for up to 2 days. To reheat, gently warm them in a skillet over medium heat or in the microwave. Be careful not to overcook them when reheating, as they can become tough.
While freezing is not recommended due to the potential for changes in texture, if you must freeze them, ensure they are completely cooled before wrapping them tightly in plastic wrap and placing them in a freezer-safe bag. They can be stored in the freezer for up to 1 month. Thaw them in the refrigerator overnight before reheating.
Nutritional Information
| Nutrient | Amount per Serving | % Daily Value |
|---|---|---|
| Calories | 139.9 kcal | N/A |
| Calories from Fat | 28 g | 20% |
| Total Fat | 3.1 g | 4% |
| Saturated Fat | 1 g | 5% |
| Cholesterol | 220.8 mg | 73% |
| Sodium | 60.2 mg | 2% |
| Total Carbohydrate | 16.7 g | 5% |
| Dietary Fiber | 0 g | 0% |
| Sugars | 14.8 g | N/A |
| Protein | 10.9 g | 21% |
Note: Nutritional information is an estimate and may vary based on specific ingredients and cooking methods.
Variations & Substitutions
- Cola or Apple Cider: If you don’t have 7-Up on hand, you can easily substitute it with cola or apple cider. The cola will impart a slightly different flavor profile, with a hint of caramel, while the apple cider will add a subtle sweetness.
- Herbs and Spices: Experiment with different herbs and spices to customize the flavor of the livers. Garlic powder, onion powder, paprika, or a pinch of cayenne pepper can add depth and complexity.
- Citrus Zest: Adding a teaspoon of lemon or orange zest to the marinade can brighten the flavor and add a refreshing aroma.
- Different Liver: While this recipe calls for chicken livers, you can also use other types of liver, such as beef or lamb liver. However, keep in mind that the cooking time may need to be adjusted depending on the type of liver you use.
- Balsamic Glaze: For a touch of elegance, drizzle the grilled livers with a balsamic glaze before serving. The sweet and tangy flavor of the glaze complements the richness of the liver perfectly.
FAQs (Frequently Asked Questions)
Q: Why marinate the chicken livers in 7-Up?
A: The 7-Up helps to tenderize the livers and infuses them with a subtle sweetness and citrusy flavor. The carbonation also aids in breaking down the tissues, resulting in a more tender texture.
Q: Can I use another carbonated beverage besides 7-Up?
A: Yes, you can substitute 7-Up with other carbonated beverages such as cola or apple cider. The flavor profile will vary slightly depending on the beverage you choose.
Q: How do I know when the chicken livers are cooked through?
A: The chicken livers are cooked through when they are browned on the outside and slightly pink on the inside. The internal temperature should reach 165°F (74°C) for food safety. Use a meat thermometer to check the temperature at the thickest part of the liver.
Q: Can I grill the chicken livers without skewers?
A: While it’s possible to grill the livers without skewers, using skewers helps to prevent them from falling through the grill grates and makes them easier to handle.
Q: Can I prepare the chicken livers ahead of time?
A: You can marinate the chicken livers ahead of time and store them in the refrigerator for up to 24 hours. However, it’s best to grill them just before serving for the best flavor and texture.
Final Thoughts
Grilled chicken livers in 7-Up might sound unconventional, but trust me, it’s a culinary adventure worth taking. The combination of the sweet and tangy marinade, the smoky char from the grill, and the delicate flavor of the liver creates a truly unique and satisfying dish. So, fire up your grill, gather your ingredients, and prepare to be amazed by this unexpected culinary delight. Don’t be afraid to experiment with different variations and substitutions to create your own signature version. And most importantly, don’t hesitate to share your feedback and experiences with others. Happy grilling!