
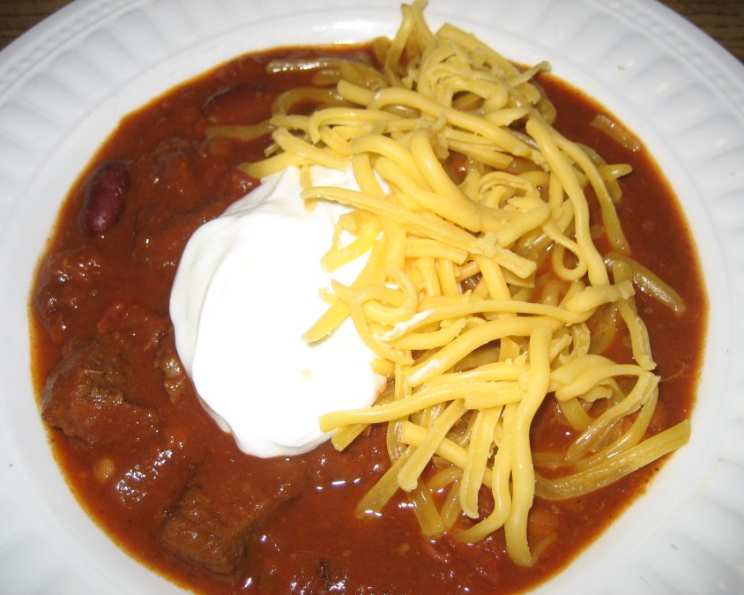
Grilled Chili: A Smoky, Hearty Delight
There’s something magical about the aroma of chili simmering on a cool autumn evening, but my most cherished chili memories involve a grill. Growing up, my dad would always make his famous chili on the grill during our annual family camping trip. The smoky char of the beef and peppers mingling with the rich, earthy spices created a flavor profile unlike any other. Now, every time I make this grilled chili, I’m instantly transported back to those happy days, surrounded by loved ones and the comforting crackle of the campfire.
Recipe Overview
- Prep Time: 30 minutes
- Cook Time: 1 hour
- Total Time: 1 hour 30 minutes
- Servings: 8
- Yield: About 10 cups
- Dietary Type: Not Gluten-Free (can be modified), Dairy Optional
Ingredients
- 2 lbs lean beef, trimmed of fat and cut into 1-inch cubes (I usually use round)
- 1/4 cup chili powder
- 1 tablespoon ground chipotle chile pepper
- 2 anaheim chilies
- 2 jalapeno peppers
- 2 tablespoons olive oil
- 1 large onion, chopped
- 2 large garlic cloves, minced
- 1 (15 ounce) can pinto beans, drained
- 1 (15 ounce) can kidney beans, drained
- 1 (15 ounce) can navy beans, drained
- 2 (14 1/2 ounce) cans diced tomatoes with juice, undrained
- 2 (14 1/2 ounce) cans tomato sauce
- Shredded cheese (garnish) (optional)
- Sour cream (garnish) (optional)
Equipment Needed
- Large Ziplock bag
- Skewers
- Gas grill or charcoal grill
- Large saucepot
- Paper towels
- Paper bag
Instructions
-
Prepare a coal fire or preheat a gas grill. Aim for medium-high heat. If using charcoal, ensure the coals are evenly distributed.
-
Measure the chili powder and chipotle chile pepper into a large ziplock bag. This spice blend will give the beef a beautiful smoky flavor.
-
Add some of the beef cubes to the bag, seal it, and shake to coat. Remove the beef cubes and repeat until all the beef is well coated. Add additional chili powder and chipotle if needed to ensure each cube is well seasoned. Reserve any remaining spice mixture – it will be added to the chili later.
-
Thread the beef cubes onto skewers. Don’t overcrowd the skewers; leave a little space between each cube for even cooking.
-
Thread the peppers onto separate skewers. Use two skewers for each pepper, one at each end, to make turning easier. This prevents them from spinning and ensures even charring.
-
Grill the beef and peppers until the beef is barely done. Do not overcook the beef, or it will become tough. Aim for about 10 minutes, turning frequently. Grill the peppers until they are blackened, about 15-20 minutes, turning occasionally. The blackening is crucial for developing their smoky sweetness.
-
Remove the beef cubes from the skewers and set aside.
-
Remove the peppers from the skewers, wrap them in damp paper towels, and place them in a paper bag. Fold the bag closed. Let them rest for 15 minutes, or until they are cool enough to handle. This steaming process makes it easier to peel the skin off.
-
Peel the skin from the peppers, seed them, and dice them. The roasted pepper aroma at this stage is incredible!
-
Meanwhile, in a large saucepot, heat the olive oil over medium heat.
-
Sauté the onion and garlic until the onion is tender and translucent, and the garlic is white or pale golden. This should take about 5-7 minutes. Be careful not to let the garlic get dark, as it will become bitter.
-
Add the grilled beef, diced peppers, pinto beans, kidney beans, navy beans, diced tomatoes with juice, tomato sauce, and the reserved spice mixture to the saucepot.
-
Bring the mixture to a simmer, then reduce the heat to low, cover, and simmer for about 20-30 minutes, or until the beef is tender and the seasonings are well blended. Stir occasionally to prevent sticking. For a richer flavor, simmer for longer.
-
Serve hot, garnished with shredded cheese or sour cream, if desired. A dollop of guacamole or a sprinkle of fresh cilantro would also be fantastic additions.
Expert Tips & Tricks
-
Marinate the beef: For even more flavor, marinate the beef cubes in the chili powder and chipotle mixture for at least 30 minutes (or up to overnight) before grilling.
-
Control the heat: If your grill runs hot, use an indirect heat zone for the beef to prevent it from burning before it’s cooked through.
-
Adjust the spice level: If you prefer a milder chili, reduce the amount of chipotle chile pepper. For a spicier chili, add a pinch of cayenne pepper or use hotter peppers like serranos.
-
Smoke it up: If you’re using a charcoal grill, add wood chips (like hickory or mesquite) for an extra layer of smoky flavor. Soak the wood chips in water for about 30 minutes before adding them to the coals.
-
Make it vegetarian: Replace the beef with a plant-based alternative or use extra beans and vegetables like corn, zucchini, and bell peppers.
-
Slow cooker option: If you don’t have a grill, you can still achieve a similar flavor by browning the beef in a skillet and roasting the peppers in the oven before adding them to the slow cooker.
Serving & Storage Suggestions
Serve the grilled chili hot in bowls, garnished with your favorite toppings like shredded cheese, sour cream, chopped onions, cilantro, or avocado. It’s also great served over rice, cornbread, or baked potatoes.
Leftover chili can be stored in an airtight container in the refrigerator for up to 3-4 days. For longer storage, freeze it for up to 3 months. Thaw in the refrigerator overnight before reheating on the stovetop or in the microwave.
Nutritional Information
| Nutrient | Amount per Serving | % Daily Value |
|---|---|---|
| Calories | 475 kcal | 24% |
| Total Fat | 12.6g | 19% |
| Saturated Fat | 3.4g | 17% |
| Cholesterol | 66.9mg | 22% |
| Sodium | 1162.2mg | 48% |
| Total Carbohydrate | 55.5g | 18% |
| Dietary Fiber | 17.7g | 70% |
| Sugars | 11.4g | 45% |
| Protein | 38.7g | 77% |
Variations & Substitutions
- Gluten-Free: This recipe is easily made gluten-free by ensuring that your chili powder and other spices are certified gluten-free. Serve with gluten-free cornbread or tortilla chips.
- Spicier Chili: Add a chopped serrano pepper or a pinch of cayenne pepper to the saucepot.
- Sweeter Chili: Add a tablespoon of brown sugar or maple syrup to balance the flavors.
- Different Beans: Feel free to substitute other types of beans, such as black beans or great northern beans.
- Vegetarian: Substitute the beef with 1.5 lbs of chopped portobello mushrooms or a plant-based ground meat alternative.
- Toppings Galore: Experiment with different toppings like crumbled tortilla chips, a squeeze of lime juice, or a dollop of Greek yogurt.
FAQs (Frequently Asked Questions)
Q: Can I make this chili ahead of time?
A: Absolutely! In fact, the flavors often meld together even better when the chili is made a day or two in advance. Store it in the refrigerator and reheat before serving.
Q: What if I don’t have a grill?
A: No problem! You can broil the peppers in the oven to blacken them and brown the beef in a large skillet. Then, proceed with the rest of the recipe in a saucepot on the stovetop.
Q: How do I prevent the beef from becoming tough?
A: Avoid overcooking the beef on the grill. Aim for medium-rare to medium, as it will continue to cook in the saucepot. Also, simmering the chili for a longer period will help tenderize the beef.
Q: Can I use ground beef instead of cubed beef?
A: Yes, you can, but the texture will be different. Ground beef will break down more during cooking, resulting in a less chunky chili.
Q: How can I thicken the chili if it’s too watery?
A: You can thicken the chili by simmering it uncovered for a longer period to allow some of the liquid to evaporate. Alternatively, you can mash a handful of the beans with a fork and stir them back into the chili.
Final Thoughts
Grilled chili is more than just a meal; it’s an experience. The smoky flavors, the hearty textures, and the customizable toppings make it a crowd-pleaser that’s perfect for any occasion. So fire up your grill, gather your friends and family, and get ready to enjoy a truly unforgettable bowl of chili. Don’t be afraid to experiment with different ingredients and toppings to create your own unique version. I’d love to hear about your culinary adventures! Share your feedback and tag me in your photos. Happy grilling!