
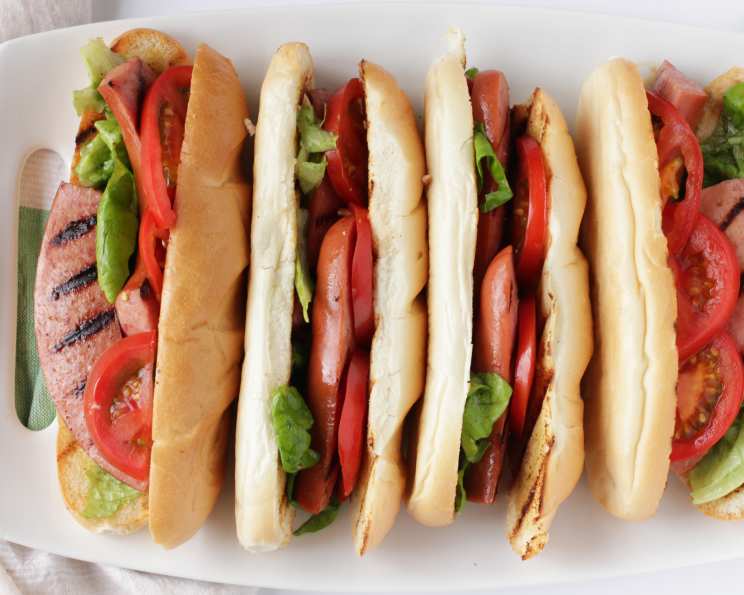
Grilled Kielbasa Sandwiches: A Culinary Adventure
The scent of grilled kielbasa always transports me back to summer afternoons at my grandfather’s. He’d fire up his ancient charcoal grill, the smoke dancing with the aroma of wood and savory sausage. These weren’t just meals; they were celebrations of family, sunshine, and simple, satisfying flavors. My favorite was always his kielbasa sandwich, a masterpiece of textures and tastes nestled inside a crusty roll.
Recipe Overview
- Prep Time: 15 minutes
- Cook Time: 7 minutes
- Total Time: 22 minutes
- Servings: 4
- Dietary Type: Varies (can be gluten-free with appropriate bread)
Ingredients
- 1 lb whole smoked kielbasa
- 1/4 cup olive oil
- 2 tablespoons Dijon mustard
- 2 tablespoons bottled horseradish, drained
- 1 tablespoon white wine vinegar
- 2 1/2 teaspoons honey
- 1 pinch garlic powder (or to taste)
- 1/4 teaspoon salt (or to taste)
- Fresh ground black pepper (to taste)
- 1 head Boston lettuce, torn into small pieces
- 2 firm ripe plum tomatoes, thinly sliced
- 4 crusty French rolls (about 6 inches long)
Equipment Needed
- Grill (outdoor, indoor, or grill pan)
- Blender or food processor
- Knife
- Cutting board
- Mixing bowl
Instructions
-
Preheat your grill to medium heat. If you’re using a charcoal grill, ensure the coals are glowing red with a light ash coating. For a gas grill, set it to medium. If you’re using a grill pan, place it over medium heat until it’s nice and hot.
-
Prepare the vinaigrette. In a blender or food processor, combine the olive oil, Dijon mustard, horseradish, white wine vinegar, honey, garlic powder, salt, and pepper. Blend until the mixture is emulsified, forming a smooth and creamy vinaigrette. Taste and adjust the seasoning as needed, adding more salt, pepper, or honey to your preference.
-
Dress the lettuce. Place the torn Boston lettuce in a mixing bowl. Pour approximately HALF of the vinaigrette over the lettuce and toss gently to coat the leaves evenly. Reserve the remaining vinaigrette for later use.
-
Prepare the rolls. Slice the crusty French rolls in half horizontally.
-
Grill the rolls. Lightly oil the grill rack. Place the top and bottom halves of the buns on the oiled grill rack, cut-side down. Grill for about 2 minutes per side, or until they are lightly toasted and have grill marks. Keep a close eye on them, as they can burn quickly. Transfer the grilled buns, cut-sides up, to a platter or plate.
-
Brush the buns. Brush the cut sides of the top halves of the rolls with the remaining vinaigrette. This will add moisture and flavor to the sandwich.
-
Assemble the base. On the bottom halves of the rolls, divide and mound the coated lettuce leaves evenly.
-
Prepare the kielbasa. Cut the kielbasa crosswise into 4 long sections. Then, halve each section lengthwise. You may trim off the outside skin before grilling if desired, especially if it’s tough.
-
Grill the kielbasa. Lightly oil the grill rack again. Place the kielbasa slices on the oiled grill rack. Grill for about 3-4 minutes, turning over once during cooking, until they are heated through and have grill marks. The internal temperature should reach 165°F (74°C).
-
Assemble the sandwiches. Arrange 2 pieces of grilled kielbasa over the lettuce on each bottom half of the roll (2 pieces per sandwich). Top with thinly sliced plum tomatoes. Season the tomatoes with salt and pepper to taste.
-
Top and serve. Cover with the top half of the rolls. Serve immediately and enjoy your delicious Grilled Kielbasa Sandwiches!
Expert Tips & Tricks
- For a spicier kick, use a spicy Dijon mustard or add a pinch of red pepper flakes to the vinaigrette.
- If you don’t have a blender or food processor, you can whisk the vinaigrette ingredients together in a bowl. Just be sure to whisk vigorously to emulsify the oil and vinegar.
- To prevent the buns from burning, keep the grill temperature moderate and watch them closely. You can also lightly brush the cut sides with olive oil before grilling.
- If you’re using a grill pan, make sure it’s properly preheated before adding the kielbasa. This will ensure good grill marks and even cooking.
- For make-ahead preparation, you can prepare the vinaigrette and slice the vegetables in advance. Store them separately in the refrigerator until ready to assemble the sandwiches.
- If you don’t have Boston lettuce, other leafy greens like Romaine or butter lettuce will also work well.
- To fix tough kielbasa, score the outside before grilling. This prevents curling and allows the heat to penetrate better.
- You can substitute salami for a Kosher option, as mentioned in the original note.
Serving & Storage Suggestions
Serve the Grilled Kielbasa Sandwiches immediately for the best flavor and texture. The warm, grilled kielbasa and toasted buns are best enjoyed fresh.
If you have leftovers, store the components separately to prevent the buns from getting soggy. Wrap the grilled kielbasa and sliced tomatoes in airtight containers and refrigerate. Keep the lettuce in a separate container lined with paper towels to absorb excess moisture. Store the buns at room temperature in a bread bag or airtight container.
Leftover kielbasa and tomatoes can be reheated in a skillet or microwave. Reheat the buns in a toaster or under the broiler. Reassemble the sandwiches just before serving. Leftovers are best consumed within 2-3 days.
Nutritional Information
| Nutrient | Amount per Serving | % Daily Value |
|---|---|---|
| Calories | 511 kcal | N/A |
| Calories from Fat | 318 g | 62% |
| Total Fat | 35.4 g | 54% |
| Saturated Fat | 9.2 g | 46% |
| Cholesterol | 78.4 mg | 26% |
| Sodium | 1794.8 mg | 74% |
| Total Carbohydrate | 30.5 g | 10% |
| Dietary Fiber | 2.6 g | 10% |
| Sugars | 5.5 g | N/A |
| Protein | 19.2 g | 38% |
Note: Nutritional information is an estimate and may vary based on specific ingredients and portion sizes.
Variations & Substitutions
- Spicy Kielbasa: Use a spicy kielbasa for an extra kick.
- Gluten-Free: Use gluten-free rolls to make this recipe gluten-free.
- Vegetarian: Replace the kielbasa with grilled portobello mushrooms marinated in a similar vinaigrette for a vegetarian option.
- Cheese: Add a slice of your favorite cheese, such as provolone or Swiss, to the sandwich for added flavor.
- Different Vegetables: Experiment with different vegetables, such as grilled onions, peppers, or zucchini.
- Different Greens: Try arugula or spinach instead of Boston lettuce for a peppery bite.
FAQs (Frequently Asked Questions)
Q: Can I use a different type of sausage?
A: Absolutely! While kielbasa is traditional, you can use any smoked sausage you prefer, such as bratwurst or Italian sausage.
Q: Can I make the vinaigrette ahead of time?
A: Yes, the vinaigrette can be made up to 2 days in advance. Store it in an airtight container in the refrigerator.
Q: How do I prevent the kielbasa from drying out on the grill?
A: Avoid overcooking the kielbasa. Grill it just until it’s heated through and has grill marks.
Q: Can I use a panini press instead of a grill?
A: Yes, a panini press will work well. Just be sure to adjust the cooking time as needed.
Q: What side dishes go well with these sandwiches?
A: Potato salad, coleslaw, corn on the cob, or a simple green salad are all great accompaniments.
Final Thoughts
This Grilled Kielbasa Sandwich recipe is more than just a meal; it’s an invitation to create lasting memories. Whether you’re grilling in your backyard or using a grill pan indoors, the combination of smoky kielbasa, tangy vinaigrette, and fresh vegetables is sure to delight your taste buds. Gather your loved ones, fire up the grill, and enjoy the simple pleasure of a perfectly crafted sandwich. Don’t hesitate to experiment with different variations and make it your own. I’d love to hear your feedback and what ingredients you enjoyed the most. Happy grilling!