
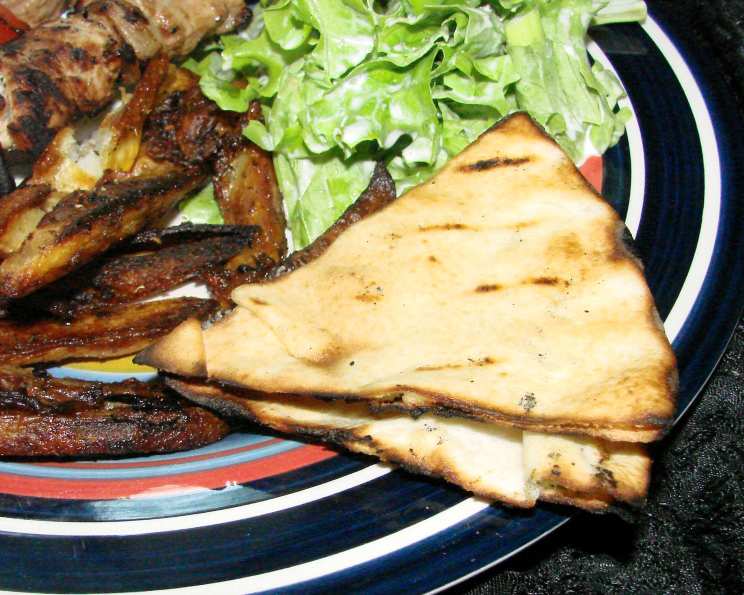
Grilled Pita Chips: A Taste of Sunshine and Smoke
There’s something magical about the smell of grilling – the smoky char, the hint of caramelized sweetness. As a child, I remember my grandfather firing up his old charcoal grill every summer weekend. While he was the master of ribs and burgers, he always made a batch of grilled pita bread on the side. He’d brush them with olive oil, sprinkle them with sesame seeds from his garden, and grill them until they were perfectly crisp. They became the perfect accompaniment to baba ghanoush or hummus, turning a simple snack into a treasured memory. These grilled pita chips are a tribute to those flavors and the simple joys of outdoor cooking.
Recipe Overview
- Prep Time: 5 minutes
- Cook Time: 4 minutes
- Total Time: 9 minutes
- Servings: 6-8
- Yields: 24 wedges
- Dietary Type: Vegetarian
Ingredients
- 3 large pita breads (or 4 small)
- 3 tablespoons olive oil, extra-virgin
- 1 tablespoon sesame seeds (optional)
Equipment Needed
- Grill
- Tongs
- Pastry Brush (optional, for applying olive oil)
- Tray, Platter or Rack
Instructions
-
Preheat your grill to high heat. You want it hot enough to char the pita quickly without burning it to a crisp. If using a charcoal grill, make sure the coals are glowing red with a light coating of ash. For a gas grill, preheat with the lid closed for at least 10 minutes.
-
Prepare the pita bread: If you’re using large pitas, cut each into 8 wedges. If using smaller pitas, cut each into 6 wedges. A pizza cutter can make this process quick and easy, resulting in even slices.
-
Brush with olive oil: Generously brush both sides of each pita wedge with extra-virgin olive oil. Don’t be shy! The olive oil not only adds flavor but also helps the pita crisp up beautifully on the grill. A pastry brush works well, but you can also drizzle the oil and rub it in with your fingers.
-
Add sesame seeds (optional): Sprinkle one side of each pita wedge with sesame seeds, if desired. Black sesame seeds offer a striking contrast and nutty flavor, while white sesame seeds provide a more delicate taste.
-
Grill the pita chips: When the grill is hot, carefully arrange the pita wedges on the grill grates. Make sure not to overcrowd the grill; work in batches if necessary. Turn the wedges with tongs, ensuring even browning on both sides. This process should take only 1-2 minutes per side. Watch them closely to prevent burning! The edges should be golden brown and slightly charred.
-
Cool and crisp: Once the pita wedges are nicely browned, remove them from the grill and place them in a single layer on a tray, platter, or rack. Allow them to cool completely. As they cool, they will crisp up even further, achieving that perfect crunchy texture.
Expert Tips & Tricks
- Stale pita revival: This recipe is perfect for reviving slightly stale pita bread. The grilling process will dry them out and restore their crispness.
- Flavor variations: Experiment with different herbs and spices. Before grilling, sprinkle the pita wedges with garlic powder, onion powder, dried oregano, or chili flakes for a customized flavor profile.
- Even cooking: For even grilling, ensure the grill grates are clean and well-oiled. This will prevent the pita from sticking and ensure even browning.
- Adjusting for grill type: The exact grilling time may vary depending on your grill. Keep a close eye on the pita chips and adjust the cooking time accordingly.
- Make ahead: You can brush the pita with olive oil and sprinkle with sesame seeds ahead of time. Store them in an airtight container until you’re ready to grill.
Serving & Storage Suggestions
Serve the grilled pita chips immediately after cooling for the best crispness. They make a fantastic accompaniment to dips like hummus, tzatziki, baba ghanoush, or even a simple bean dip. They are also a great addition to a cheese board or charcuterie platter.
Store leftover grilled pita chips in an airtight container at room temperature. They will stay crisp for up to 2-3 days. If they start to soften, you can re-crisp them in a low oven (300°F/150°C) for a few minutes. It’s best not to freeze the pita chips, as they will lose their crispness upon thawing.
Nutritional Information
| Nutrient | Amount per Serving | % Daily Value |
|---|---|---|
| Calories | 142 kcal | N/A |
| Fat | 7.1 g | 10% |
| Saturated Fat | 1 g | 4% |
| Cholesterol | 0 mg | 0% |
| Sodium | 160.9 mg | 6% |
| Carbohydrate | 16.7 g | 5% |
| Fiber | 0.7 g | 2% |
| Sugars | 0.4 g | 1% |
| Protein | 2.7 g | 5% |
Note: Nutritional information is an estimate and may vary depending on the specific ingredients and portion sizes used.
Variations & Substitutions
- Gluten-Free: Use gluten-free pita bread for a gluten-free version of this recipe.
- Different Oils: Experiment with flavored olive oils, such as garlic-infused or chili-infused oil, for added flavor.
- Spice it up: Add a pinch of cayenne pepper or red pepper flakes to the olive oil for a spicy kick.
- Herb Infusion: Infuse the olive oil with fresh herbs like rosemary or thyme for a more aromatic flavor. Simply heat the olive oil gently with the herbs before brushing on the pita.
- Cheese Sprinkle: For a richer flavor, sprinkle a little grated Parmesan or Pecorino Romano cheese on the pita wedges before grilling.
FAQs (Frequently Asked Questions)
Q: Can I use regular olive oil instead of extra-virgin olive oil?
A: Yes, you can use regular olive oil, but extra-virgin olive oil will provide a richer flavor.
Q: How do I prevent the pita chips from burning on the grill?
A: Keep a close eye on the pita chips and turn them frequently. Reduce the heat if necessary.
Q: Can I make these in the oven if I don’t have a grill?
A: Yes, you can bake them in the oven at 350°F (175°C) for 5-7 minutes per side, or until golden brown and crisp.
Q: What dips go well with these pita chips?
A: Hummus, tzatziki, baba ghanoush, guacamole, and bean dips are all excellent choices.
Q: Can I use different types of seeds instead of sesame seeds?
A: Absolutely! Try using poppy seeds, sunflower seeds, or even a blend of seeds for different flavors and textures.
Final Thoughts
These grilled pita chips are more than just a snack; they’re an invitation to slow down, savor the moment, and enjoy the simple pleasures of cooking outdoors. The smoky flavor, the satisfying crunch, and the versatility of this recipe make it a guaranteed crowd-pleaser. So fire up your grill, gather your friends and family, and create some new memories around this delightful treat. Don’t hesitate to experiment with different flavors and spices to make it your own. And be sure to share your creations – and your grilling stories – with those you love.