
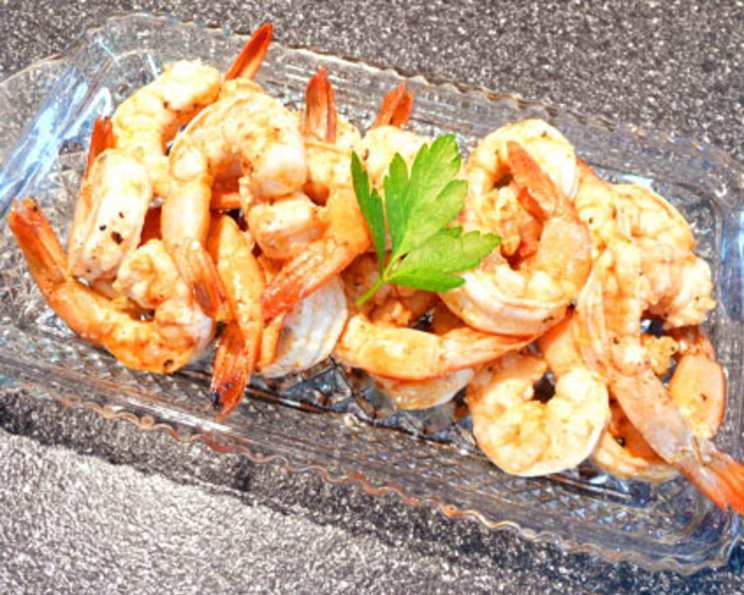
Grilled Salt & Pepper Shrimp: A Fiery Kiss from the Coals
The first time I tasted truly exceptional grilled shrimp, it wasn’t in a fancy restaurant. It was at a beachside barbecue, the salty air mixing with the irresistible aroma of seafood kissed by flames. My uncle, a man who treated grilling like an art form, handed me a skewer of plump, perfectly charred shrimp. That first bite – the sweet, succulent shrimp, the smoky char, and the potent kick of pepper – sparked a lifelong obsession with recreating that perfect, simple flavor. This recipe aims to capture that memory, offering a bold and flavorful shrimp dish that’s both easy to make and impossible to resist.
Recipe Overview
- Prep Time: 15 minutes
- Cook Time: 4-6 minutes
- Total Time: 20 minutes
- Servings: 6-8
- Yield: Varies based on shrimp size
- Dietary Type: Pescatarian, Gluten-Free, Dairy-Free
Ingredients
- 4 lbs large shrimp, peeled and deveined with tails on
- 2 tablespoons fresh lime juice
- 1 tablespoon coarse salt
- 2 tablespoons cracked black and white peppercorns
- 1 teaspoon cayenne pepper
- ½ teaspoon chili powder
- splash dry vermouth
- ¼ cup olive oil, plus extra for brushing
Equipment Needed
- Large bowl
- Colander
- Charcoal or gas grill
- Grill brush
- Aluminum foil
Instructions
-
Begin by preparing the shrimp. Place the shrimp in a colander, rinse them under cold water, and then pat them completely dry with paper towels. This is a crucial step, as dry shrimp will char better on the grill.
-
In a large bowl, create your flavor base. Combine the dried shrimp, lime juice, coarse salt, cracked black and white peppercorns, cayenne pepper, and chili powder. Toss thoroughly to ensure each shrimp is evenly coated with the spice mixture.
-
Add a splash of dry vermouth to the bowl, followed by ¼ cup of olive oil. Toss again, making sure every piece of shrimp is glistening with the marinade. Cover the bowl and refrigerate the shrimp until you are ready to use them. The marinating time allows the flavors to meld, but don’t marinate for more than an hour, as the lime juice can start to “cook” the shrimp.
-
Prepare your grill. Whether you’re using a charcoal or gas grill, prepare it for direct grilling over medium-high heat. For a charcoal grill, this means arranging the coals so they provide a consistent heat source across the grilling surface.
-
Clean and oil the grill grate. Using a grill brush, scrub the grate clean to remove any debris from previous grilling sessions. Then, lightly brush the grate with olive oil to prevent the shrimp from sticking. This is an essential step for achieving those beautiful grill marks.
-
Time to grill the shrimp! Working in batches to avoid overcrowding the grill, place the marinated shrimp directly on the hot grate. Grill the shrimp, turning once, until they turn bright red and develop a nice char on both sides. This usually takes about 2-3 minutes per side, depending on the size of the shrimp and the intensity of the heat. Be vigilant, as shrimp can overcook quickly, becoming rubbery.
-
Transfer the grilled shrimp to a serving platter. Tent the platter loosely with aluminum foil to keep the shrimp warm until you are ready to serve.
Expert Tips & Tricks
- Don’t overcrowd the grill: Grilling in batches ensures that each shrimp cooks evenly and develops a beautiful char. Overcrowding lowers the grill temperature and steams the shrimp instead of grilling it.
- Use a grilling basket: If you’re concerned about the shrimp falling through the grates, use a grilling basket. Be sure to oil the basket well to prevent sticking.
- Adjust the spice level: Feel free to adjust the amount of cayenne pepper and chili powder to suit your taste. If you prefer a milder flavor, reduce the amount of these spices. For a spicier kick, add a pinch of red pepper flakes.
- Skewers are your friend: For easier handling and even cooking, thread the shrimp onto skewers before grilling. This also makes for a more elegant presentation.
- Freshness is key: Use the freshest shrimp you can find for the best flavor and texture. Frozen shrimp can be used, but make sure to thaw it completely and pat it dry before marinating.
- Don’t over-marinate: The acid in the lime juice can break down the shrimp if marinated for too long. Limit marinating to a maximum of one hour.
- Achieving the perfect char: For a truly impressive char, ensure your grill is hot and the shrimp are dry before placing them on the grate.
Serving & Storage Suggestions
Serve the grilled salt & pepper shrimp immediately while they are still warm and juicy. They make a fantastic appetizer or main course. Garnish with fresh lime wedges and chopped cilantro for a pop of color and flavor.
Leftover grilled shrimp can be stored in an airtight container in the refrigerator for up to 2 days. They are best enjoyed cold in salads or shrimp cocktails, as reheating can sometimes make them tough. If you must reheat them, do so gently in a skillet with a little olive oil over low heat. Avoid microwaving, as this can easily overcook them.
Do not leave shrimp at room temperature for more than two hours.
Nutritional Information
| Nutrient | Amount per Serving | % Daily Value |
|---|---|---|
| Calories | 297.6 kcal | N/A |
| Calories from Fat | 109 g | 37% |
| Total Fat | 12.2 g | 18% |
| Saturated Fat | 1.6 g | 8% |
| Cholesterol | 382 mg | 127% |
| Sodium | 2882.7 mg | 120% |
| Total Carbohydrate | 3.5 g | 1% |
| Dietary Fiber | 0.2 g | 0% |
| Sugars | 0.1 g | 0% |
| Protein | 41.4 g | 82% |
Note: Nutritional information is an estimate and may vary based on specific ingredients and portion sizes.
Variations & Substitutions
- Spicy Mango Salsa: Top the grilled shrimp with a vibrant mango salsa for a sweet and spicy contrast.
- Coconut Lime Marinade: Substitute the dry vermouth with coconut milk and add a pinch of ginger for a tropical twist.
- Lemon Pepper Shrimp: Use lemon juice instead of lime juice for a brighter, more citrusy flavor.
- Herb-Infused Oil: Infuse the olive oil with fresh herbs like rosemary, thyme, or oregano for added depth of flavor.
- Vegetable Skewers: Alternate the shrimp on skewers with colorful vegetables like bell peppers, zucchini, and onions for a complete meal.
- Garlic Butter Sauce: Drizzle the grilled shrimp with a garlic butter sauce for a richer, more decadent flavor. Sauté minced garlic in butter until fragrant, then add a squeeze of lemon juice and a pinch of salt.
FAQs (Frequently Asked Questions)
Q: Can I use frozen shrimp for this recipe?
A: Yes, you can. Ensure the shrimp is fully thawed and patted dry before marinating. This will help it char better on the grill.
Q: How do I know when the shrimp is cooked through?
A: The shrimp is done when it turns pink and opaque, and the flesh is firm to the touch. Avoid overcooking, as it can become rubbery.
Q: Can I use a different type of pepper?
A: Absolutely! Feel free to experiment with different types of peppers, such as Szechuan peppercorns for a citrusy, numbing sensation, or smoked paprika for a smoky flavor.
Q: Can I make this recipe ahead of time?
A: You can marinate the shrimp ahead of time, but grilling should be done just before serving for the best flavor and texture.
Q: What should I serve with grilled salt & pepper shrimp?
A: This shrimp pairs well with a variety of sides, such as grilled vegetables, rice pilaf, quinoa salad, or a simple green salad. It also makes a delicious addition to tacos or wraps.
Final Thoughts
This Grilled Salt & Pepper Shrimp recipe is more than just a collection of ingredients and instructions; it’s an invitation to create a culinary memory. Whether you’re a seasoned grill master or a novice cook, I encourage you to try this simple yet impactful dish. The combination of the smoky char, the succulent shrimp, and the bold spice blend is sure to tantalize your taste buds and leave you wanting more. So fire up the grill, gather your friends and family, and prepare to experience a truly unforgettable grilling experience. And don’t be afraid to experiment with variations and substitutions to create your own signature version of this classic dish. Bon appétit!