
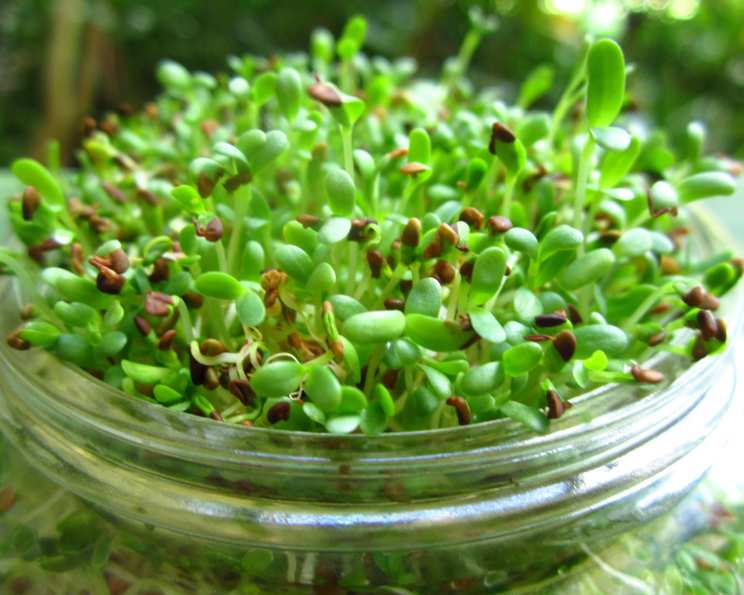
Growing Alfalfa Sprouts: A Culinary Adventure
The first time I tasted alfalfa sprouts, I was a kid helping my grandmother in her garden. She plucked a handful of tiny, pale green shoots from a jar on the windowsill and handed them to me. “Taste the sunshine,” she said with a wink. I was surprised by the delicate, slightly nutty flavor – a world away from the vegetables I usually knew. It felt like a secret ingredient, a tiny burst of freshness that transformed everything it touched. Now, years later, the simple act of growing my own alfalfa sprouts brings back that same sense of wonder and connection to nature.
Recipe Overview
- Prep Time: 5 minutes
- Soak Time: 8-12 hours
- Sprout Time: 5-6 days
- Yields: 2 cups
- Serves: 10
- Dietary Type: Vegan
Ingredients
- 2 tablespoons of alfalfa sprout seeds
- 1 quart mason jar
Equipment Needed
- Mason jar
- Sprouting lid or cheesecloth and rubber band
Instructions
-
Begin by adding 2 tablespoons of alfalfa sprout seeds to a quart mason jar. If you don’t have a sprouting lid, you can use a piece of cheesecloth secured with a rubber band.
-
Rinse the seeds thoroughly with cool water. This helps remove any debris and activates the germination process.
-
For the first day, fill the jar about halfway with cool water. This soaking step is crucial to soften the seeds and initiate sprouting. Let them soak overnight, approximately 8-12 hours.
-
After the soaking period, drain the water completely. It’s important to remove all excess water to prevent mold growth.
-
Set the jar out of direct sunlight and at room temperature. An optimal temperature is around 70 degrees Fahrenheit. A kitchen counter or a pantry shelf works well. Direct sunlight can overheat the sprouts and hinder their growth.
-
Rinse and drain the sprouts twice a day. This is the most important step in the sprouting process. Gently add cool water to the jar, swirl the sprouts to rinse them, and then drain all the water thoroughly. This provides the necessary moisture and prevents the sprouts from drying out or becoming moldy.
-
Continue rinsing and draining twice a day for the next 5-6 days. You’ll notice the sprouts growing larger and more vibrant with each passing day.
-
At the end of day 5 or the start of day 6, your sprouts will be ready to eat. They should have developed small green leaves and a crisp texture.
-
Refrigerate your sprouts for 8-12 hours after the final rinse and drain. This chilling period helps to slow down the sprouting process and enhances the crispness and flavor of the sprouts.
-
To refrigerate, ensure sprouts are drained. Store in the same jar with the sprouting lid or in a container lined with paper towels to absorb extra moisture.
-
Enjoy your sprouts in salads, sandwiches, or as a topping to any dish. They add a fresh, crunchy element to any meal.
Expert Tips & Tricks
- Seed Quality: Use high-quality, certified sprouting seeds. These are specifically grown for sprouting and have a higher germination rate and are less likely to carry harmful bacteria.
- Proper Drainage: Make sure the sprouts are thoroughly drained after each rinse. Excess moisture is the number one cause of mold and spoilage.
- Air Circulation: Ensure good air circulation around the jar. Don’t pack the sprouts too tightly, and avoid placing the jar in a closed cabinet.
- Mold Prevention: If you notice any signs of mold (unpleasant odor, slimy texture, dark spots), discard the entire batch immediately.
- Sunlight Exposure: While direct sunlight should be avoided during the sprouting process, a little indirect light in the last day or two can help the sprouts develop a deeper green color.
- Flavor Enhancement: Some people like to add a few drops of lemon juice or apple cider vinegar to the final rinse to enhance the flavor and act as a natural preservative.
- De-hulling: After sprouting, some seeds may still have their outer hulls attached. You can remove these by placing the sprouts in a bowl of water and gently agitating them. The hulls will float to the top and can be skimmed off.
Serving & Storage Suggestions
Alfalfa sprouts are incredibly versatile and can be added to a wide variety of dishes. They make a great addition to salads, sandwiches, wraps, and sushi rolls. They can also be used as a topping for soups, omelets, and stir-fries. Their delicate flavor pairs well with a variety of dressings, sauces, and seasonings.
Store your sprouted alfalfa in the refrigerator in an airtight container lined with a paper towel. This will help absorb any excess moisture and keep the sprouts fresh and crisp. Properly stored, alfalfa sprouts can last for up to a week in the refrigerator.
Do not freeze sprouts, as they will become mushy and lose their texture.
Nutritional Information
| Nutrient | Amount per Serving | % Daily Value |
|---|---|---|
| Calories | 2 kcal | 0% |
| Total Fat | 0g | 0% |
| Saturated Fat | 0g | 0% |
| Cholesterol | 0mg | 0% |
| Sodium | 0mg | 0% |
| Total Carbohydrate | 0g | 0% |
| Dietary Fiber | 0g | 0% |
| Sugars | 0g | 0% |
| Protein | 0g | 0% |
Note: Nutritional information is an estimate and may vary based on seed variety and growing conditions.
Variations & Substitutions
While alfalfa sprouts are a classic choice, you can experiment with other types of seeds to grow a variety of sprouts with different flavors and textures.
- Broccoli Sprouts: These have a slightly spicy, peppery flavor and are rich in antioxidants.
- Radish Sprouts: These have a stronger, more pungent flavor and add a zesty kick to dishes.
- Mung Bean Sprouts: These are commonly used in Asian cuisine and have a mild, slightly sweet flavor.
- Clover Sprouts: These have a mild, slightly sweet flavor and a delicate texture.
- Lentil Sprouts: These are a good source of protein and have a nutty flavor.
- Mixed Sprouts: For a blend of flavors and textures, combine different types of seeds for sprouting.
FAQs (Frequently Asked Questions)
Q: How do I know if my alfalfa sprouts are safe to eat?
A: Fresh alfalfa sprouts should have a clean, slightly nutty aroma and a crisp texture. Avoid eating sprouts that have a musty or unpleasant odor, a slimy texture, or any signs of mold.
Q: Can I use tap water for rinsing the sprouts?
A: Yes, tap water is generally safe for rinsing sprouts. However, if you are concerned about the quality of your tap water, you can use filtered or bottled water.
Q: How long does it take for alfalfa seeds to sprout?
A: Alfalfa seeds typically take 5-6 days to sprout, depending on the temperature and humidity.
Q: What if I forget to rinse my sprouts one day?
A: Missing a rinse is not a big deal. Just resume the regular rinsing schedule as soon as possible. However, consistent rinsing is important to prevent the sprouts from drying out or becoming moldy.
Q: Can I grow alfalfa sprouts in a plastic container?
A: It’s best to use a glass mason jar for sprouting, as plastic containers can sometimes leach chemicals into the sprouts.
Final Thoughts
Growing your own alfalfa sprouts is a rewarding and surprisingly simple process. It’s a fantastic way to add a boost of freshness and nutrition to your diet, and it’s a fun project to do with kids. Give it a try, and discover the joy of “tasting the sunshine” right from your own kitchen! Don’t hesitate to experiment with different types of seeds and share your sprouting successes (or challenges!) with fellow food enthusiasts. Happy sprouting!