
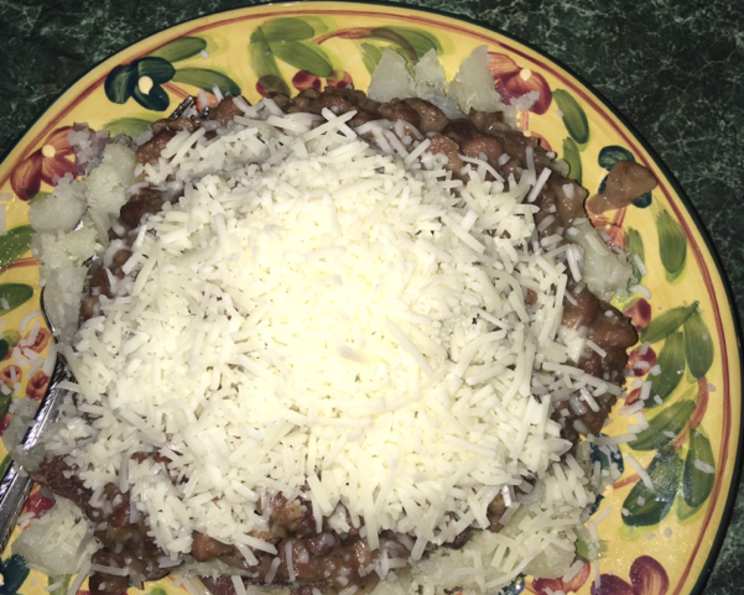
Guadalajara Re-Fried Beans: A Taste of Home
The aroma of re-fried beans always takes me back to my college days. My best friend, Maria, whose abuela hailed from Guadalajara, would whip up a batch every Sunday. The apartment would be filled with the savory scent of garlic and onions sautéing in olive oil, a far cry from the dorm food I was used to. It was more than just a meal; it was a warm hug, a taste of tradition that made our little apartment feel like home. These weren’t just any re-fried beans; they were Guadalajara re-fried beans, and they spoiled me for all other versions.
Recipe Overview
- Prep Time: 15 minutes
- Cook Time: 4 hours 15 minutes
- Total Time: 4 hours 30 minutes
- Servings: 12
- Yield: 6 cups
- Dietary Type: Vegetarian (easily Vegan)
Ingredients
- 2 cups dry pinto beans, washed
- 1 large onion, chopped
- 5 garlic cloves, smashed
- 1 cup extra virgin olive oil
- 1 tablespoon garlic salt
- 1 cup Monterey Jack cheese (optional, omit for vegan)
Equipment Needed
- Large pot
- Colander
- Large frying pan or skillet
- Slotted spoon
- Wooden spoon
- Potato masher
Instructions
-
Begin by thoroughly washing the pinto beans in a colander. Scrub them well, picking out any discolored beans, small stones, or debris. A good rinse is essential for a clean flavor.
-
Transfer the cleaned beans to a large pot. Add enough water to cover the beans generously – about two inches above the bean level. Bring the water to a vigorous boil and continue boiling for 15 minutes. This initial boil helps to release some of the starches and enzymes that can cause digestive discomfort.
-
After the 15-minute boil, drain the beans into a colander and rinse them again with cold water. This step further reduces the gas-producing compounds in the beans.
-
Return the rinsed beans to the pot and cover them again with fresh water, ensuring the water level is at least an inch above the beans. Bring the water to a simmer. Then, reduce the heat to low, cover the pot, and simmer gently for 4 hours. The goal is to cook the beans until they are very tender and easily mashed. Check the water level periodically and add more if needed to prevent the beans from drying out.
-
After 4 hours, the beans and water should have developed a deep reddish color, indicating they are fully cooked. Remove the pot from the heat and let it stand while you prepare your pan for the next step.
-
In a large frying pan or skillet, heat the olive oil over medium heat. Add the chopped onion and smashed garlic to the hot oil. Cook, stirring occasionally, until the onions become translucent and start to caramelize. This process usually takes about 5-7 minutes. Caramelizing the onions and garlic adds a depth of sweetness and savory flavor to the beans.
-
Once the onions and garlic are caramelized, reduce the burner to low heat. Using a large slotted spoon, begin transferring the cooked beans from the pot to the frying pan, spooning the beans over the onions and garlic. Be sure to drain off excess water before transferring the beans. Reserve the bean broth in the pot for later use.
-
After transferring as many of the beans as possible to the pan, sprinkle them with garlic salt. Stir the beans with a wooden spoon to evenly distribute the seasoning and coat them with the flavored oil.
-
Continue cooking the beans over low heat, stirring frequently, until they have absorbed the oil and start to look slightly milky. At this point, begin smashing the beans with a potato masher. Mash the beans until they reach your desired consistency – some people prefer them smooth, while others like a bit of texture. Don’t worry if the beans appear dry and pasty at this stage; the bean broth will remedy that.
-
Once the beans are mostly smashed, use the wooden spoon to push them towards the sides of the pan, creating a ring shape with an empty space in the center. The ring should resemble a large doughnut.
-
Give the reserved bean broth a good stir and carefully pour it into the empty space in the center of the bean ring. Add as much broth as the pan will comfortably hold without overflowing.
-
With the wooden spoon, begin cutting the smashed beans into the liquid, allowing the broth to seep through them. Continue cutting and stirring until the beans and broth are thoroughly combined and the mixture becomes creamy and smooth.
-
Allow the beans to simmer gently over low heat, stirring occasionally, until they reach your desired consistency. This usually takes about 10-15 minutes. If the beans become too thick, add a little more bean broth or water. If they are too thin, continue simmering to allow the excess liquid to evaporate.
-
If using, garnish the re-fried beans with shredded Monterey Jack cheese just before serving. The cheese will melt beautifully into the warm beans.
-
Serve warm as a side dish with your favorite Mexican dishes, as a dip with tortilla chips, or spooned into warm tortillas for a satisfying snack.
Expert Tips & Tricks
-
Freezing for Later: If you’re making a large batch, freeze half of the cooked, unfried beans for another meal. I find the beans actually taste even better after being chilled before frying.
-
Quick Version: For a faster version, use 3-4 cans of pinto beans. While the flavor won’t be quite the same, it will still be much better than store-bought canned re-fried beans. This method should only take about an hour. Be sure to drain and rinse canned beans thoroughly.
-
Spice It Up: Add a pinch of chili powder or a finely chopped jalapeño pepper to the onions and garlic for a spicy kick.
-
Herb Boost: Stir in some freshly chopped cilantro or epazote (a traditional Mexican herb) just before serving for a burst of fresh flavor.
Serving & Storage Suggestions
Serve your Guadalajara re-fried beans warm as a side dish to accompany tacos, enchiladas, huevos rancheros, or any of your favorite Mexican dishes. They also make a delicious dip for tortilla chips. To store leftovers, allow the beans to cool completely, then transfer them to an airtight container. They will keep in the refrigerator for up to 3-4 days. For longer storage, freeze the beans in freezer-safe containers for up to 2-3 months. Reheat in a saucepan over low heat, adding a little water or broth if needed to restore the desired consistency.
Nutritional Information
Note: Nutritional information is an estimate and may vary based on specific ingredients and portion sizes.
| Nutrient | Amount per Serving | % Daily Value |
|---|---|---|
| Calories | 225 kcal | 11% |
| Total Fat | 21 g | 27% |
| Saturated Fat | 4 g | 20% |
| Cholesterol | 8 mg | 3% |
| Sodium | 105 mg | 4% |
| Total Carbohydrate | 6 g | 2% |
| Dietary Fiber | 0 g | 0% |
| Sugars | 1 g | 2% |
| Protein | 5 g | 10% |
Variations & Substitutions
-
Vegan Version: Omit the Monterey Jack cheese. The beans are delicious on their own without it.
-
Lard Option: For a more traditional flavor, substitute some or all of the olive oil with lard. This will give the beans a richer, more savory taste.
-
Spice Level: Adjust the amount of garlic salt to your liking. You can also add other spices like cumin, oregano, or smoked paprika.
-
Bean Variety: While pinto beans are traditional, you can also use black beans, kidney beans, or a combination of beans.
-
Creamy Texture: For extra creamy beans, use an immersion blender to puree a portion of the beans before mixing them with the broth.
FAQs (Frequently Asked Questions)
Q: Why do I need to boil the beans first before simmering them?
A: The initial boil helps to remove some of the indigestible sugars that can cause gas and bloating. It also helps to soften the beans, reducing the simmering time.
Q: Can I use a slow cooker to cook the beans?
A: Yes, you can cook the beans in a slow cooker. After the initial boil, transfer the beans to the slow cooker, cover with water, and cook on low for 6-8 hours, or until the beans are very tender.
Q: How can I prevent the beans from sticking to the pan when re-frying them?
A: Use a non-stick pan or skillet and make sure to stir the beans frequently, especially as they start to thicken. Adding a little more olive oil can also help.
Q: Can I make these beans ahead of time?
A: Absolutely! The beans can be made a day or two in advance and stored in the refrigerator. Simply reheat them in a saucepan over low heat before serving.
Q: What’s the best way to serve these beans?
A: Guadalajara re-fried beans are incredibly versatile. Serve them as a side dish, a dip, a filling for burritos or tacos, or as a topping for nachos.
Final Thoughts
These Guadalajara re-fried beans are more than just a recipe; they’re a taste of heritage, a comforting classic that can be easily adapted to your own preferences. Whether you’re a seasoned chef or a kitchen novice, I encourage you to give this recipe a try. Share it with your loved ones, experiment with different variations, and let the warm, savory flavors transport you to a place of culinary bliss. And if you tweak the recipe or pair it with something amazing, please let me know! Buen provecho!