
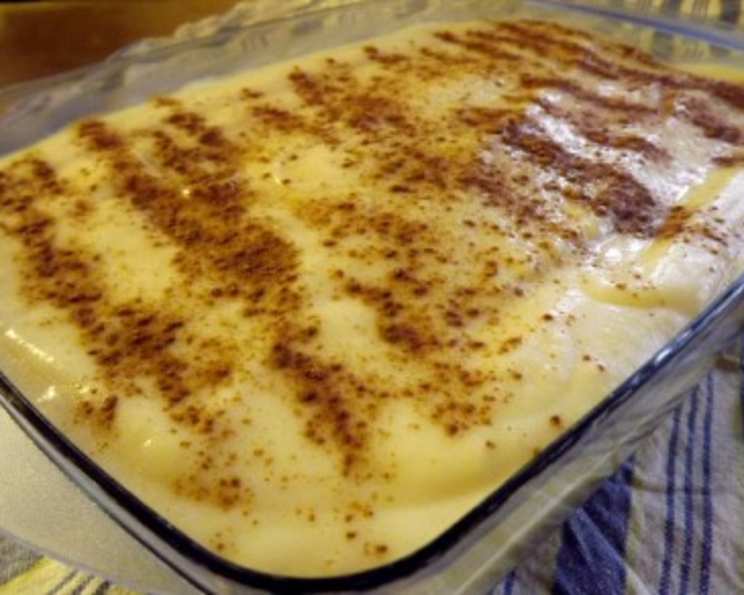
Guamanian Pudding Dessert: A Taste of Island Comfort
There’s a certain magic to discovering recipes passed down through communities, each one holding a piece of someone’s story. I remember one sweltering summer, volunteering at a local church bazaar. The air hung thick with humidity and the scent of plumeria, but the moment I tasted a sliver of a cool, creamy, cinnamon-dusted dessert, I was transported. It tasted like pure sunshine and island breezes. It was years before I finally tracked down a similar recipe, and to this day, a bite of this Guamanian Pudding Dessert instantly brings me back to that humid summer day and the warmth of community.
Recipe Overview
- Prep Time: 20 minutes
- Cook Time: 20 minutes
- Chill Time: 2 hours
- Total Time: At least 2 hours, 40 minutes
- Servings: 12-16
- Yield: One 9×13-inch casserole dish
- Dietary Type: Not Vegetarian (contains eggs); Not Gluten Free (contains pound cake)
Ingredients
- 1 2/3 cups water
- 1 (12 oz.) can Carnation Evaporated Milk
- 1/4 cup margarine, cut into pieces
- 6 tablespoons sugar
- 2 teaspoons vanilla extract
- 2 eggs, beaten
- 1/4 cup cornstarch
- 1/3 cup water
- 1 baked pound cake, cut into thin slices (about 1/4-1/2″ thick)
- Ground cinnamon
Equipment Needed
- Large saucepan
- Wooden spoon
- Whisk
- Measuring cups and spoons
- 9×13 inch glass casserole dish
- Covered bowl or plastic wrap
Instructions
- In a large saucepan, combine 1 2/3 cups water, one can of evaporated milk, 1/4 cup of margarine, 6 tablespoons of sugar, 2 teaspoons of vanilla extract, and 2 beaten eggs. Make sure your eggs are well beaten to prevent any clumps during the cooking process.
- In a separate small bowl, whisk together 1/4 cup of cornstarch and 1/3 cup water until smooth. This creates a slurry that will thicken the pudding. Ensure there are no lumps in the cornstarch mixture; a smooth slurry is key for an even pudding texture.
- Add the cornstarch slurry to the mixture in the saucepan. Whisk constantly to incorporate it fully.
- Place the saucepan over medium-low heat (about #3-4 on an electric stove). It’s crucial to use medium-low heat to avoid scorching the pudding.
- Stir the mixture constantly with a wooden spoon until it begins to thicken and develops a pudding-like texture. This should take approximately 15-20 minutes. You’ll know it’s ready when the pudding coats the back of a wooden spoon. The consistency should be thick enough to leave a clear line when you run your finger through it.
- Remove the saucepan from the heat. Transfer the pudding to a covered bowl. Cover the bowl with plastic wrap, pressing it directly onto the surface of the pudding to prevent a skin from forming.
- Chill the pudding in the refrigerator until completely cool. This will take at least an hour, but longer is better. The pudding will thicken further as it cools.
- While the pudding is chilling, prepare the pound cake. If you’re using a store-bought cake, simply slice it into thin slices, approximately 1/4 to 1/2 inch thick. If you’ve baked your own, ensure it’s completely cooled before slicing.
- Once the pudding is chilled and the pound cake is sliced, it’s time to assemble the dessert. Line the bottom of a 9×13 inch glass casserole dish with the thin slices of pound cake. Arrange the slices so that the entire base of the pan is covered, using smaller pieces to fill in any gaps. This cake layer acts as a delicious sponge, soaking up the creamy pudding.
- Spread the chilled pudding evenly over the pound cake base. Ensure the entire surface is covered with a generous layer of pudding.
- Generously dust the entire surface of the pudding with ground cinnamon. The cinnamon adds a warm, aromatic spice that complements the creamy pudding perfectly.
- Cover the casserole dish and chill in the refrigerator for at least 1 hour before serving. This allows the flavors to meld together and the pudding to set properly.
Expert Tips & Tricks
- Preventing a Skin: To prevent a skin from forming on the pudding while it chills, press a piece of plastic wrap directly onto the surface. This minimizes air exposure.
- Pudding Consistency: This pudding has a softer consistency than some traditional puddings. It should thicken, but will remain slightly pourable, similar to a trifle custard or zabaglione. Don’t expect it to become firm like a pudding cup.
- Cake Thickness Matters: Be mindful of the thickness of your cake slices. Thicker slices will make the dessert heavier, while thinner slices will allow the pudding to shine. A thickness of 1/4 to 1/2 inch is ideal.
- Enhance the Flavor: For an extra layer of flavor, consider adding a splash of rum or brandy to the pudding mixture while it’s cooking.
- Citrus Zest: For a bright, fresh twist, try adding a teaspoon of lemon or orange zest to the pudding mixture while cooking.
Serving & Storage Suggestions
This Guamanian Pudding Dessert is best served chilled. To serve, cut into squares or rectangles and present on individual plates. A light dusting of extra cinnamon or a sprig of mint adds a nice visual touch.
Leftovers can be stored in the refrigerator, covered, for up to 3 days. The pound cake may become slightly softer over time, but the flavor will remain delicious. This dessert is not suitable for freezing, as the pudding texture will change upon thawing. It’s best enjoyed fresh.
Nutritional Information
| Nutrient | Amount per Serving | % Daily Value |
|---|---|---|
| Calories | 220 kcal | 11% |
| Total Fat | 10g | 15% |
| Saturated Fat | 5g | 25% |
| Cholesterol | 50mg | 17% |
| Sodium | 100mg | 4% |
| Total Carbohydrate | 30g | 10% |
| Dietary Fiber | 0g | 0% |
| Sugars | 15g | N/A |
| Protein | 3g | 6% |
Note: Nutritional information is an estimate and may vary based on specific ingredients and portion sizes.
Variations & Substitutions
- Gluten-Free: Use a gluten-free pound cake for a gluten-free version of this dessert.
- Dairy-Free: While the recipe calls for evaporated milk, you can experiment with using a thick, unsweetened plant-based milk alternative like oat or cashew milk. Be aware that this may slightly alter the flavor and texture of the pudding.
- Flavor Variations: Infuse the pudding with different extracts, such as almond or coconut extract, for a unique twist.
- Fruit Addition: Add a layer of sliced fruit, such as bananas, mangoes, or berries, between the cake and pudding layers for added flavor and texture.
- Spiced Cinnamon: Mix a pinch of nutmeg or allspice with the ground cinnamon for a warmer, more complex flavor.
FAQs (Frequently Asked Questions)
Q: Can I use regular milk instead of evaporated milk?
A: While you can substitute regular milk, the pudding will be less rich and creamy. Evaporated milk provides a denser texture.
Q: My pudding is too thin. What did I do wrong?
A: Make sure you’re using medium-low heat and stirring constantly. Also, ensure your cornstarch slurry is smooth and fully incorporated. If it’s still too thin, you can whisk a little more cornstarch with cold water and slowly add it to the pudding while cooking, stirring constantly.
Q: Can I make this dessert ahead of time?
A: Absolutely! In fact, this dessert is best made ahead of time to allow the flavors to meld together. It can be stored in the refrigerator for up to 3 days.
Q: What kind of pound cake is best to use?
A: You can use store-bought or homemade pound cake. Vanilla or lemon pound cake works particularly well.
Q: Can I reduce the sugar in this recipe?
A: Yes, you can reduce the sugar to taste. However, keep in mind that sugar contributes to the overall texture of the pudding, so reducing it significantly may affect the final result.
Final Thoughts
This Guamanian Pudding Dessert is more than just a recipe; it’s a slice of island comfort, a taste of community, and a memory in every bite. It’s a simple yet satisfying dessert that’s perfect for any occasion. Whether you’re looking for a unique dessert to impress your guests or simply craving a taste of something special, I encourage you to give this recipe a try. Share it with your loved ones, and let the flavors transport you to a place of sunshine and sweet memories. Don’t hesitate to experiment with variations and make it your own. And most importantly, enjoy the process of creating something delicious!