
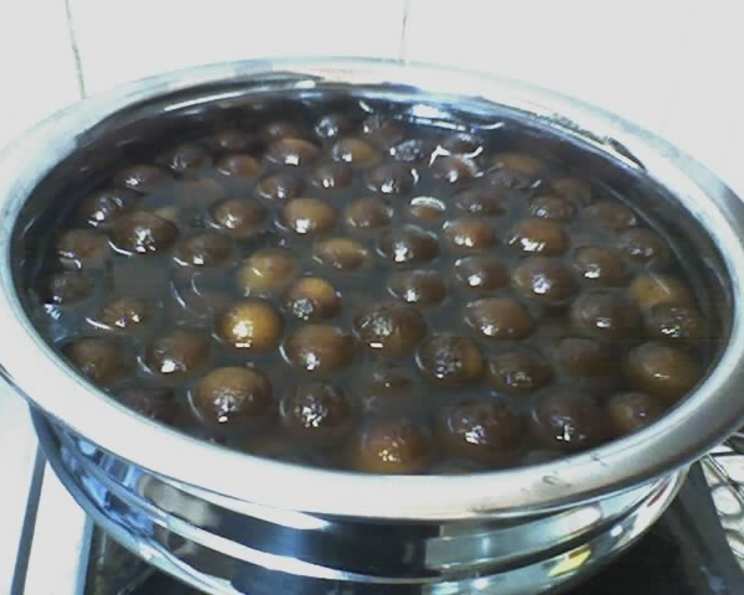
Gulab Jamun: The Nectar of the Gods
The memory is etched in my mind: the vibrant colours of Diwali, the intoxicating aroma of cardamom and rose, and the moment my grandmother, her hands dusted with flour, would present me with a bowl of glistening, syrup-soaked Gulab Jamun. These weren’t just sweets; they were love, tradition, and pure unadulterated joy condensed into a single, perfect bite. To this day, the taste of a warm, tender Gulab Jamun instantly transports me back to her kitchen, a place filled with warmth, laughter, and the comforting scent of ghee.
Recipe Overview
- Prep Time: 20 minutes
- Cook Time: 30 minutes
- Total Time: 50 minutes
- Yields: 24 gulab jamuns
- Dietary Type: Vegetarian
Ingredients
Traditional Method
- 1 liter milk
- 1 1⁄2 tablespoons flour
Powdered-Milk Method
- 2 cups powdered milk
- 1 1⁄2 tablespoons self-rising flour
- 1⁄2 cup warm milk
- 1 teaspoon ghee or 1 teaspoon butter
Scented Syrup
- 2 cups sugar
- 2 cups water
- 1 tablespoon rose water or 1/2 teaspoon rose extract
- 1⁄2 teaspoon saffron (powdered, and optional)
- 1⁄2 teaspoon cardamom powder (optional)
Ghee
- 1 lb butter, unsalted is best but salted will work in a pinch
Equipment Needed
- Saucepan (heavy-bottomed or non-stick for traditional method, good quality for ghee)
- Wok or karai (for frying)
- Wooden spoon
- Butter Plate
Instructions
Let’s embark on this culinary journey to create these melt-in-your-mouth delicacies. We’ll start by making the ghee, then the syrup, and finally, the Gulab Jamun themselves.
Step 1: Making the Ghee
The essence of good Gulab Jamun lies in frying them in pure, clarified butter – ghee. It imparts a rich, nutty flavour that elevates the dessert to another level.
- Place the butter in a good saucepan and bring it to a boil on medium heat.
- Once boiling, reduce the heat to low. Now, observe the transformation.
- As the butter simmers slowly, moisture will evaporate.
- The white protein-solids from the butter will sink to the bottom of the pan and gradually turn golden brown.
- A foam will rise to the surface, eventually forming a light crust.
- The butter itself will turn a beautiful gold colour and emit a slightly nutty aroma.
- When all the moisture is gone, the ghee is ready. This process usually takes about 20 minutes.
- Carefully decant the clear ghee into a heatproof container, leaving the golden-brown buttery solids behind.
- Save those delicious golden buttery bits at the bottom of the pan! They are fantastic on toast, mixed with vegetables, or mashed potatoes. If you used salted butter, be mindful of the salt content when using these solids.
Step 2: Preparing the Scented Syrup
The syrup is what gives Gulab Jamun their signature sweetness and aroma.
- In a saucepan, combine the sugar and water.
- Bring the mixture to a boil and let it simmer for 3 minutes.
- Remove the pan from the heat and stir in the rose water (or rose extract).
- If desired, add the saffron and cardamom powder for extra flavour complexity. This will lend a beautiful aroma and flavour to your syrup.
Step 3a: Making the Dough (Traditional Method)
This method takes longer but delivers a unique, slightly chewy texture.
- Use a heavy-bottomed or non-stick pan to prevent the milk from sticking and burning.
- Pour the milk into the pan and bring it to a boil over medium heat.
- Reduce the heat and stir constantly to prevent scorching.
- Continue to cook the milk down until it forms a thick paste. This requires patience and constant attention.
- Add the flour to the paste and mix thoroughly until you have a smooth dough.
- Oil your hands lightly.
- Roll small portions of the dough into uniform balls. Aim for about 24 balls.
- Place the formed balls onto a buttered plate and set aside.
Step 3b: Making the Dough (Powdered-Milk Method)
This method is quicker and simpler, making it ideal for beginners.
- Combine the warm milk and ghee (or butter) in a bowl.
- In a separate bowl, mix together the powdered milk and self-rising flour.
- Gradually sprinkle the dry ingredients into the wet ingredients, mixing continuously to form a soft, pliable dough. Do not overmix.
- Oil your hands lightly.
- Roll small portions of the dough into uniform balls. Aim for about 24 balls.
- Place the formed balls onto a buttered plate and set aside.
Step 4: Frying the Gulab Jamun
This is the most delicate part of the process. Low and gentle heat is crucial for even cooking.
- Use a wok or karai for best results. Ensure the ghee is about 2.5-3 inches deep.
- Heat the ghee on low heat until it reaches a temperature of 215 degrees Fahrenheit (102 degrees Celsius). Use a thermometer to ensure accuracy.
- Gently slip the dough balls into the warm ghee, one by one. They will initially sink to the bottom. Avoid overcrowding the pan.
- Do not touch or disturb the balls at this point.
- Gently shake the pan occasionally to move the balls and prevent them from browning too much on one side.
- After about 5 minutes, the balls will begin to float to the surface and you will notice they start to get bigger.
- Now, use a wooden spoon or similar utensil to gently agitate and keep them evenly browning.
- The ghee will slowly get hotter as the balls cook.
- After about 20 minutes, the ghee temperature should have risen to around 245 degrees Fahrenheit (118 degrees Celsius), and the balls should be a nice, deep golden brown.
- Remove one of the fried balls and place it in the prepared syrup.
- Observe for 3 minutes. If the ball doesn’t collapse, remove the remaining balls from the ghee and add them to the syrup.
- If the test ball does collapse, continue frying the remaining balls for another 5 minutes and then test again. This indicates that they need a little more time to cook through.
Step 5: Soaking and Serving
- Let the Gulab Jamun soak in the syrup for at least 2 hours before serving. This allows them to fully absorb the sweet, fragrant liquid.
- Serve the Gulab Jamun at room temperature or warmed up.
Expert Tips & Tricks
- Patience is Key: Frying Gulab Jamun requires patience. Don’t rush the process by increasing the heat. Low and slow cooking ensures they cook evenly and develop a beautiful colour.
- Ghee Temperature: Maintaining the correct ghee temperature is crucial. If it’s too hot, the Gulab Jamun will brown too quickly on the outside and remain uncooked inside.
- Dough Consistency: The dough should be soft and pliable but not sticky. If it’s too sticky, add a little more powdered milk or flour. If it’s too dry, add a little more warm milk.
- Cracks: Avoid cracks on the gulab jamun; it’s best to gently knead the dough, just until it comes together, as over-kneading may result in cracks.
- Even Browning: Constant, gentle agitation during frying is essential for even browning.
- Testing: Always test one Gulab Jamun in the syrup before adding the rest. This ensures they are cooked through and won’t collapse.
Serving & Storage Suggestions
Gulab Jamun is best served warm, allowing the syrup to further permeate the soft, doughy balls. A dollop of vanilla ice cream or a sprinkle of chopped nuts makes a delightful addition.
Store leftover Gulab Jamun in an airtight container in the refrigerator, submerged in the syrup. They will last for up to 3-4 days. Reheat gently in a microwave or on the stovetop before serving. They can be enjoyed cold as well, straight from the fridge.
Nutritional Information
Please note that the nutritional information is an estimate and may vary based on specific ingredients and portion sizes.
| Nutrient | Amount per Serving | % Daily Value |
|---|---|---|
| Calories | 288.9 kcal | N/A |
| Total Fat | 20.1 g | 30% |
| Saturated Fat | 12.7 g | 63% |
| Cholesterol | 58.2 mg | 19% |
| Sodium | 178.5 mg | 7% |
| Total Carbohydrate | 23.7 g | 7% |
| Dietary Fiber | 0 g | 0% |
| Sugars | 20.8 g | 83% |
| Protein | 4.7 g | 9% |
Variations & Substitutions
- Khoya Gulab Jamun: For a richer, denser texture, use khoya (reduced milk solids) in the dough instead of powdered milk.
- Paneer Gulab Jamun: Add some crumbled paneer (Indian cheese) to the dough for a slightly tangy flavour.
- Rose Essence Substitute: If you can’t find rose water, you can use a few drops of rose essence, but be careful not to add too much as it can be overpowering.
- Saffron Infusion: For a more intense saffron flavour, soak the saffron strands in a tablespoon of warm milk for 30 minutes before adding them to the syrup.
- Honey Syrup: For a slightly healthier version, substitute some of the sugar in the syrup with honey.
FAQs (Frequently Asked Questions)
Q: Why are my Gulab Jamun hard and dense?
A: This is usually due to using too much flour or overmixing the dough. Be gentle with the dough and ensure you use the correct flour-to-milk ratio.
Q: My Gulab Jamun are collapsing in the syrup. What am I doing wrong?
A: This usually means they are not cooked through. Fry them for a little longer at a lower temperature and test again.
Q: Can I use oil instead of ghee for frying?
A: While you can use oil, it will significantly impact the flavour. Ghee provides a rich, nutty taste that is essential to the authentic Gulab Jamun experience.
Q: How can I prevent cracks from forming on my Gulab Jamun?
A: Gently knead the dough just until it comes together. Avoid over-kneading, which can cause cracks. Also, ensure your dough is adequately hydrated.
Q: Can I make the syrup ahead of time?
A: Yes, you can prepare the syrup a day or two in advance and store it in the refrigerator. Reheat it gently before adding the fried Gulab Jamun.
Final Thoughts
Gulab Jamun is more than just a dessert; it’s a celebration of flavour, aroma, and tradition. Don’t be intimidated by the process; with a little patience and attention to detail, you can create these delectable treats in your own kitchen. Share your creations with loved ones and experience the joy of bringing a little bit of India into your home. I encourage you to try this recipe and experience the magic of Gulab Jamun for yourself. And feel free to experiment with the flavours and aromas to create your own unique twist on this classic dessert!