
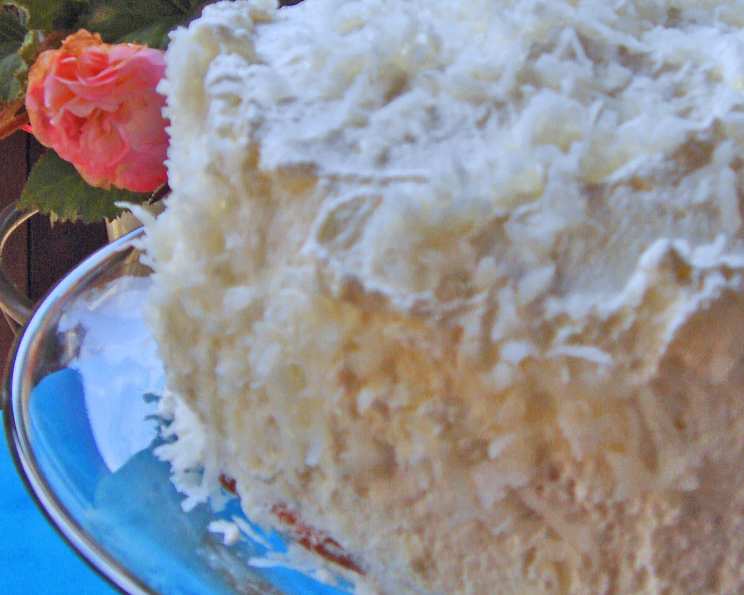
Halekulani Hotel Coconut Cake: A Taste of Hawaiian Paradise
The first time I encountered the Halekulani Coconut Cake was a revelation. It wasn’t just a dessert; it was an edible postcard from a dream. I remember sitting on a sun-drenched lanai overlooking Waikiki Beach, the gentle trade winds rustling through the palm trees, each bite of the cake transporting me further into a state of pure bliss. The delicate sponge, the rich pastry cream infused with Amaretto, and the fluffy whipped cream blanketed with toasted coconut – it was, and still is, the quintessential taste of Hawaiian luxury. It’s a cake that whispers of fragrant plumeria, warm ocean breezes, and the aloha spirit.
Recipe Overview
- Prep Time: 1 hour
- Cook Time: 30 minutes
- Total Time: Several hours (includes chilling)
- Servings: 12
- Yield: 1 cake
- Dietary Type: Not specified (contains dairy, eggs, and gluten)
Ingredients
For the Sponge Cake:
- 1 1/2 cups cake flour
- 2/3 cup sugar
- 1/2 cup sugar
- 1/2 teaspoon salt
- 2 teaspoons baking powder
- 1/4 cup vegetable oil
- 2 eggs
- 2/3 cup water
- 8 egg whites
- 1/2 teaspoon cream of tartar
For the Pastry Cream:
- 2 cups 2% low-fat milk, divided
- 1/2 cup sugar
- 1/8 teaspoon salt
- 1/2 teaspoon vanilla extract
- 6 tablespoons cornstarch
- 2 eggs
- 2 tablespoons butter
- 1 1/4 cups sweetened flaked coconut
- 1/2 cup Amaretto
For the Whipped Cream:
- 3 cups heavy cream
- 3 tablespoons sugar
- 1/2 cup sweetened flaked coconut
Equipment Needed
- 9-inch springform pan
- Mixing bowls
- Electric mixer (stand or hand-held)
- Spatula
- Saucepan
- Whisk
- Plastic wrap
- Serrated knife
- Cake board or serving plate
Instructions
- Prepare the Cake Batter: Preheat your oven to 350°F (175°C). Grease and flour a 9-inch springform pan meticulously to ensure the cake releases easily.
- Combine Dry Ingredients: In a medium bowl, sift together the cake flour, 2/3 cup of sugar, salt, and baking powder. Sifting is crucial for a light and airy sponge.
- Combine Wet Ingredients: In a separate bowl, combine the vegetable oil, eggs, and water. Whisk until well combined.
- Incorporate Wet and Dry: Add the wet ingredients to the dry ingredients and mix until just smooth. Avoid overmixing, as this can develop the gluten in the flour and result in a tough cake.
- Prepare the Meringue: In a clean, grease-free bowl, whip the egg whites with the cream of tartar until soft peaks form. Gradually add the remaining 1/2 cup of sugar, continuing to whip until stiff, glossy peaks form. The meringue should hold its shape.
- Fold in Meringue: Gently fold the meringue into the batter in two additions, being careful not to deflate the egg whites. The batter should be light and airy.
- Bake the Cake: Pour the batter into the prepared springform pan and spread evenly. Bake for approximately 30 minutes, or until a wooden skewer inserted into the center comes out clean.
- Cool the Cake: Remove the cake from the oven and let it cool in the pan for 10-15 minutes before releasing it from the springform pan. Place the cake on a wire rack to cool completely. Store the cake in the refrigerator for several hours or overnight before cutting. This allows the cake to firm up and makes it easier to slice.
- Prepare the Pastry Cream: In a medium saucepan, combine 1 3/4 cups of milk, 1/2 cup of sugar, salt, and vanilla extract. Cook over medium-high heat, stirring constantly, until tiny bubbles form around the edges of the pan (do not boil).
- Prepare the Cornstarch Slurry: In a separate bowl, combine the remaining 1/4 cup of milk with the cornstarch. Add the eggs and beat well until smooth.
- Temper the Eggs: Gradually add about 1/2 cup of the hot milk mixture to the egg mixture, whisking constantly to temper the eggs and prevent them from scrambling.
- Combine and Cook Pastry Cream: Pour the egg mixture back into the saucepan with the remaining milk mixture. Cook over medium heat, stirring constantly with a whisk, until the pastry cream thickens and comes to a boil. Continue cooking for 1 minute, stirring constantly, to ensure the cornstarch is fully cooked.
- Finish the Pastry Cream: Remove the pastry cream from the heat and stir in the butter until melted and smooth. Scrape the custard into a bowl, cover the surface directly with plastic wrap to prevent a skin from forming, and refrigerate until completely chilled.
- Prepare the Whipped Cream: In a chilled mixing bowl, combine the heavy cream and 3 tablespoons of sugar. Whip with an electric mixer until stiff peaks form. Be careful not to overwhip, as this can turn the cream into butter.
- Assemble the Filling: Gently fold 1 cup of the prepared whipped cream, Amaretto, and 1 1/4 cups of sweetened flaked coconut into the chilled pastry cream.
- Assemble the Cake: Once the cake is completely cooled, use a long, serrated knife to carefully cut it into three even layers.
- Layer and Frost: Place one cake layer on a 9-inch cake board or serving plate. Spread half of the pastry cream mixture evenly over the cake layer. Place the second cake layer on top of the pastry cream and spread the remaining pastry cream mixture evenly over it. Top with the third cake layer.
- Frost the Cake: Frost the top and sides of the cake with the remaining whipped cream.
- Garnish: Sprinkle the top of the cake with the remaining 1/2 cup of sweetened flaked coconut.
- Chill and Serve: Refrigerate the cake for at least 30 minutes to allow the flavors to meld before serving.
Expert Tips & Tricks
- Cake Flour is Key: Don’t substitute all-purpose flour for cake flour; it will affect the texture. Cake flour has a lower protein content, resulting in a more tender crumb.
- Meringue Magic: Ensure your bowl and whisk are completely clean and free of any grease when making the meringue. Even a tiny bit of fat can prevent the egg whites from whipping up properly.
- Pastry Cream Perfection: Constant stirring is essential when making pastry cream to prevent scorching and ensure a smooth, lump-free texture.
- Flavor Boost: Toast the flaked coconut lightly in a dry skillet over medium heat for a nuttier, more intense coconut flavor. Watch carefully as it can burn quickly.
- Amaretto Alternative: If you prefer a non-alcoholic version, substitute the Amaretto with almond extract, starting with 1/4 teaspoon and adjusting to taste.
Serving & Storage Suggestions
Serve the Halekulani Coconut Cake chilled for the best flavor and texture. It pairs beautifully with a cup of Kona coffee or a glass of chilled sparkling wine. To store leftovers, keep the cake refrigerated in an airtight container. It will stay fresh for up to 3 days. The cake is best enjoyed fresh, as the whipped cream can start to soften after a day or two. Freezing is not recommended, as it can alter the texture of the cake and filling.
Nutritional Information
| Nutrient | Amount per Serving | % Daily Value |
|---|---|---|
| Calories | 584 kcal | N/A |
| Total Fat | 36 g | 55% |
| Saturated Fat | 21 g | 104% |
| Cholesterol | 152 mg | 50% |
| Sodium | 338 mg | 14% |
| Total Carbohydrate | 59 g | 19% |
| Dietary Fiber | 1 g | 3% |
| Sugars | 39 g | N/A |
| Protein | 9 g | 17% |
Note: Nutritional information is an estimate and may vary based on specific ingredients and preparation methods.
Variations & Substitutions
- Gluten-Free: Substitute the cake flour with a gluten-free cake flour blend. Ensure the blend contains xanthan gum or add it separately according to the package instructions.
- Dairy-Free: Use coconut milk or almond milk in place of the 2% milk for the pastry cream, and use a dairy-free whipped topping alternative.
- Coconut Cream Enhancement: For an even richer coconut flavor, substitute some of the heavy cream with coconut cream in the whipped cream.
- Tropical Fruit Infusion: Add a layer of diced mango or pineapple between the cake layers for a more vibrant tropical flavor.
FAQs (Frequently Asked Questions)
Q: Can I make the cake layers ahead of time?
A: Yes, you can bake the cake layers a day or two in advance. Wrap them tightly in plastic wrap and store them at room temperature or in the refrigerator.
Q: How do I prevent the pastry cream from forming a skin while chilling?
A: Ensure the plastic wrap is pressed directly onto the surface of the pastry cream while it chills. This prevents air from reaching the surface and forming a skin.
Q: Can I use canned whipped cream instead of making my own?
A: While homemade whipped cream is recommended for the best flavor and texture, you can use a high-quality canned whipped cream in a pinch.
Q: What is the best way to cut the cake layers evenly?
A: Use a long, serrated knife and gently saw back and forth through the cake, using a ruler or guide to ensure even layers. You can also use dental floss to cut through the cake.
Q: How long does the assembled cake last?
A: The assembled cake is best enjoyed within 2-3 days when stored properly in the refrigerator.
Final Thoughts
The Halekulani Coconut Cake is more than just a recipe; it’s an invitation to experience a taste of paradise. Don’t be intimidated by the multiple steps – each one contributes to the incredible final result. I encourage you to try this recipe and share the aloha spirit with your loved ones. Whether you’re celebrating a special occasion or simply craving a taste of the tropics, this cake is sure to transport you to the sun-kissed shores of Hawaii.