
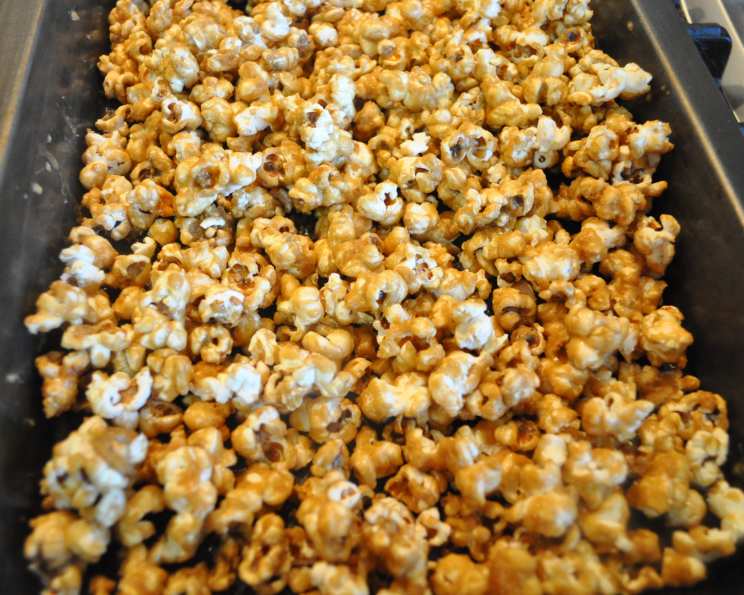
Spooky Sweetness: Mastering the Art of Homemade Halloween Caramel Corn
The scent of caramel, mingling with the comforting aroma of freshly popped corn, always takes me back to chilly October evenings. Bundled up in my warmest sweater, I would sit on the living room floor, mesmerized as my grandmother stirred a bubbling pot on the stove. The resulting caramel corn, sticky and sweet, was the highlight of our Halloween celebrations – a treat so good, it made even the spookiest ghost stories seem a little less scary. To this day, that simple pleasure remains a cherished memory and the inspiration behind this recipe.
Recipe Overview
- Prep Time: 15 minutes
- Cook Time: 65 minutes (including baking time)
- Total Time: 1 hour 20 minutes
- Servings: Varies depending on portion size
- Yield: Approximately 7 quarts
- Dietary Type: Vegetarian (Can be made dairy-free with substitutions – see Variations)
Ingredients
- 7 quarts popped corn (about 1 cup unpopped kernels)
- 2 cups brown sugar
- 1 cup butter (2 sticks)
- 1/2 cup light corn syrup
- 1 teaspoon salt
- 1 teaspoon vanilla extract
- 1/2 teaspoon baking soda
Equipment Needed
- Large pot or saucepan
- Large mixing bowl
- Baking sheet(s)
- Spatula or large spoon
- Measuring cups and spoons
Instructions
-
Pop the Corn: Begin by popping the corn. You’ll need about 7 quarts of popped corn, so adjust the amount of unpopped kernels accordingly. Whether you use an air popper, stovetop method, or microwave popcorn bags, make sure to remove any unpopped kernels to avoid any unwanted crunch in your caramel corn.
-
Prepare the Caramel: In a large pot or saucepan over medium heat, combine the brown sugar, butter, light corn syrup, and salt. Stir constantly until the butter is melted and the brown sugar is dissolved.
-
Cook the Caramel: Once the mixture is smooth, bring it to a boil. Continue to cook, without stirring, for exactly 5 minutes. Use a candy thermometer if you have one; the mixture should reach the soft-ball stage (235-240°F). Don’t be tempted to stir during this time; it can cause the sugar to crystallize.
-
Add Flavor Boosters: Remove the pot from the heat and quickly stir in the vanilla extract and baking soda. The mixture will foam up slightly, which is perfectly normal. The baking soda is crucial as it aerates the caramel, giving it a lighter texture and preventing it from becoming rock hard.
-
Coat the Corn: Pour the hot caramel mixture over the popped corn in a very large mixing bowl. Use a spatula or large spoon to gently toss the corn, ensuring every piece is evenly coated with the caramel. This step is crucial for that perfect, sweet-and-salty bite in every kernel. Work quickly, as the caramel will start to harden as it cools.
-
Bake for Crispness: Spread the caramel-coated corn in a single layer on a baking sheet(s). This prevents clumping and allows the caramel to bake evenly.
-
Bake at Low Temperature: Bake in a preheated oven at 250°F (120°C) for 1 hour, stirring every 15 minutes to ensure even baking and prevent burning. Keep a close eye on it, as ovens can vary. The caramel corn is done when it’s golden brown and crisp.
-
Cool and Break Apart: Remove the baking sheet from the oven and let the caramel corn cool completely on the baking sheet. Once cooled, break apart any large clumps into smaller pieces.
Expert Tips & Tricks
- Use Fresh Popcorn: Stale popcorn won’t absorb the caramel properly and will result in a less-than-ideal texture.
- Don’t Overcook the Caramel: Overcooked caramel will be hard and brittle. Undercooked caramel will be sticky and won’t coat the popcorn properly. The 5-minute cooking time is usually accurate, but using a candy thermometer is always recommended.
- Stir Gently: When coating the corn with caramel, be gentle to avoid crushing the popcorn.
- Line your Baking Sheet: Lining your baking sheet with parchment paper or a silicone mat will prevent sticking and make cleanup a breeze.
- Salted Butter: Using salted butter adds an extra layer of flavor to the caramel corn. If using unsalted butter, increase the amount of salt in the recipe to 1 1/2 teaspoons.
Serving & Storage Suggestions
Serve the caramel corn as a sweet treat for Halloween parties, movie nights, or as a homemade gift.
- Serving: Present it in a large bowl for sharing, or package it in individual bags for easy snacking.
- Storage: Store the cooled caramel corn in an airtight container at room temperature. It will stay fresh for up to a week. For longer storage, you can freeze it for up to 2 months. Thaw completely before serving. Be aware that freezing may slightly alter the texture.
Nutritional Information
Note: Nutritional information is an estimate and may vary based on specific ingredients and portion sizes.
| Nutrient | Amount per Serving* | % Daily Value |
|---|---|---|
| Calories | 450 kcal | 23% |
| Total Fat | 20g | 31% |
| Saturated Fat | 10g | 50% |
| Cholesterol | 30mg | 10% |
| Sodium | 300mg | 13% |
| Total Carbohydrate | 65g | 22% |
| Dietary Fiber | 2g | 8% |
| Sugars | 40g | N/A |
| Protein | 2g | 4% |
*Based on an estimated serving size of approximately 1 cup.
Variations & Substitutions
- Dairy-Free Caramel Corn: Substitute the butter with a vegan butter alternative or coconut oil. Ensure the vegan butter is suitable for cooking and baking.
- Nutty Caramel Corn: Add 1 cup of chopped nuts (peanuts, pecans, or walnuts) to the popcorn before coating with caramel.
- Chocolate Caramel Corn: Drizzle melted chocolate (milk, dark, or white) over the cooled caramel corn.
- Spiced Caramel Corn: Add 1/2 teaspoon of cinnamon, nutmeg, or pumpkin pie spice to the caramel mixture for a warm, seasonal flavor.
- Halloween Candy Mix-ins: Toss in your favorite Halloween candies like M&Ms, candy corn, or Reese’s Pieces after baking and cooling for an extra festive treat.
- Savory-Sweet Caramel Corn: Add a pinch of cayenne pepper to the caramel for a little kick.
FAQs (Frequently Asked Questions)
Q: Why is my caramel corn sticky and not crunchy?
A: The caramel may not have been cooked long enough. Ensure you cook it for the full 5 minutes after it comes to a boil, or use a candy thermometer to reach the soft-ball stage (235-240°F). Also, make sure to bake the coated corn at a low temperature to remove excess moisture.
Q: Can I use microwave popcorn for this recipe?
A: While you can, freshly popped corn from an air popper or stovetop is recommended for the best texture and flavor. Microwave popcorn often contains added oils and flavorings that can affect the caramel coating.
Q: How do I prevent the caramel from burning in the oven?
A: Make sure to stir the caramel corn every 15 minutes during baking and keep a close eye on it. Baking at a low temperature (250°F) helps prevent burning. If you notice it browning too quickly, lower the oven temperature slightly.
Q: Can I make this recipe ahead of time?
A: Yes, you can make caramel corn a day or two in advance. Store it in an airtight container at room temperature to maintain its crispness.
Q: What can I do if my caramel corn is too hard?
A: If the caramel corn is too hard, it means the caramel was overcooked. Unfortunately, there’s no real fix once it’s hardened. To avoid this in the future, be sure to monitor the caramel closely and use a candy thermometer for accuracy.
Final Thoughts
So, there you have it – a simple yet incredibly satisfying recipe for homemade Halloween Caramel Corn. This isn’t just a treat; it’s a tradition waiting to be made. Gather your loved ones, pop that corn, and let the sweet aroma fill your kitchen with the spirit of Halloween. Don’t hesitate to experiment with variations and make it your own. And most importantly, enjoy every sticky, sweet, and crunchy bite! Share your creations and let me know how it turns out. Happy Halloween baking!