
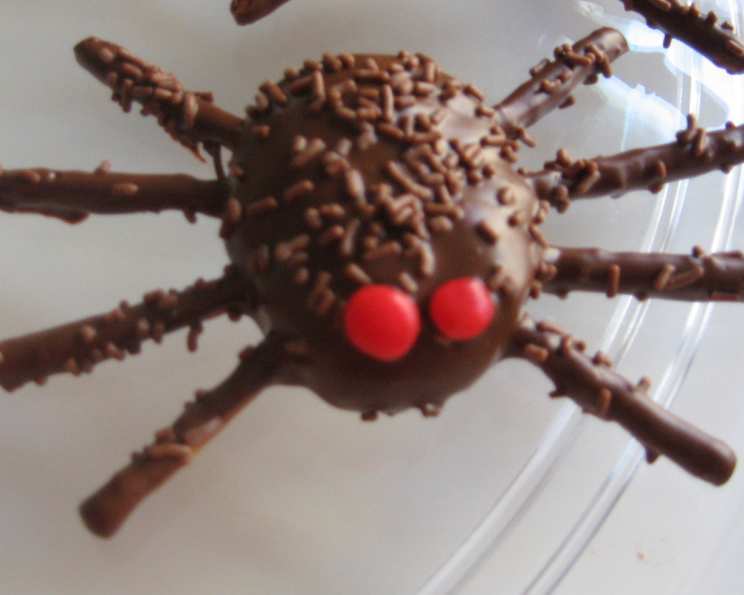
Halloween Furry Spiders (Tarantulas)
I still remember the Halloween party in elementary school, the air thick with the scent of pumpkin spice and nervous excitement. While elaborate costumes and face paint were certainly a highlight, what truly captivated me was the dessert table. Amidst the ghosts and goblins were these peculiar treats – chocolatey, sprinkle-covered spiders with pretzel stick legs. Even though I was a bit spooked by real spiders, these edible versions were utterly irresistible, a perfect blend of playful fright and pure, sugary delight. It was love at first bite, and a memory I cherish to this day. This recipe aims to recreate that magic, making Halloween a little sweeter and a lot more fun!
Recipe Overview
- Prep Time: 30 minutes (includes post-baking assembly)
- Cook Time: 10 minutes
- Total Time: 40 minutes
- Yields: 30 cookies
- Dietary Type: Peanut-Free (see variations for other dietary needs)
Ingredients
- 10 tablespoons butter, softened
- ½ cup brown sugar
- ¼ cup sugar
- 1 egg
- 1 teaspoon vanilla extract
- 2 tablespoons unsweetened cocoa powder
- ½ teaspoon baking powder
- ½ teaspoon salt
- 2 cups all-purpose flour
- 8 ounces pretzel sticks
- 11-12 ounces milk chocolate chips
- 2-3 tablespoons vegetable oil
- Chocolate sprinkles
- Red cinnamon candies, small
Equipment Needed
- Large mixing bowl
- Electric mixer
- Cookie sheets
- Wire rack
- Microwave-safe bowl (or double boiler)
Instructions
-
Preheat your oven to 350 degrees Fahrenheit (175 degrees Celsius).
-
In a large mixing bowl, cream together the softened butter, brown sugar, and sugar using an electric mixer until the mixture is light and fluffy. This usually takes 2-3 minutes. Don’t rush this step; properly creaming the butter and sugar is crucial for a tender cookie.
-
Add the egg and vanilla extract to the creamed butter and sugar mixture. Beat well until fully incorporated. Scrape down the sides of the bowl to ensure everything is evenly mixed.
-
In a separate small bowl, whisk together the unsweetened cocoa powder, baking powder, and salt. This helps to distribute the dry ingredients evenly throughout the dough.
-
Gradually add the dry ingredients to the wet ingredients, mixing on low speed until just combined. Then, add the flour a little at a time, mixing until a smooth dough forms. Be careful not to overmix, as this can result in tough cookies.
-
Roll the dough into tablespoon-sized balls. I find that 30 balls is the perfect amount for this recipe, and allows for easy assembly into the spider shapes.
-
Now, for the fun part! Take each dough ball and gently press the ends of eight pretzel sticks firmly into the dough to create the spider legs. You can use full-size pretzel sticks, or break them into graduating lengths for a more realistic (or perhaps even scarier!) effect.
-
Place each spider cookie onto an ungreased cookie sheet, leaving about an inch of space between them.
-
Bake in the preheated oven for approximately 10 minutes, or until the cookies are firm to the touch and the edges are lightly golden brown. Keep a close eye on them; baking times may vary slightly depending on your oven.
-
Remove the cookie sheet from the oven and transfer the spider cookies to a wire rack to cool completely. This is essential before decorating, as the melted chocolate will slide right off warm cookies.
-
While the cookies are cooling, prepare the chocolate coating. Melt the milk chocolate chips and 2 tablespoons of vegetable oil in a microwave-safe bowl in 30-second intervals, stirring in between, until smooth. Alternatively, you can melt the chocolate in a double boiler over simmering water. If the chocolate is too thick, add the remaining tablespoon of vegetable oil, one teaspoon at a time, until it reaches a thin, pourable consistency. The oil helps to thin the chocolate, making it easier to coat the cookies and giving them a nice shine.
-
Place a clean cookie sheet under the wire rack to catch any excess chocolate. Now, pour the melted chocolate over each cookie, ensuring the entire surface, including the pretzel legs, is covered. I like to hold each spider over the pot of melted chocolate and dip the legs in, or pour the chocolate over them, shaking off the excess. Then, place the spider back on the rack and spoon additional chocolate over the body. The goal is to achieve full coverage with a relatively thin layer of chocolate.
-
While the chocolate is still wet, generously coat each cookie with chocolate sprinkles. This adds texture and visual appeal.
-
Finally, press two red cinnamon candies onto the front of each spider’s head to create the eyes.
-
Allow the chocolate to harden completely at room temperature before storing the cookies. This typically takes about 30-60 minutes.
Expert Tips & Tricks
-
Don’t skip the creaming step: Properly creaming the butter and sugar is crucial for a tender cookie.
-
Chill the dough: If the dough is too soft to work with, wrap it in plastic wrap and chill it in the refrigerator for 15-20 minutes.
-
Use good quality chocolate: The flavor of the chocolate coating will significantly impact the overall taste of the cookies, so use a good quality brand that you enjoy.
-
Customize the decorations: Get creative with the decorations! Use different colored sprinkles, edible glitter, or even small candies to create unique spider designs.
-
Melt chocolate carefully: Be patient when melting the chocolate, and avoid overheating it, as this can cause it to seize and become grainy.
Serving & Storage Suggestions
Serve these Halloween Furry Spiders as a delightful treat at your next Halloween party, or package them in individual bags as spooky party favors. They are best enjoyed within 2-3 days of baking, but can be stored in an airtight container at room temperature for up to a week. For longer storage, you can freeze them for up to a month. Let them thaw at room temperature before serving.
Nutritional Information
| Nutrient | Amount per Serving | % Daily Value |
|---|---|---|
| Calories | 180.9 kcal | – |
| Calories from Fat | 74 g | 41% |
| Total Fat | 8.3 g | 12% |
| Saturated Fat | 4.6 g | 23% |
| Cholesterol | 18.8 mg | 6% |
| Sodium | 193.9 mg | 8% |
| Total Carbohydrate | 24.1 g | 8% |
| Dietary Fiber | 0.9 g | 3% |
| Sugars | 10.8 g | – |
| Protein | 2.8 g | 5% |
Variations & Substitutions
-
Gluten-Free: Substitute a gluten-free all-purpose flour blend for the regular flour. Be sure to use a blend that contains xanthan gum for the best results.
-
Dairy-Free: Use a dairy-free butter substitute for the butter and dairy-free chocolate chips.
-
Vegan: Substitute the butter with a vegan butter alternative, use a flax egg (1 tablespoon ground flaxseed mixed with 3 tablespoons water) in place of the egg, and use dairy-free chocolate chips. Ensure the red cinnamon candies are also vegan.
-
Different Chocolate: Experiment with different types of chocolate, such as dark chocolate or white chocolate, for a different flavor profile.
-
Nuts: Add chopped nuts, such as almonds or pecans, to the dough for added texture and flavor.
FAQs (Frequently Asked Questions)
Q: Can I make the dough ahead of time?
A: Yes, you can make the dough ahead of time. Wrap it tightly in plastic wrap and store it in the refrigerator for up to 2 days. Allow it to come to room temperature slightly before rolling out the cookies.
Q: What if my chocolate is too thick to coat the cookies?
A: Add a little more vegetable oil, one teaspoon at a time, until it reaches the desired consistency.
Q: Can I use a different type of candy for the eyes?
A: Absolutely! Feel free to use any small, round candies that you like. M&Ms or other small chocolate candies would also work well.
Q: My pretzel sticks are breaking when I try to insert them into the dough. What am I doing wrong?
A: Make sure your dough is not too cold. If it is, let it sit at room temperature for a few minutes to soften slightly. You can also try gently pre-making the holes with a toothpick before inserting the pretzel sticks.
Q: How do I prevent the chocolate from melting when I store the cookies?
A: Make sure the chocolate is completely hardened before storing the cookies. Store them in a cool, dry place in an airtight container. If it’s very warm, you can store them in the refrigerator.
Final Thoughts
These Halloween Furry Spiders are more than just a cute and spooky treat; they’re a fun and creative way to celebrate the holiday with family and friends. From the buttery, chocolatey cookies to the crunchy pretzel legs and colorful sprinkles, every bite is a delightful explosion of textures and flavors. So gather your ingredients, put on your favorite Halloween tunes, and get ready to create some creepy-crawly fun in the kitchen. Don’t forget to share your creations and tag me in your pictures! Happy baking, and Happy Halloween!