
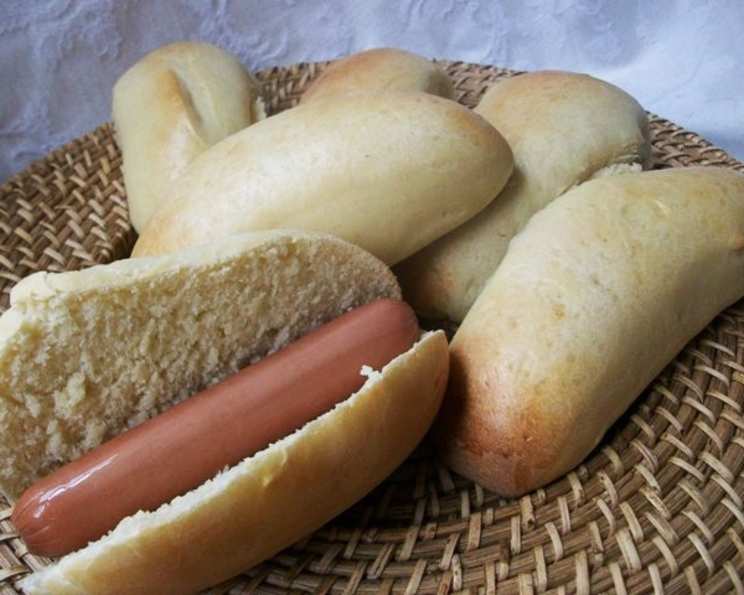
The Quintessential Homemade Hamburger and Hot Dog Bun
My grandmother, bless her heart, believed in doing everything from scratch. While other kids munched on store-bought sandwich bread, I remember the yeasty aroma of her freshly baked buns wafting through her kitchen window. There was something truly special about sinking your teeth into a burger nestled between a soft, golden-brown bun made with love – a feeling I try to recreate in my own kitchen today, channeling her spirit with every loaf.
Recipe Overview
- Prep Time: 2 hours 30 minutes
- Cook Time: 15 minutes
- Total Time: 3 hours 20 minutes
- Servings: 12
- Yield: 12 buns
- Dietary Type: Vegetarian
Ingredients
Buns:
- 4 1⁄4 cups unbleached all-purpose flour (19 oz.)
- 1 1⁄2 teaspoons salt
- 3 tablespoons granulated sugar
- 2 teaspoons instant yeast
- 1 large egg, slightly beaten, at room temperature
- 1⁄4 cup butter, room temperature (margarine, shortening or vegetable oil can be substituted)
- 1 1⁄2 – 1 3⁄4 cups buttermilk, room temperature (milk can be substituted)
Garnish:
- 1 egg, beaten with 1 teaspoon cold water
- 2 tablespoons poppy seeds (optional) or 2 tablespoons caraway seeds (optional)
- Cooking spray
Equipment Needed
- Large mixer bowl
- Stand mixer with paddle and dough hook attachments
- Large bowl
- Plastic wrap
- Lined baking sheets
- Towel
- Wire rack
Instructions
-
In a large mixer bowl, blend together the flour, salt, sugar and yeast. Make sure the yeast is evenly distributed throughout the dry ingredients for optimal activation.
-
Pour in the egg, butter and 1 1/2 cups buttermilk and mix on low speed with the paddle attachment until all the flour is absorbed and the dough forms a ball. This initial mixing ensures that all the ingredients are incorporated properly.
-
If the dough seems very stiff and dry, add additional buttermilk until the dough is soft and supple. The amount of liquid needed can vary depending on the humidity and the type of flour used.
-
With the dough hook attachment, knead the dough on medium speed until soft, supple, and tacky, but not sticky. Continue kneading until the dough clears the sides of the bowl (it may stick slightly to the bottom). This kneading process develops the gluten, which gives the buns their structure.
-
Lightly oil a large bowl and transfer the dough to the bowl, turning it over to coat it with oil. This prevents the dough from sticking to the bowl as it rises.
-
Cover with plastic wrap and allow to rise at room temperature for 1 1/2 to 2 hours, or until the dough doubles in size. This first rise, or bulk fermentation, allows the yeast to develop flavor and leaven the dough. The time can vary depending on the temperature. A warmer environment will result in a faster rise.
-
Remove the dough from the bowl and divide it into 12 pieces, approximately 3 ounces each. Using a kitchen scale ensures uniform buns that will bake evenly.
-
Shape each piece into a ball by stretching the surface of the dough around to the bottom on all sides, rotating the ball a quarter-turn as you go. This technique creates tension on the surface of the dough, resulting in a smoother, more even rise.
-
Place the shaped balls on lined baking sheets, leaving some space between each bun. The parchment paper or silicone baking mat prevents the buns from sticking to the baking sheet.
-
Mist the dough lightly with cooking spray and cover with a towel or plastic wrap. This prevents the surface of the dough from drying out during the second rise.
-
Allow the dough to rest for 20 minutes.
-
For hamburger buns: gently press down on the rolls to form the desired shape. A slightly flattened bun is ideal for holding burger toppings.
-
For hot dog buns: gently roll the dough on a floured surface until elongated to about 4 inches; transfer to lined baking sheets. You can adjust the length according to your preference and the size of your hot dogs.
-
Mist tops of buns with cooking spray and loosely cover with plastic wrap or a towel.
-
Allow the dough to rise at room temperature for 60 to 90 minutes, or until nearly doubled in size. This second rise, or proofing, is crucial for achieving a light and airy texture.
-
Preheat oven to 400°F (200°C). Ensure the oven is fully preheated for even baking.
-
Brush tops of the buns with egg wash and garnish with poppy seeds or caraway seeds, if desired. The egg wash gives the buns a beautiful golden-brown color and helps the seeds adhere.
-
Bake for approximately 15 minutes or until they are golden brown (interior temperature should register 180 degrees in the center). Use a thermometer to check the internal temperature for accuracy.
-
When the buns are done, remove them immediately from the baking sheet and cool on a wire rack. This prevents the bottoms of the buns from becoming soggy.
Expert Tips & Tricks
- For a richer flavor, use melted butter instead of softened butter. Be sure the butter is cooled slightly before adding it to the dough, so it doesn’t cook the egg.
- To ensure even browning, rotate the baking sheets halfway through baking.
- For softer crusts, brush the warm buns with melted butter immediately after baking.
- If you don’t have buttermilk, you can make a substitute by adding 1 tablespoon of white vinegar or lemon juice to 1 cup of milk. Let it sit for 5 minutes before using.
- To achieve a more even shape, consider using a bun divider after the first rise.
Serving & Storage Suggestions
Serve these homemade buns warm or at room temperature with your favorite burgers, hot dogs, or BBQ sandwiches. They are also delicious served with soups or salads.
Storage:
- Room Temperature: Store in an airtight container for up to 2 days.
- Refrigerator: Store in an airtight container for up to 5 days.
- Freezer: Freeze in an airtight container or freezer bag for up to 2 months. Thaw completely before using.
To reheat, wrap the buns in foil and warm them in a 350°F oven for 5-10 minutes. You can also toast them lightly for a crispier texture.
Nutritional Information
| Nutrient | Amount per Serving | % Daily Value |
|---|---|---|
| Calories | 242.3 kcal | N/A |
| Calories from Fat | N/A | 23% |
| Total Fat | 6.1 g | 9% |
| Saturated Fat | 3 g | 15% |
| Cholesterol | 46.6 mg | 15% |
| Sodium | 363.1 mg | 15% |
| Total Carbohydrate | 39.1 g | 13% |
| Dietary Fiber | 1.5 g | 6% |
| Sugars | 4.8 g | N/A |
| Protein | 7.2 g | 14% |
Note: Nutritional information is an estimate and may vary based on specific ingredients and portion sizes.
Variations & Substitutions
- Whole Wheat Buns: Substitute 1 cup of whole wheat flour for 1 cup of all-purpose flour for a heartier bun.
- Vegan Buns: Substitute the butter with a plant-based butter alternative, the egg with flax egg (1 tablespoon ground flaxseed mixed with 3 tablespoons water), and use your favorite plant-based milk instead of buttermilk.
- Sweet Buns: Add 1-2 tablespoons of honey or maple syrup to the dough for a slightly sweeter flavor.
- Herb Buns: Add 1-2 tablespoons of chopped fresh herbs, such as rosemary, thyme, or oregano, to the dough for a savory twist.
- Cheesy Buns: Brush the tops of the buns with melted butter and sprinkle with grated Parmesan or cheddar cheese before baking.
FAQs (Frequently Asked Questions)
Q: Can I knead the dough by hand instead of using a stand mixer?
A: Yes, absolutely! Kneading by hand will take a bit longer, about 10-15 minutes, until the dough is smooth and elastic.
Q: Can I make the dough ahead of time?
A: Yes, you can let the dough rise in the refrigerator overnight. This will slow down the rising process and develop more flavor. Bring the dough back to room temperature before shaping and baking.
Q: What if my buns are browning too quickly?
A: If your buns are browning too quickly, tent them with foil during the last few minutes of baking to prevent them from burning.
Q: Can I freeze the baked buns?
A: Yes, baked buns freeze well. Let them cool completely before wrapping them tightly in plastic wrap and placing them in a freezer bag.
Q: Why are my buns flat and dense?
A: This can happen if the yeast is old or if the dough is not allowed to rise long enough. Make sure your yeast is fresh and give the dough ample time to rise in a warm place.
Final Thoughts
There’s a certain satisfaction that comes from creating something truly homemade, especially when it involves bread. These hamburger and hot dog buns are more than just a vessel for your fillings; they’re a testament to the joy of baking and the power of simple ingredients. So, roll up your sleeves, gather your ingredients, and get ready to experience the unparalleled taste of homemade buns. Don’t be afraid to experiment with variations, and most importantly, have fun with the process. I encourage you to share your creations and feedback – happy baking!