
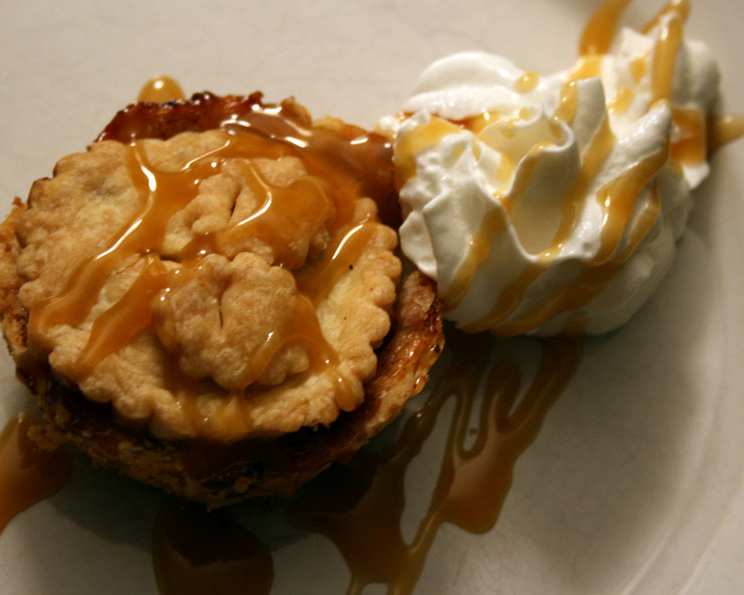
Handheld Apple Pies: A Taste of Autumn in Every Bite
There’s something about the scent of cinnamon and baked apples that instantly transports me back to my grandmother’s kitchen. I remember standing on a stool, barely tall enough to reach the counter, eagerly helping her cut out circles of pie dough. The warmth of the oven, the sweet aroma filling the air, and the anticipation of that first bite – these are the memories I cherish, and this handheld apple pie recipe is a direct descendant of those precious moments.
Recipe Overview
- Prep Time: 25 minutes
- Cook Time: 20 minutes
- Total Time: 45 minutes
- Servings: 24
- Yield: 24 mini pies
- Dietary Type: Vegetarian
Ingredients
- For the Mini Pie Crusts:
- 2 (count) pre-made boxed pie crusts
- For the Apple Filling:
- ¼ cup butter
- 4 large tart apples, peeled, cored, and cubed
- 2 teaspoons cornstarch
- ½ cup cold water
- ½ cup brown sugar
- ½ teaspoon ground cinnamon
- For the Oat Crumble Topping:
- 1 cup flour
- 1 cup rolled oats
- ⅔ cup packed brown sugar
- ⅔ teaspoon ground cinnamon
- ½ cup butter, melted
Equipment Needed
- Round or flower-shaped cookie cutter
- Muffin tin
- Large skillet or saucepan
- Baking sheet
- Mixing bowl
Instructions
- Prepare the Pie Crusts: Unroll the pre-made pie dough. Using a round or flower-shaped cookie cutter, cut out as many circles as possible.
- Bake the Mini Crusts: Gently place each round of dough into a muffin tin. Bake until golden brown, approximately 10 minutes, at the temperature suggested by the pie crust manufacturer. Pay attention to the crust while it bakes to avoid burning.
- Make the Apple Filling: In a large skillet or saucepan, melt the butter over medium heat. Add the cubed apples. Cook, stirring constantly, until the apples are almost tender, about 6-7 minutes. You want them softened but still holding their shape.
- Thicken the Filling: In a small bowl, dissolve the cornstarch in the cold water. Add this mixture to the skillet with the apples.
- Flavor the Filling: Stir in the brown sugar and cinnamon. Bring the mixture to a boil for 2 minutes, stirring occasionally to prevent sticking. The sauce should thicken slightly.
- Fill the Baked Crusts: Remove the apple filling from the heat and carefully spoon it into the pre-baked mini pie crusts. Fill each crust generously.
- Prepare the Crumble Topping: In a mixing bowl, combine the flour, rolled oats, packed brown sugar, and cinnamon.
- Add Melted Butter to Topping: Pour the melted butter over the dry ingredients and mix until the mixture resembles coarse crumbs. This can be done with a fork or your fingers.
- Bake the Topping: Spread the crumble topping evenly on a baking sheet. Bake for 10 minutes, or until the topping is light golden brown and crunchy. Watch carefully to prevent burning.
- Cool and Assemble: Let the crumble topping cool completely. Once cooled, sprinkle the crumble topping generously over the apple filling in each mini pie.
Expert Tips & Tricks
- Blind Baking the Crust: For an extra crisp crust, try blind baking it. Before baking, prick the bottom of each crust with a fork and fill it with pie weights or dried beans. This will prevent the crust from puffing up during baking.
- Apple Variety: Experiment with different types of apples! A mix of tart and sweet apples, such as Granny Smith and Honeycrisp, can add complexity to the flavor.
- Cinnamon Swirls: For a beautiful presentation, lightly dust the tops of the filled pies with cinnamon before adding the oat crumble.
- Preventing Soggy Crusts: A soggy crust is the enemy of a great pie. Ensure the apple filling isn’t too watery by cooking it until thickened and using a well-baked crust.
- Make-Ahead Tip: The oat crumble topping can be made ahead of time and stored in an airtight container at room temperature for up to 3 days. The apple filling can also be made a day in advance and refrigerated.
- Reheating: To reheat, preheat oven to 350°F (175°C) and bake for 5-10 minutes or until heated through. Cover the pies with foil if the topping starts to brown too quickly.
Serving & Storage Suggestions
These handheld apple pies are best served slightly warm, but they are also delicious at room temperature. A scoop of vanilla ice cream or a dollop of whipped cream adds a delightful touch.
- Storage: Store leftover mini pies in an airtight container at room temperature for up to 2 days, or in the refrigerator for up to 5 days.
- Freezing: For longer storage, freeze the baked pies in an airtight container for up to 2 months. Thaw overnight in the refrigerator before serving.
- Reheating Frozen Pies: Reheat frozen pies in a preheated oven at 350°F (175°C) for 10-15 minutes, or until heated through.
Nutritional Information
| Nutrient | Amount per Serving | % Daily Value |
|---|---|---|
| Calories | 218.4 kcal | N/A |
| Calories from Fat | 99g | 46% |
| Total Fat | 11.1 g | 17% |
| Saturated Fat | 4.9 g | 24% |
| Cholesterol | 15.2 mg | 5% |
| Sodium | 123.7 mg | 5% |
| Total Carbohydrate | 28.7 g | 9% |
| Dietary Fiber | 1.9 g | 7% |
| Sugars | 14.1 g | 56% |
| Protein | 2.2 g | 4% |
Note: Nutritional information is an estimate and may vary based on specific ingredients and preparation methods.
Variations & Substitutions
- Gluten-Free Option: Use a gluten-free pie crust and gluten-free flour in the crumble topping.
- Vegan Option: Use vegan butter and ensure the pie crust is vegan-friendly.
- Spice It Up: Add a pinch of nutmeg or ginger to the apple filling for a warmer flavor.
- Nutty Topping: Add chopped pecans or walnuts to the crumble topping for extra crunch and flavor.
- Caramel Drizzle: Drizzle caramel sauce over the finished pies for an extra indulgent treat.
- Other Fruit Fillings: Try this recipe with other fruits, such as blueberries, cherries, or peaches. Adjust the sugar and spices accordingly.
FAQs (Frequently Asked Questions)
Q: Can I use store-bought apple pie filling?
A: While homemade is always best, you can substitute store-bought apple pie filling if you’re short on time. Just be sure to drain any excess liquid to prevent a soggy crust.
Q: My pie crust is browning too quickly. What should I do?
A: Tent the muffin tin with aluminum foil during the last few minutes of baking to prevent the crust from burning.
Q: How do I know when the apple filling is done?
A: The apple filling is done when the apples are tender and the sauce has thickened slightly. It should coat the back of a spoon.
Q: Can I make these pies ahead of time?
A: Yes, you can make these pies ahead of time and store them in the refrigerator for up to 5 days. Reheat before serving.
Q: My crumble topping is too dry. How can I fix it?
A: Add a tablespoon or two of melted butter to the crumble topping and mix until it comes together.
Final Thoughts
These handheld apple pies are more than just a dessert; they’re a little piece of comfort, a reminder of simpler times, and a delicious way to celebrate the flavors of autumn. Whether you’re baking them for a party, a family gathering, or just a cozy night in, I hope this recipe brings you as much joy as it has brought me over the years. So go ahead, gather your ingredients, preheat your oven, and get ready to fill your kitchen with the irresistible aroma of homemade apple pie. And don’t forget to share your creations with loved ones – because the best memories are always made sweeter when shared.