
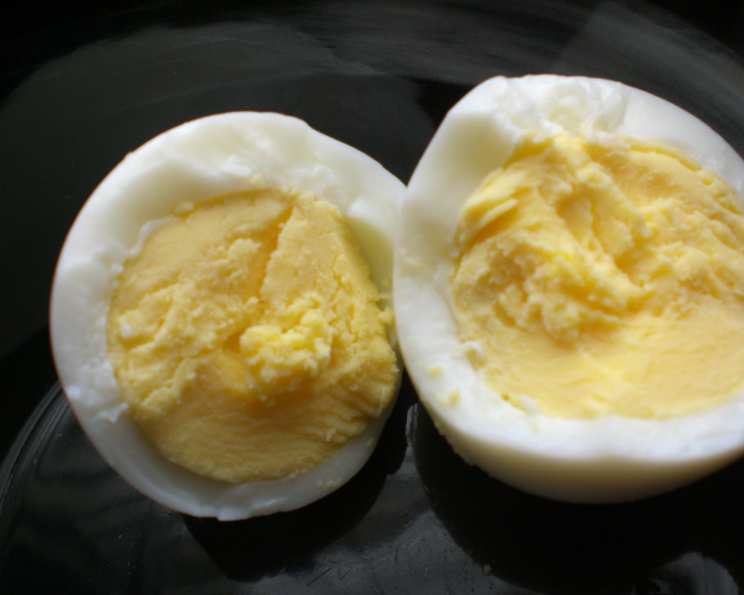
The Perfect Hard-Boiled Egg: A Culinary Essential
As a child, Easter wasn’t just about chocolate bunnies; it was about the vibrant hues transforming plain white eggs into miniature works of art. I recall the painstaking process of carefully lowering each egg into simmering water, the anticipation building as they gently knocked against each other in the pot. The real magic happened later, of course, with dyes swirling and patterns emerging, but even then, I knew the simple, perfectly cooked egg was the foundation of it all. Today, whether deviled, sliced atop a salad, or enjoyed simply with a sprinkle of salt and pepper, a well-prepared hard-boiled egg remains a timeless and versatile staple in my kitchen.
Recipe Overview
- Prep Time: 1 minute
- Cook Time: 15-18 minutes
- Total Time: Approximately 20 minutes
- Servings: Varies (based on the number of eggs cooked)
- Yield: Varies (based on the number of eggs cooked)
- Dietary Type: Gluten-Free, Dairy-Free, Vegetarian, Paleo, Keto
Ingredients
- Eggs (as many as you need)
- Water
Equipment Needed
- Saucepan
- Lid for saucepan
- Slotted spoon or tongs
- Bowl
- Ice
Instructions
- Gently place the eggs in a saucepan. Ensure they are arranged in a single layer to promote even cooking.
- Add enough cold water to the saucepan to cover the eggs by approximately 1 inch. This is crucial for consistent results.
- Cover the saucepan with a lid.
- Quickly bring the water to a boil over high heat. Keep a close watch, as you want to catch it right as it reaches a rolling boil.
- Once the water is boiling, immediately remove the saucepan from the heat source. This is the key to preventing rubbery eggs and that unpleasant green ring around the yolk.
- Let the eggs stand in the hot water, covered, for exactly 15 minutes for large eggs. If you are using extra-large eggs, increase the standing time to 18 minutes. For medium-sized eggs, reduce the standing time to 12 minutes. The standing time is crucial, so set a timer!
- After the designated standing time, carefully pour out the hot water and immediately rinse the eggs under cold running water.
- Transfer the eggs to a bowl filled with ice water. Allow them to cool completely in the ice bath. This step stops the cooking process and makes the eggs easier to peel.
Expert Tips & Tricks
- Freshness Matters (Sometimes): While very fresh eggs can be harder to peel, eggs that are about a week old often peel the easiest. If you’re planning on making deviled eggs for a party, plan ahead and buy your eggs a week in advance.
- The Secret Ingredient (Not Really): Some people swear by adding a teaspoon of baking soda or vinegar to the water, believing it helps with peeling. While the science is debatable, it won’t hurt anything, so feel free to experiment.
- Gentle Handling: When placing the eggs in the pot, lower them gently with a spoon to prevent cracking.
- The Perfect Yolk: Adjust the standing time slightly based on your preference for yolk consistency. Shorter times will result in a softer, more runny yolk.
- Peeling Like a Pro: After cooling, gently tap the egg all over to create small cracks in the shell. Start peeling at the larger end, where there’s usually an air pocket. Peeling under running water can also help.
- No Green Ring: The dreaded green ring around the yolk is caused by a reaction between sulfur in the egg white and iron in the yolk. Overcooking is the main culprit. The method outlined above minimizes this reaction.
- Altitude Adjustment: If you live at a high altitude, you may need to slightly adjust the cooking time. Start by adding a minute or two to the standing time.
Serving & Storage Suggestions
Hard-boiled eggs are incredibly versatile. Enjoy them:
- As a quick and healthy snack: Sprinkle with salt, pepper, or everything bagel seasoning.
- Deviled: Mash the yolks with mayonnaise, mustard, and spices for a classic appetizer.
- Sliced on salads: Add protein and richness to green salads, Cobb salads, or Niçoise salads.
- In egg salad sandwiches: A simple and satisfying lunch option.
- Pickled: Preserve them in vinegar and spices for a tangy treat.
Storage:
- Unpeeled hard-boiled eggs can be stored in the refrigerator for up to a week.
- Peeled hard-boiled eggs are best consumed within a day or two, as they can become rubbery and absorb odors in the refrigerator. Store them in an airtight container with a damp paper towel to help retain moisture.
- Hard-boiled eggs are not recommended for freezing, as the texture of the white will become very rubbery and unpleasant.
Nutritional Information
Here’s an approximate breakdown of the nutritional content per large hard-boiled egg:
| Nutrient | Amount per Serving | % Daily Value |
|---|---|---|
| Calories | 78 kcal | 4% |
| Total Fat | 5g | 6% |
| Saturated Fat | 2g | 10% |
| Cholesterol | 186mg | 62% |
| Sodium | 62mg | 3% |
| Total Carbohydrate | 1g | 0% |
| Dietary Fiber | 0g | 0% |
| Sugars | 1g | |
| Protein | 6g | 12% |
| Vitamin A | 80mcg | 9% |
| Calcium | 25mg | 2% |
| Iron | 1mg | 6% |
Nutritional information is an estimate and can vary based on egg size and other factors.
Variations & Substitutions
- Spicy Deviled Eggs: Add a pinch of cayenne pepper or a dash of hot sauce to your deviled egg filling.
- Mediterranean Egg Salad: Incorporate chopped olives, sun-dried tomatoes, and feta cheese into your egg salad.
- Curried Eggs: Add curry powder and mango chutney to your egg salad for an exotic twist.
- Scotch Eggs (sort of): While this recipe doesn’t cover the full process of making scotch eggs, you can use hard-boiled eggs as the starting point for wrapping in sausage meat and baking or frying.
- Dyed Eggs with Natural Dyes: For a healthier alternative to commercial egg dyes, use natural ingredients like beetroot juice (pink), turmeric (yellow), spinach (green), or red cabbage (blue/purple).
FAQs (Frequently Asked Questions)
Q: Why are my hard-boiled eggs so hard to peel?
A: This is often due to using very fresh eggs. Try using eggs that are about a week old, and be sure to cool them completely in an ice bath after cooking.
Q: How can I tell if my hard-boiled eggs are cooked properly?
A: If you follow the timing in this recipe carefully, your eggs should be perfectly cooked with a firm yolk. If you’re still unsure, cut one open to check.
Q: Can I cook more or fewer eggs at a time?
A: Yes, you can adjust the quantity of eggs as needed. Just make sure they are in a single layer in the saucepan and that they are fully covered with water.
Q: What causes the green ring around the yolk of hard-boiled eggs?
A: It’s a harmless reaction between sulfur in the egg white and iron in the yolk, caused by overcooking. The method in this recipe minimizes this.
Q: Can I use this method for quail eggs?
A: Yes, but you will need to significantly reduce the standing time. Start with around 5-6 minutes.
Final Thoughts
The humble hard-boiled egg, a culinary chameleon capable of transforming from a simple snack to a sophisticated appetizer, truly deserves a spot in every home cook’s repertoire. I encourage you to master this basic technique and explore the countless ways to incorporate these protein-packed gems into your meals. Experiment with different seasonings, variations, and serving suggestions. And don’t be afraid to share your own creative twists and feedback – happy cooking!